At long last, part 3 of my journey to try and cool my T340 with out having to listen to a hair dryer.
Here is part 1 and part 2 if you’re curious about what I’ve done so far.
I ended up getting a 3D Printer sometime after I wrote part 2 and one of the projects I had in mind was designing and printing a shroud that I could attach fan(s) to and slide over top of the heatsink in my T340 to create a better seal for airflow and get rid of the zap strap solution from part 2.
I was hoping that having a proper shroud would increase cooling efficiency, unfortunately I don’t think it did much for my overall temperatures BUT it did make it so my fan is now easily replaceable and just slides overtop the heatsink. More on that later (or just scroll to the bottom).
Here is what I came up with:

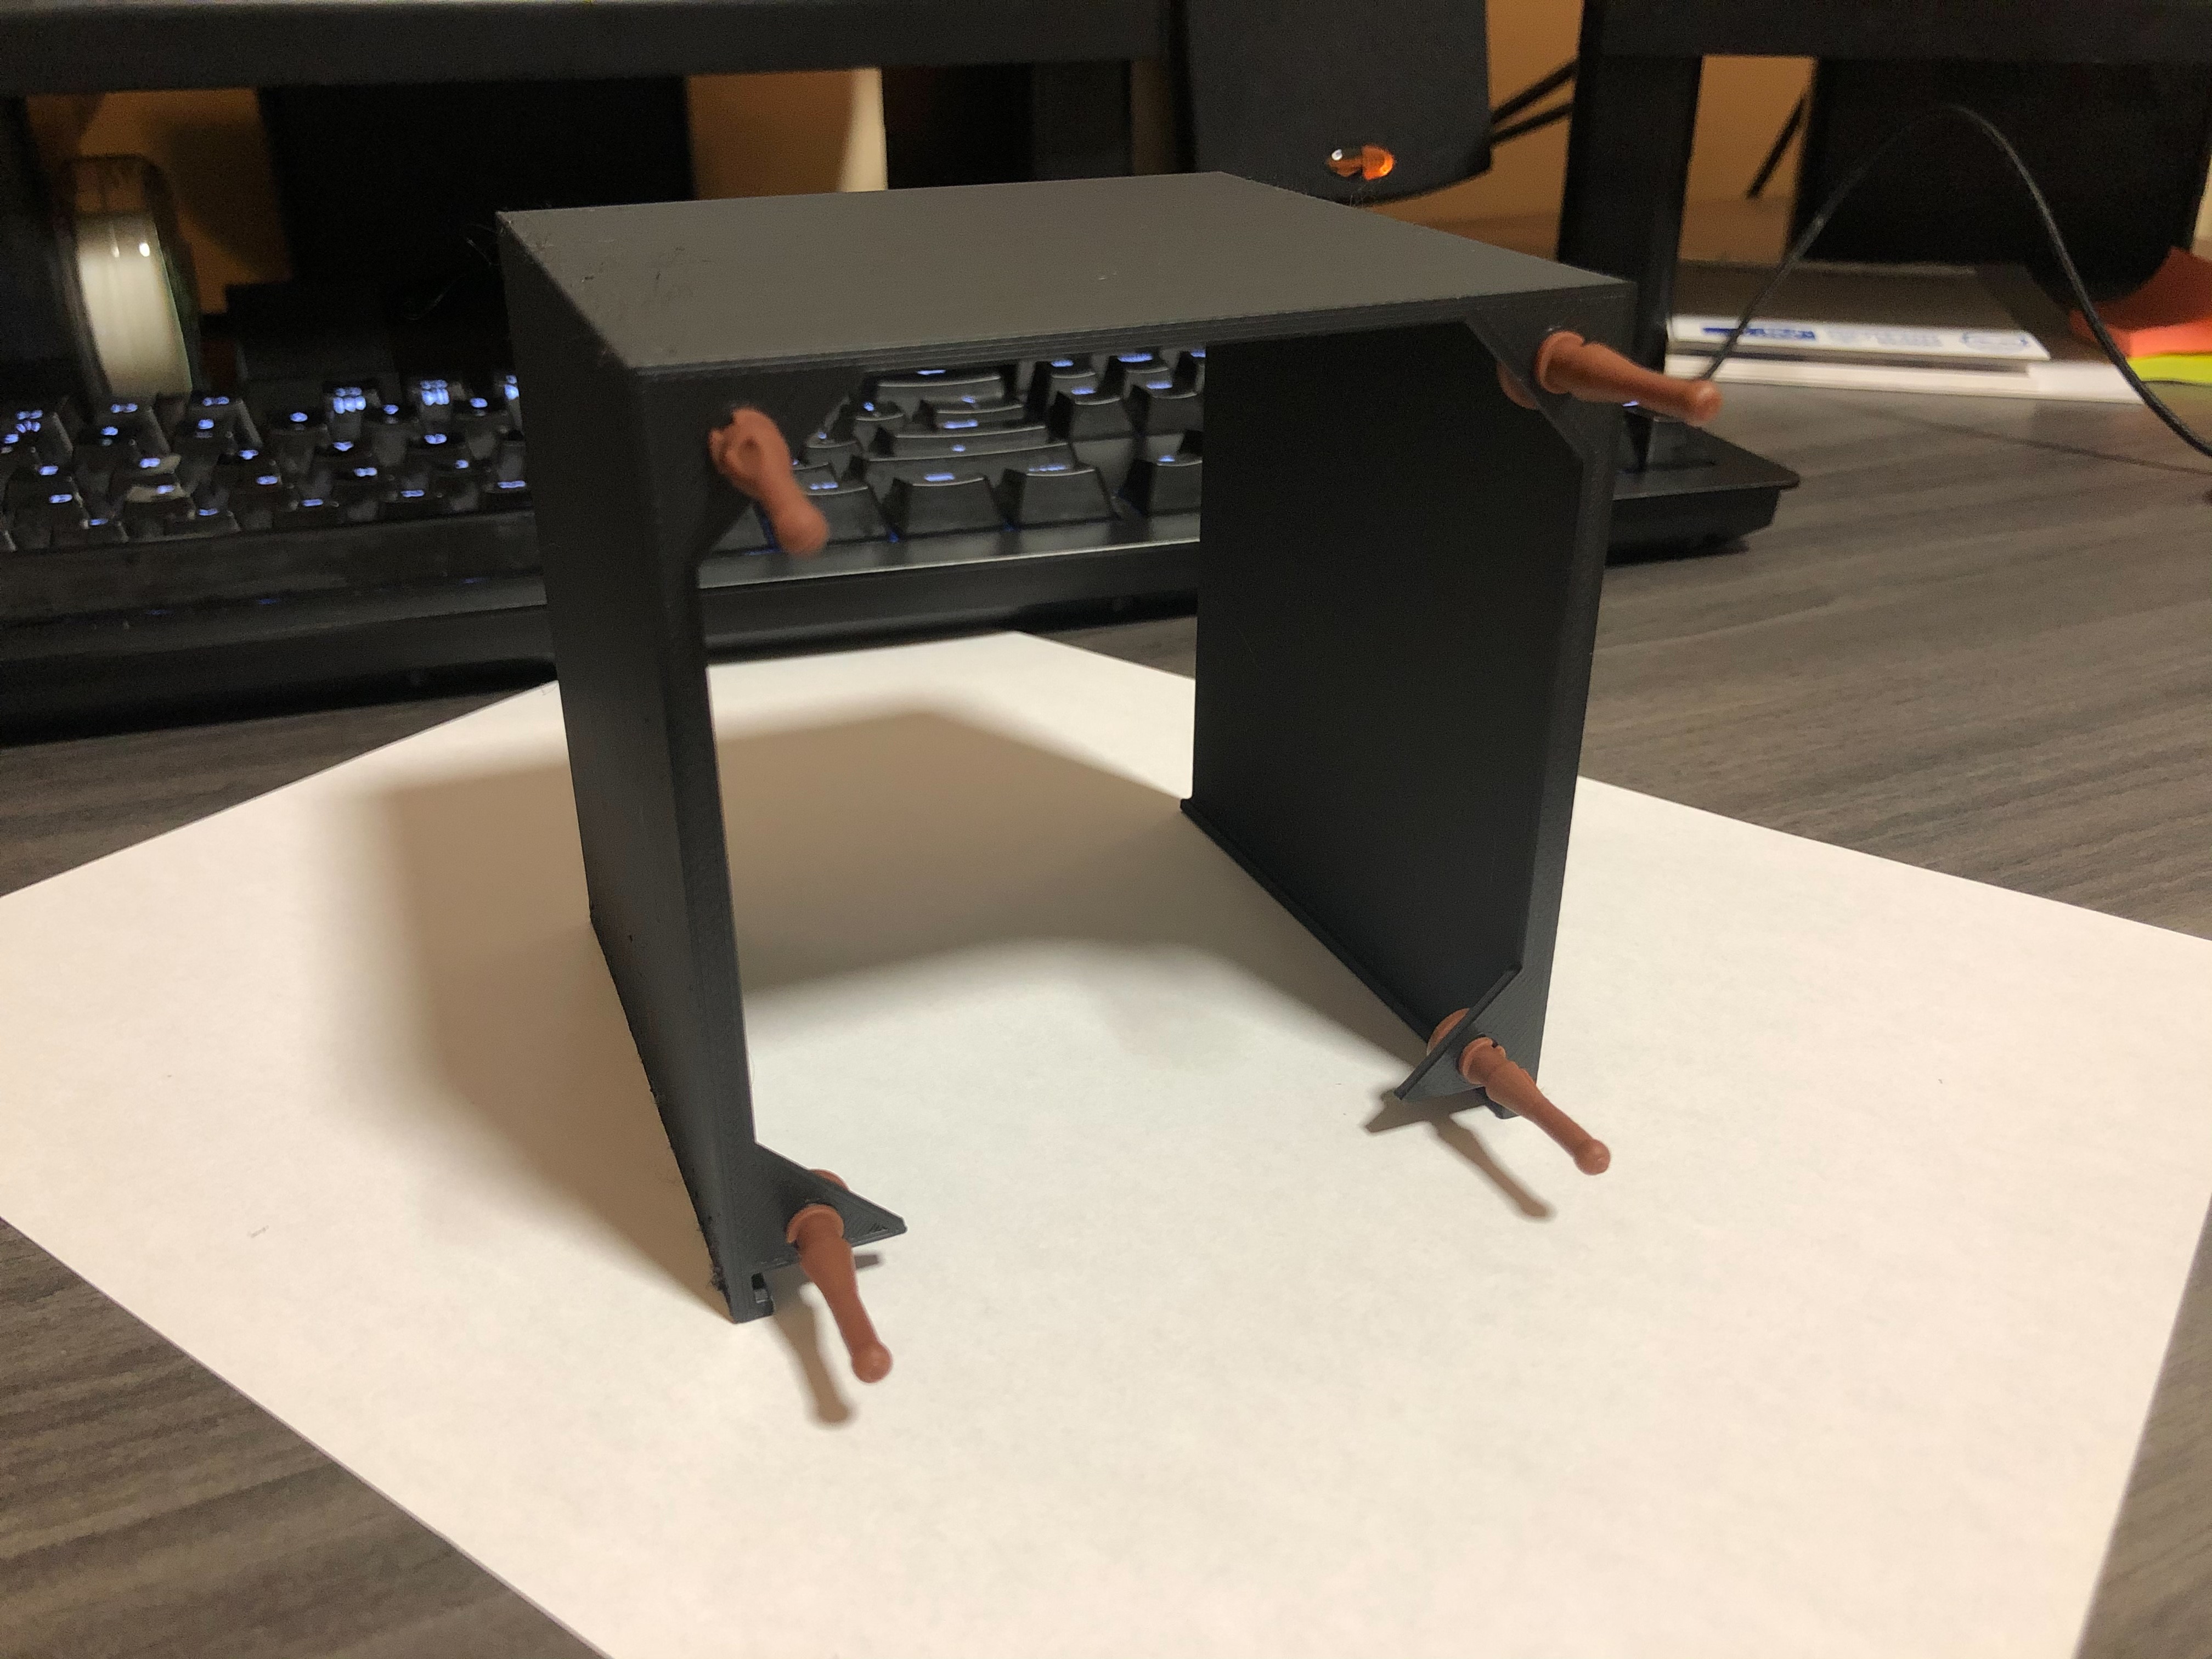
It’s hard to tell in the photos but there is a tiny lip at the bottom that snugly tucks over the base of the heatsink to prevent the whole shroud from just sliding off over time.
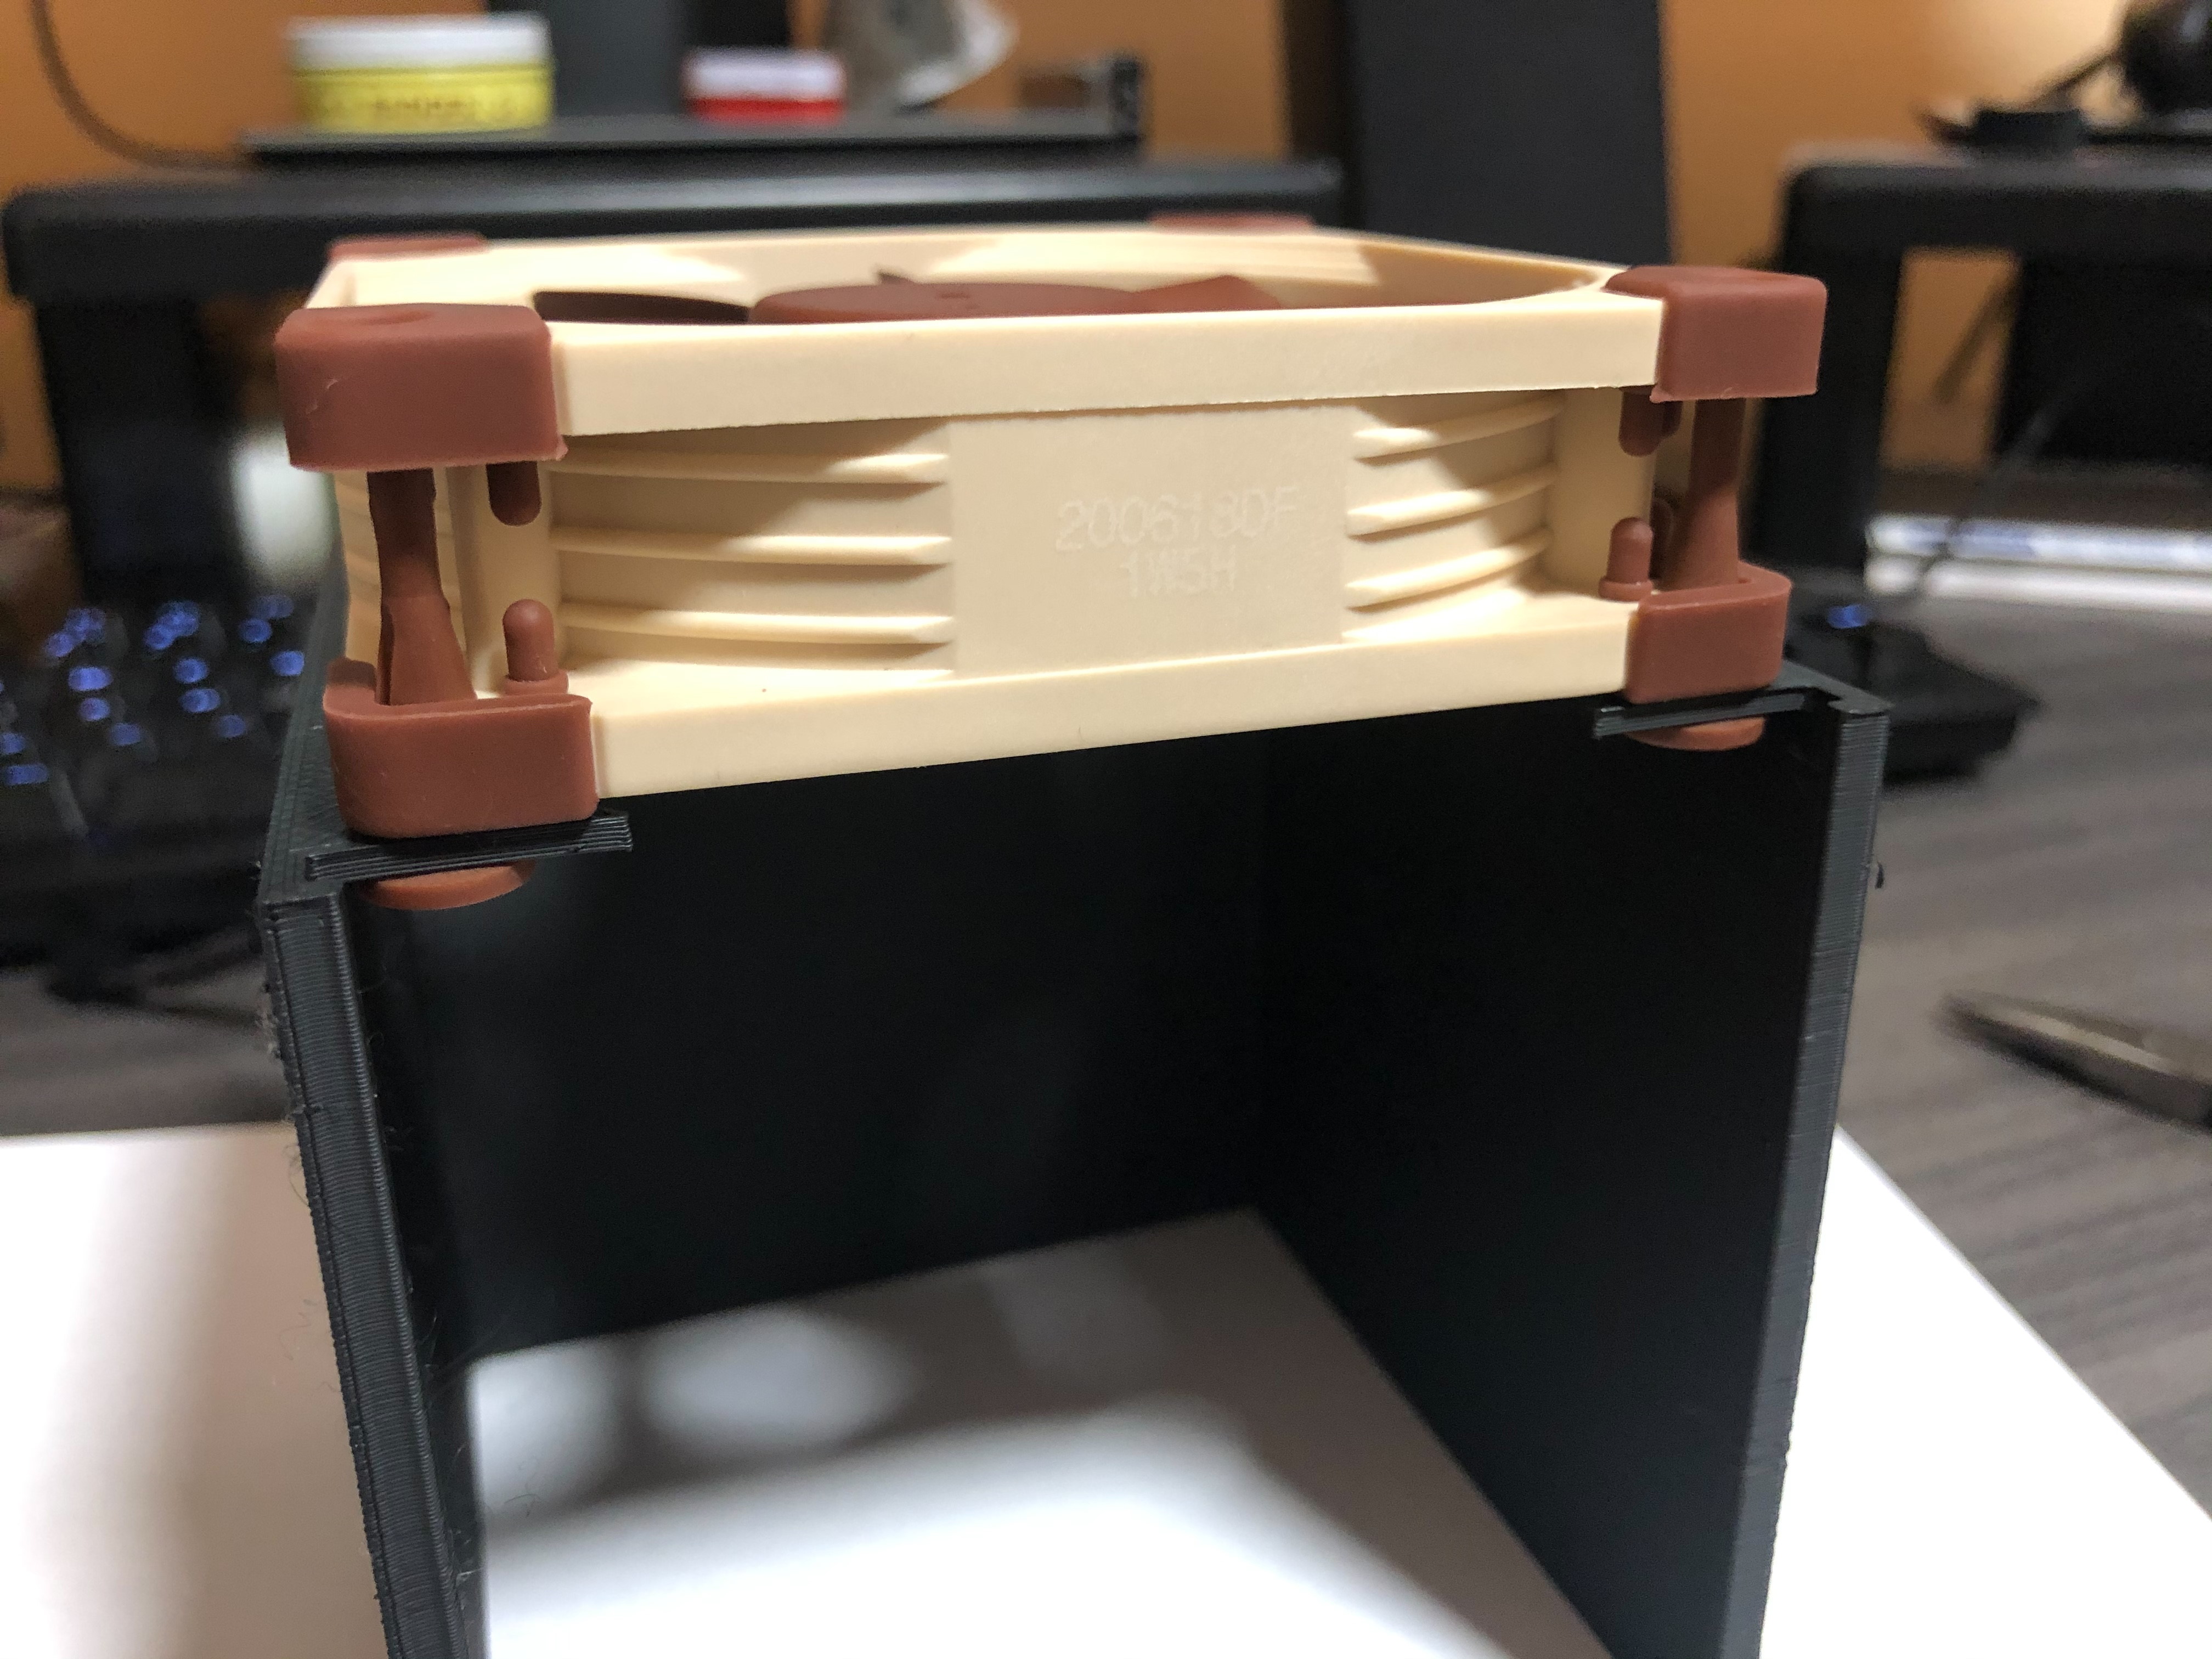
I used the rubber fan holders that Noctua includes with their fans and they fit very nicely in the holes. If you’re going to use a different fan I can’t guarantee the screw holes will hold up to standard case fan screws. A M4 screw and nut should work just fine though.
When mounting the fan be very careful. I printed at 0.3mm layer height and found that if I yanked too hard when installing/removing the rubber stoppers the layers would peel apart. This might be solved by printing at 0.2mm.
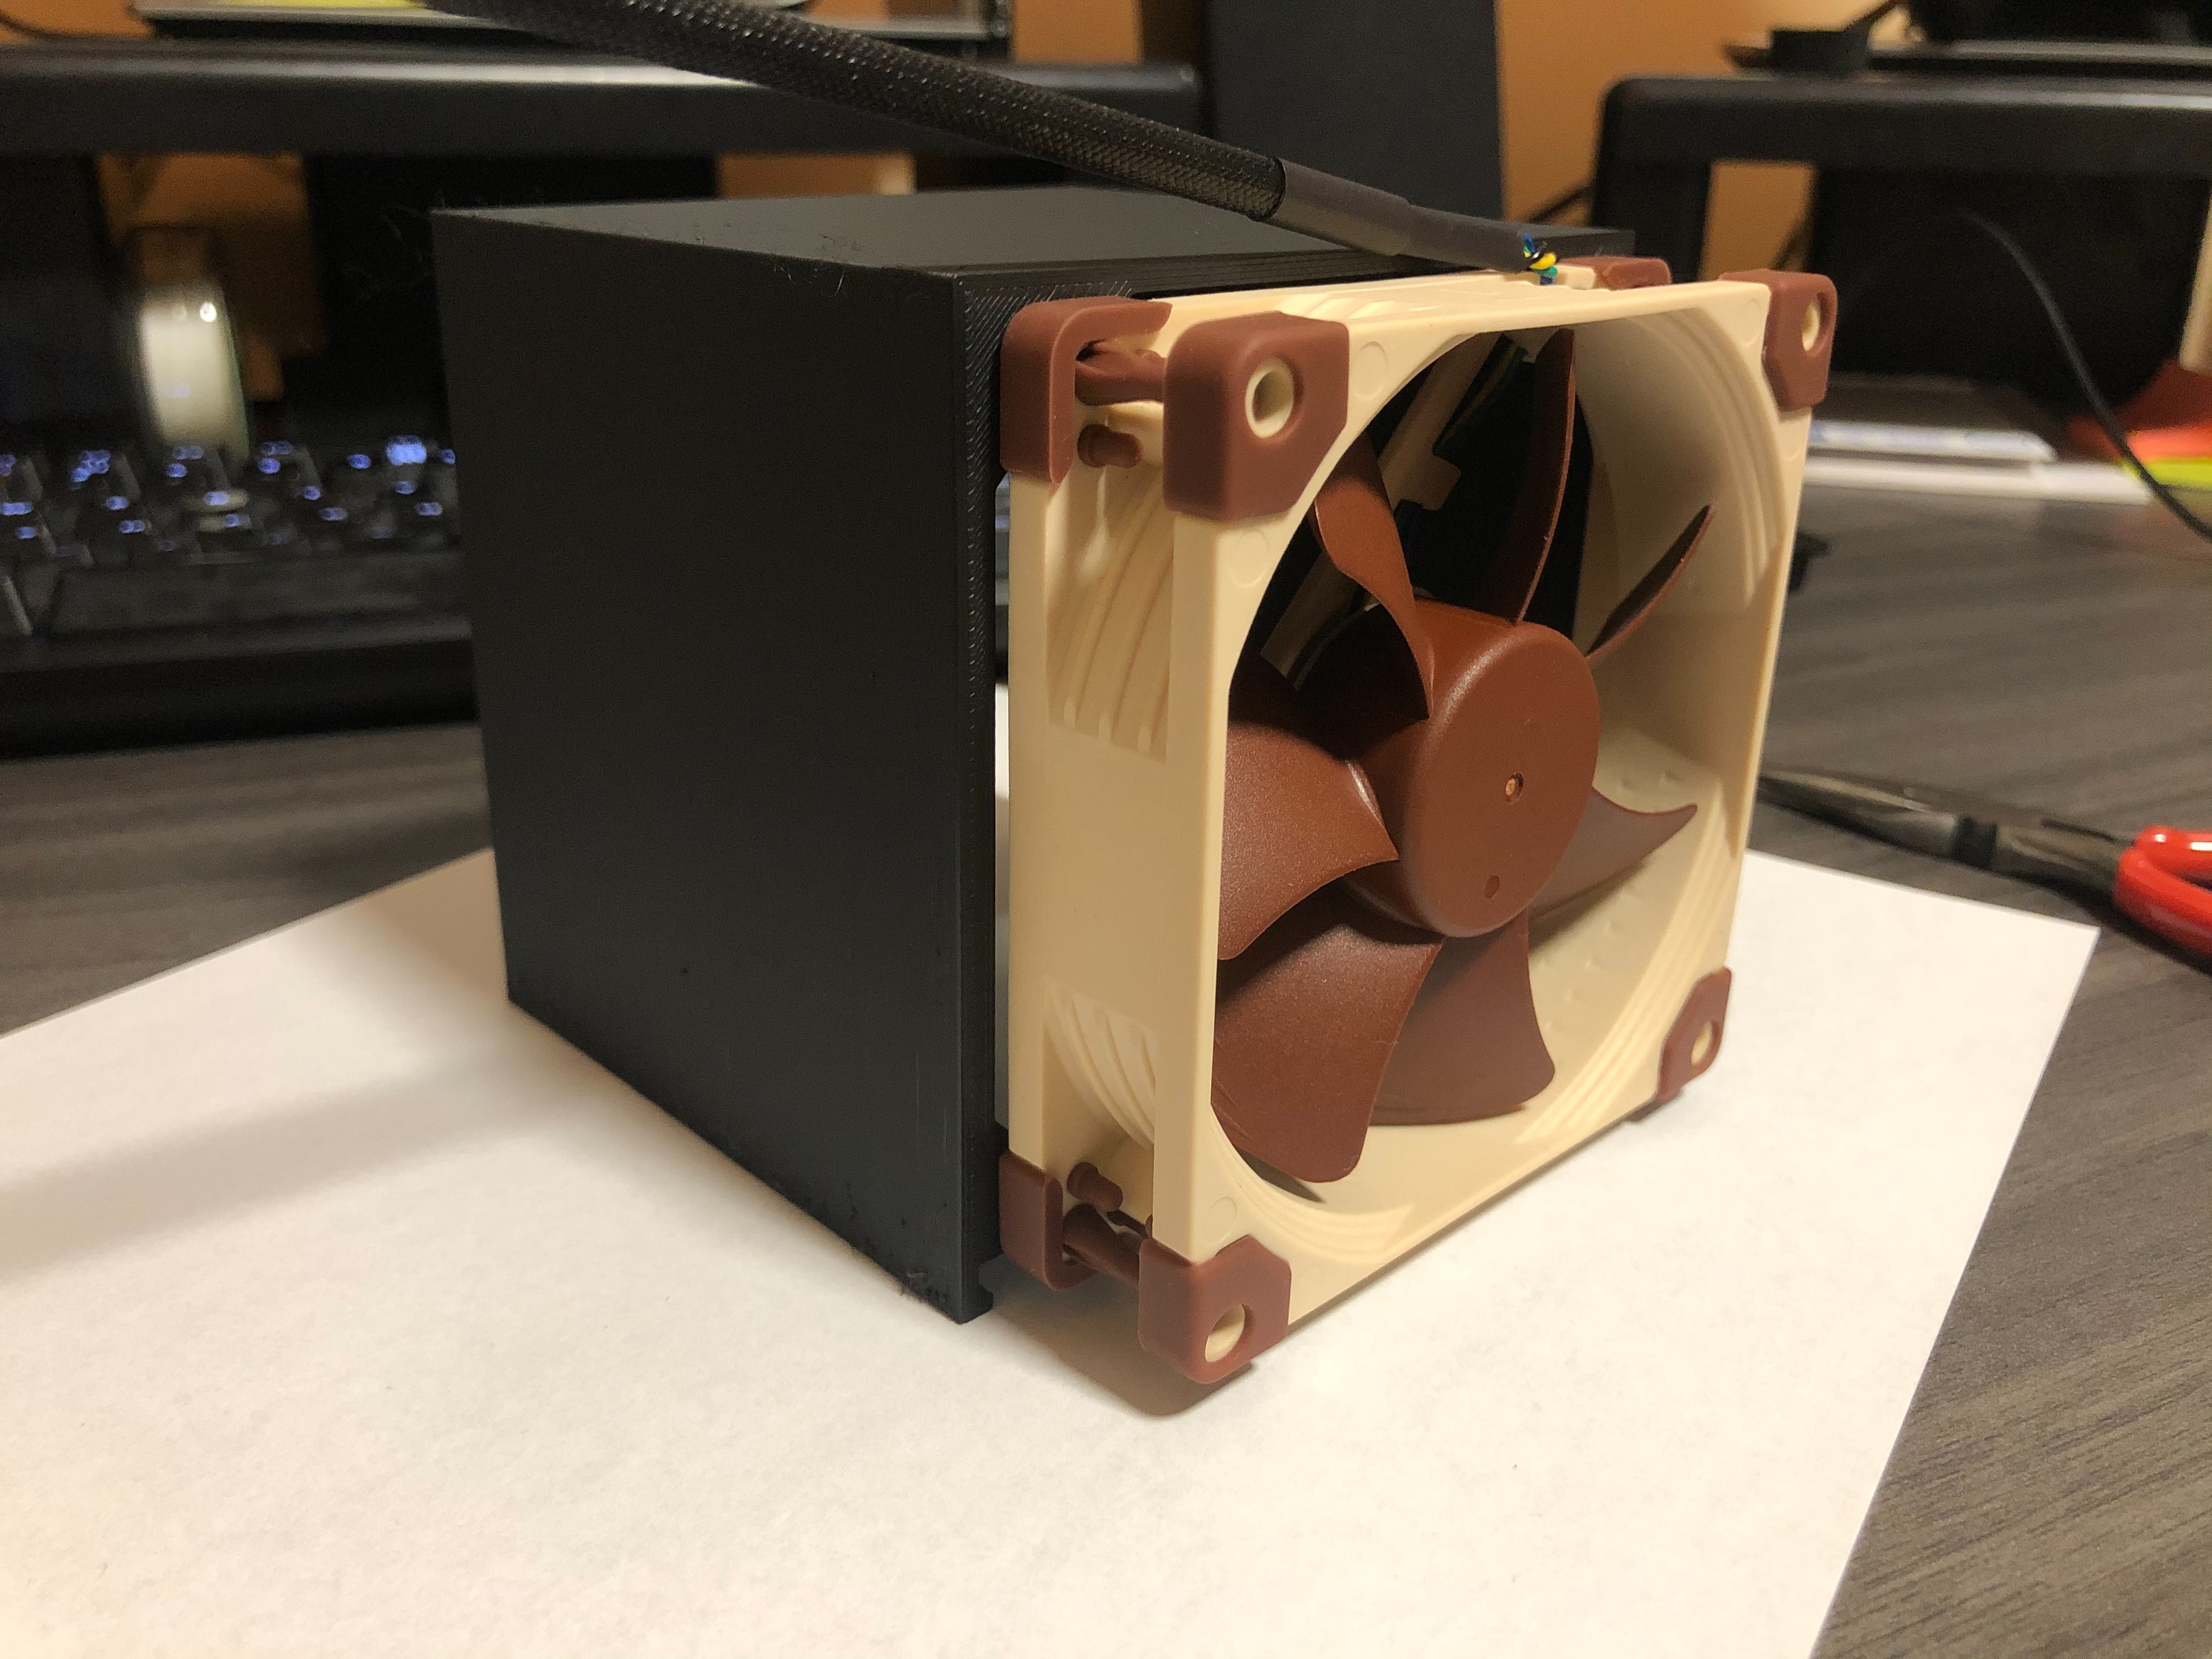
Here it is installed:
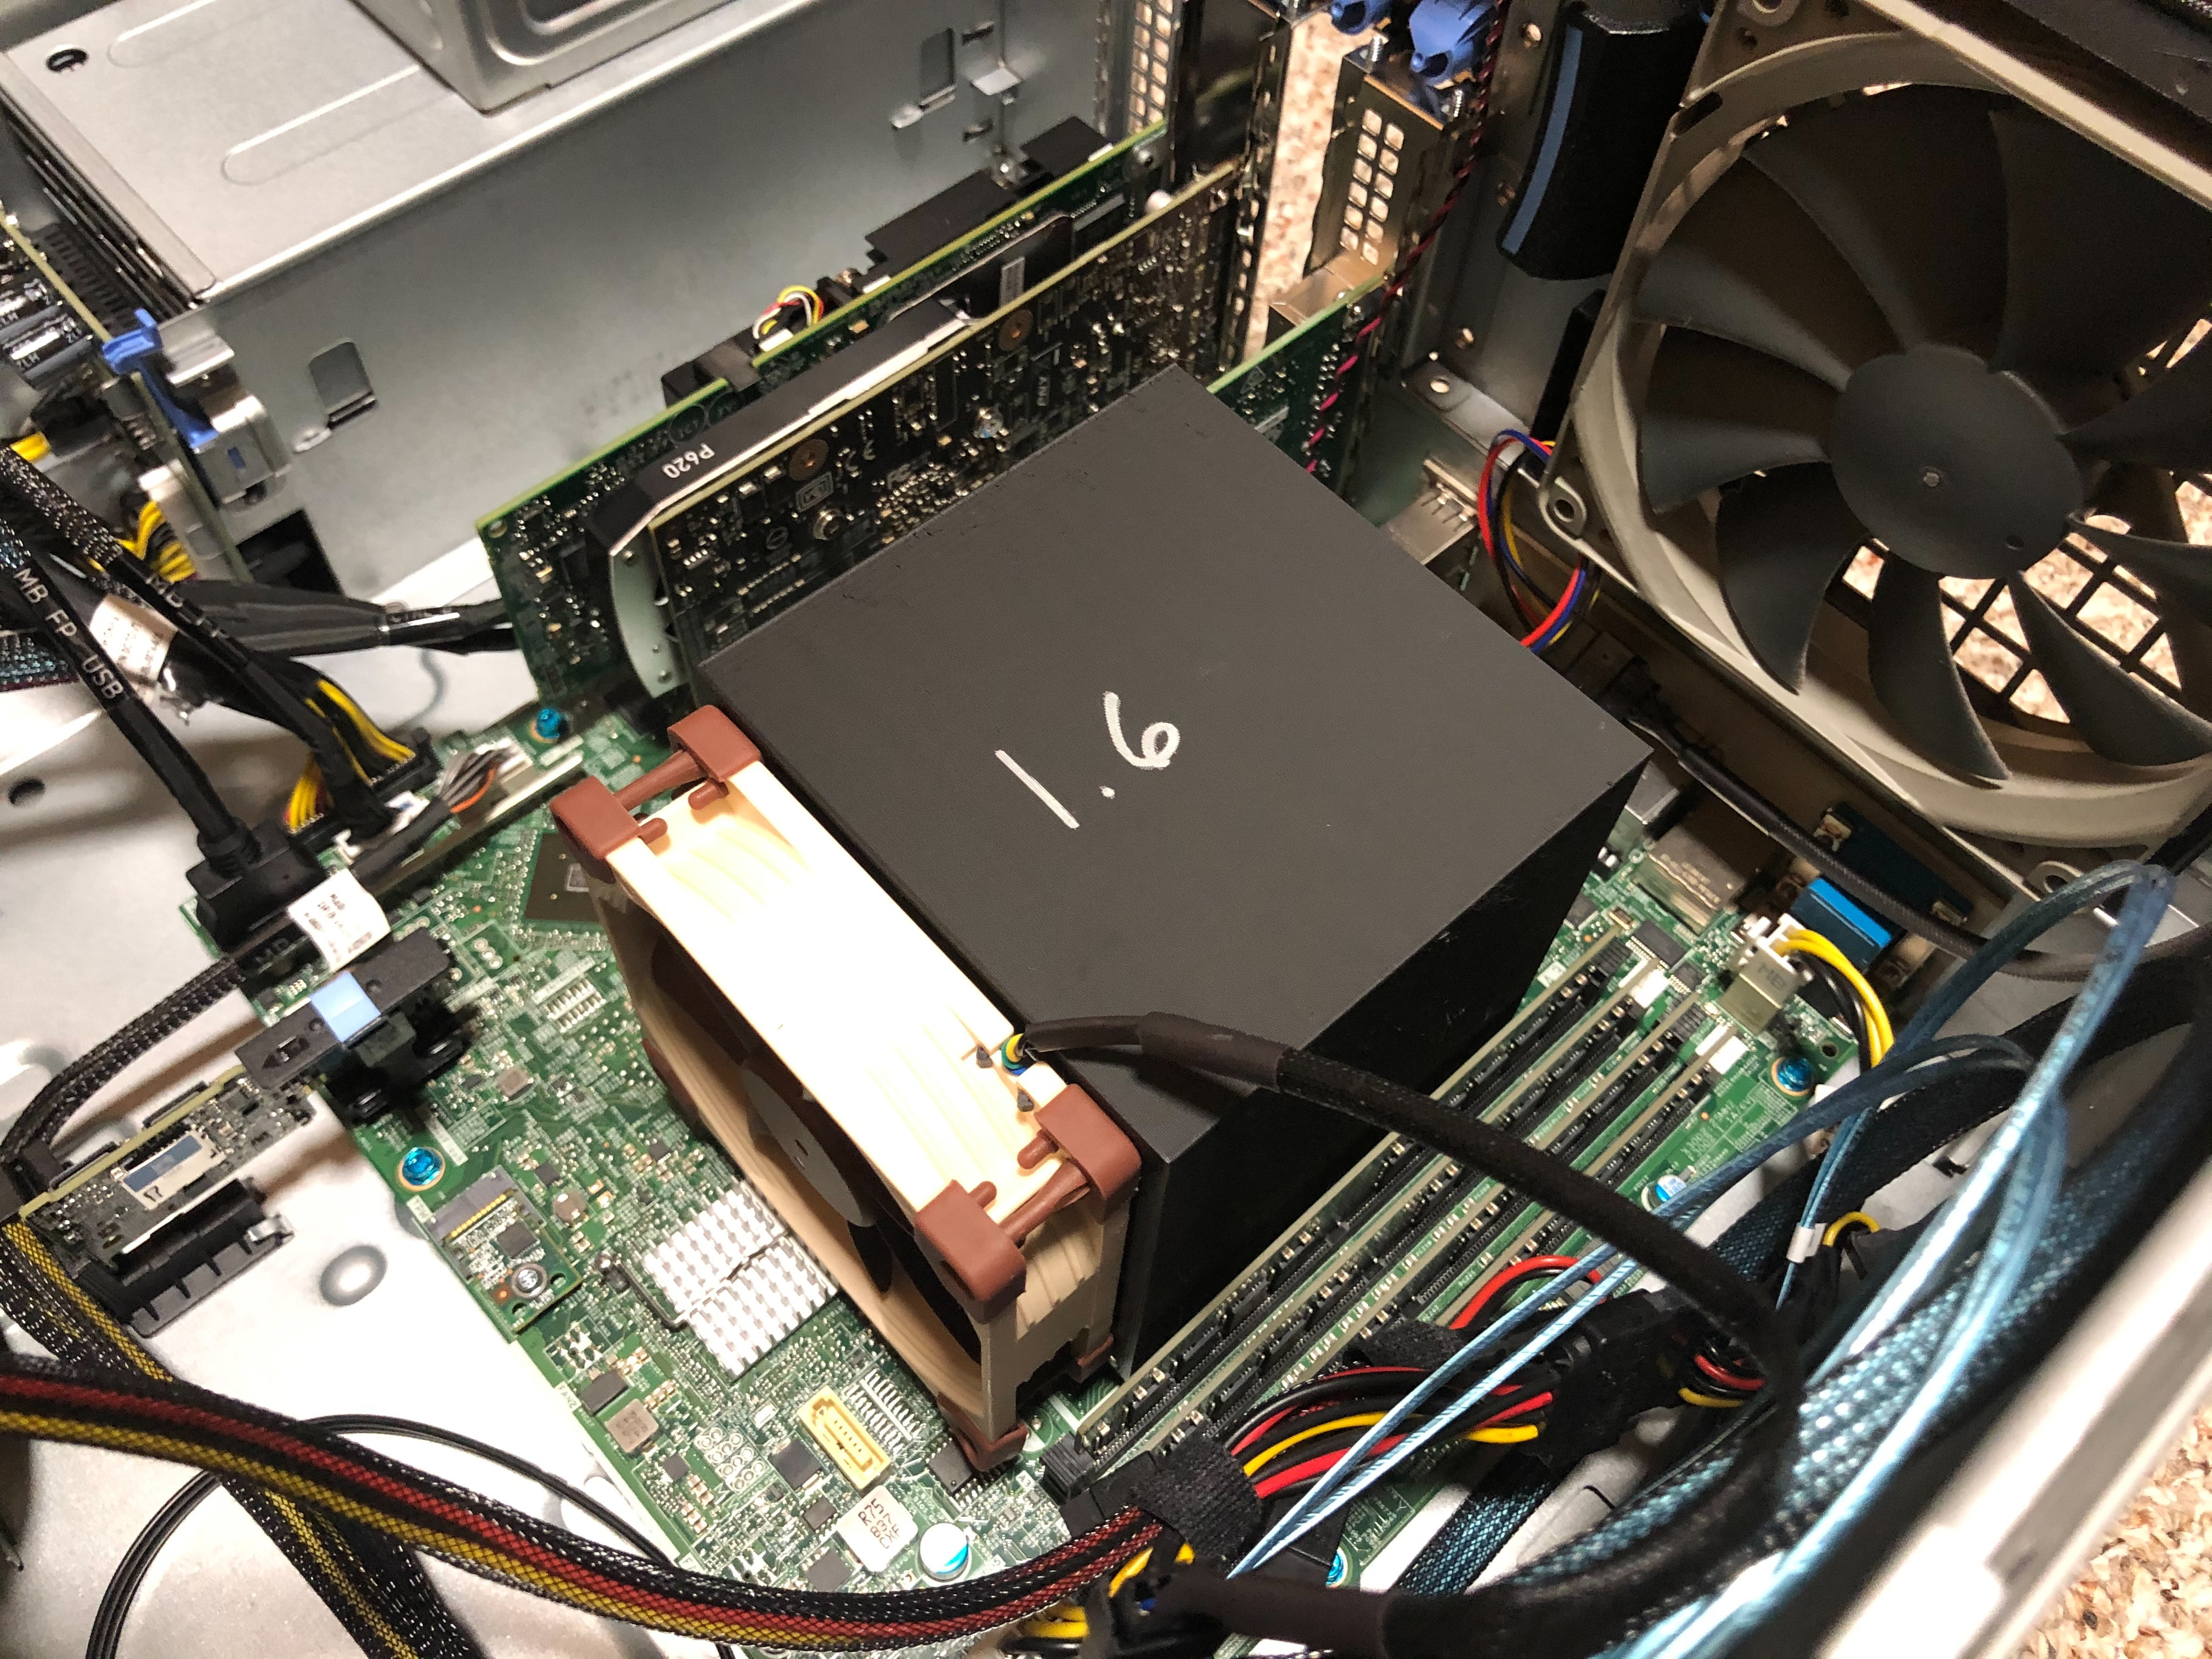
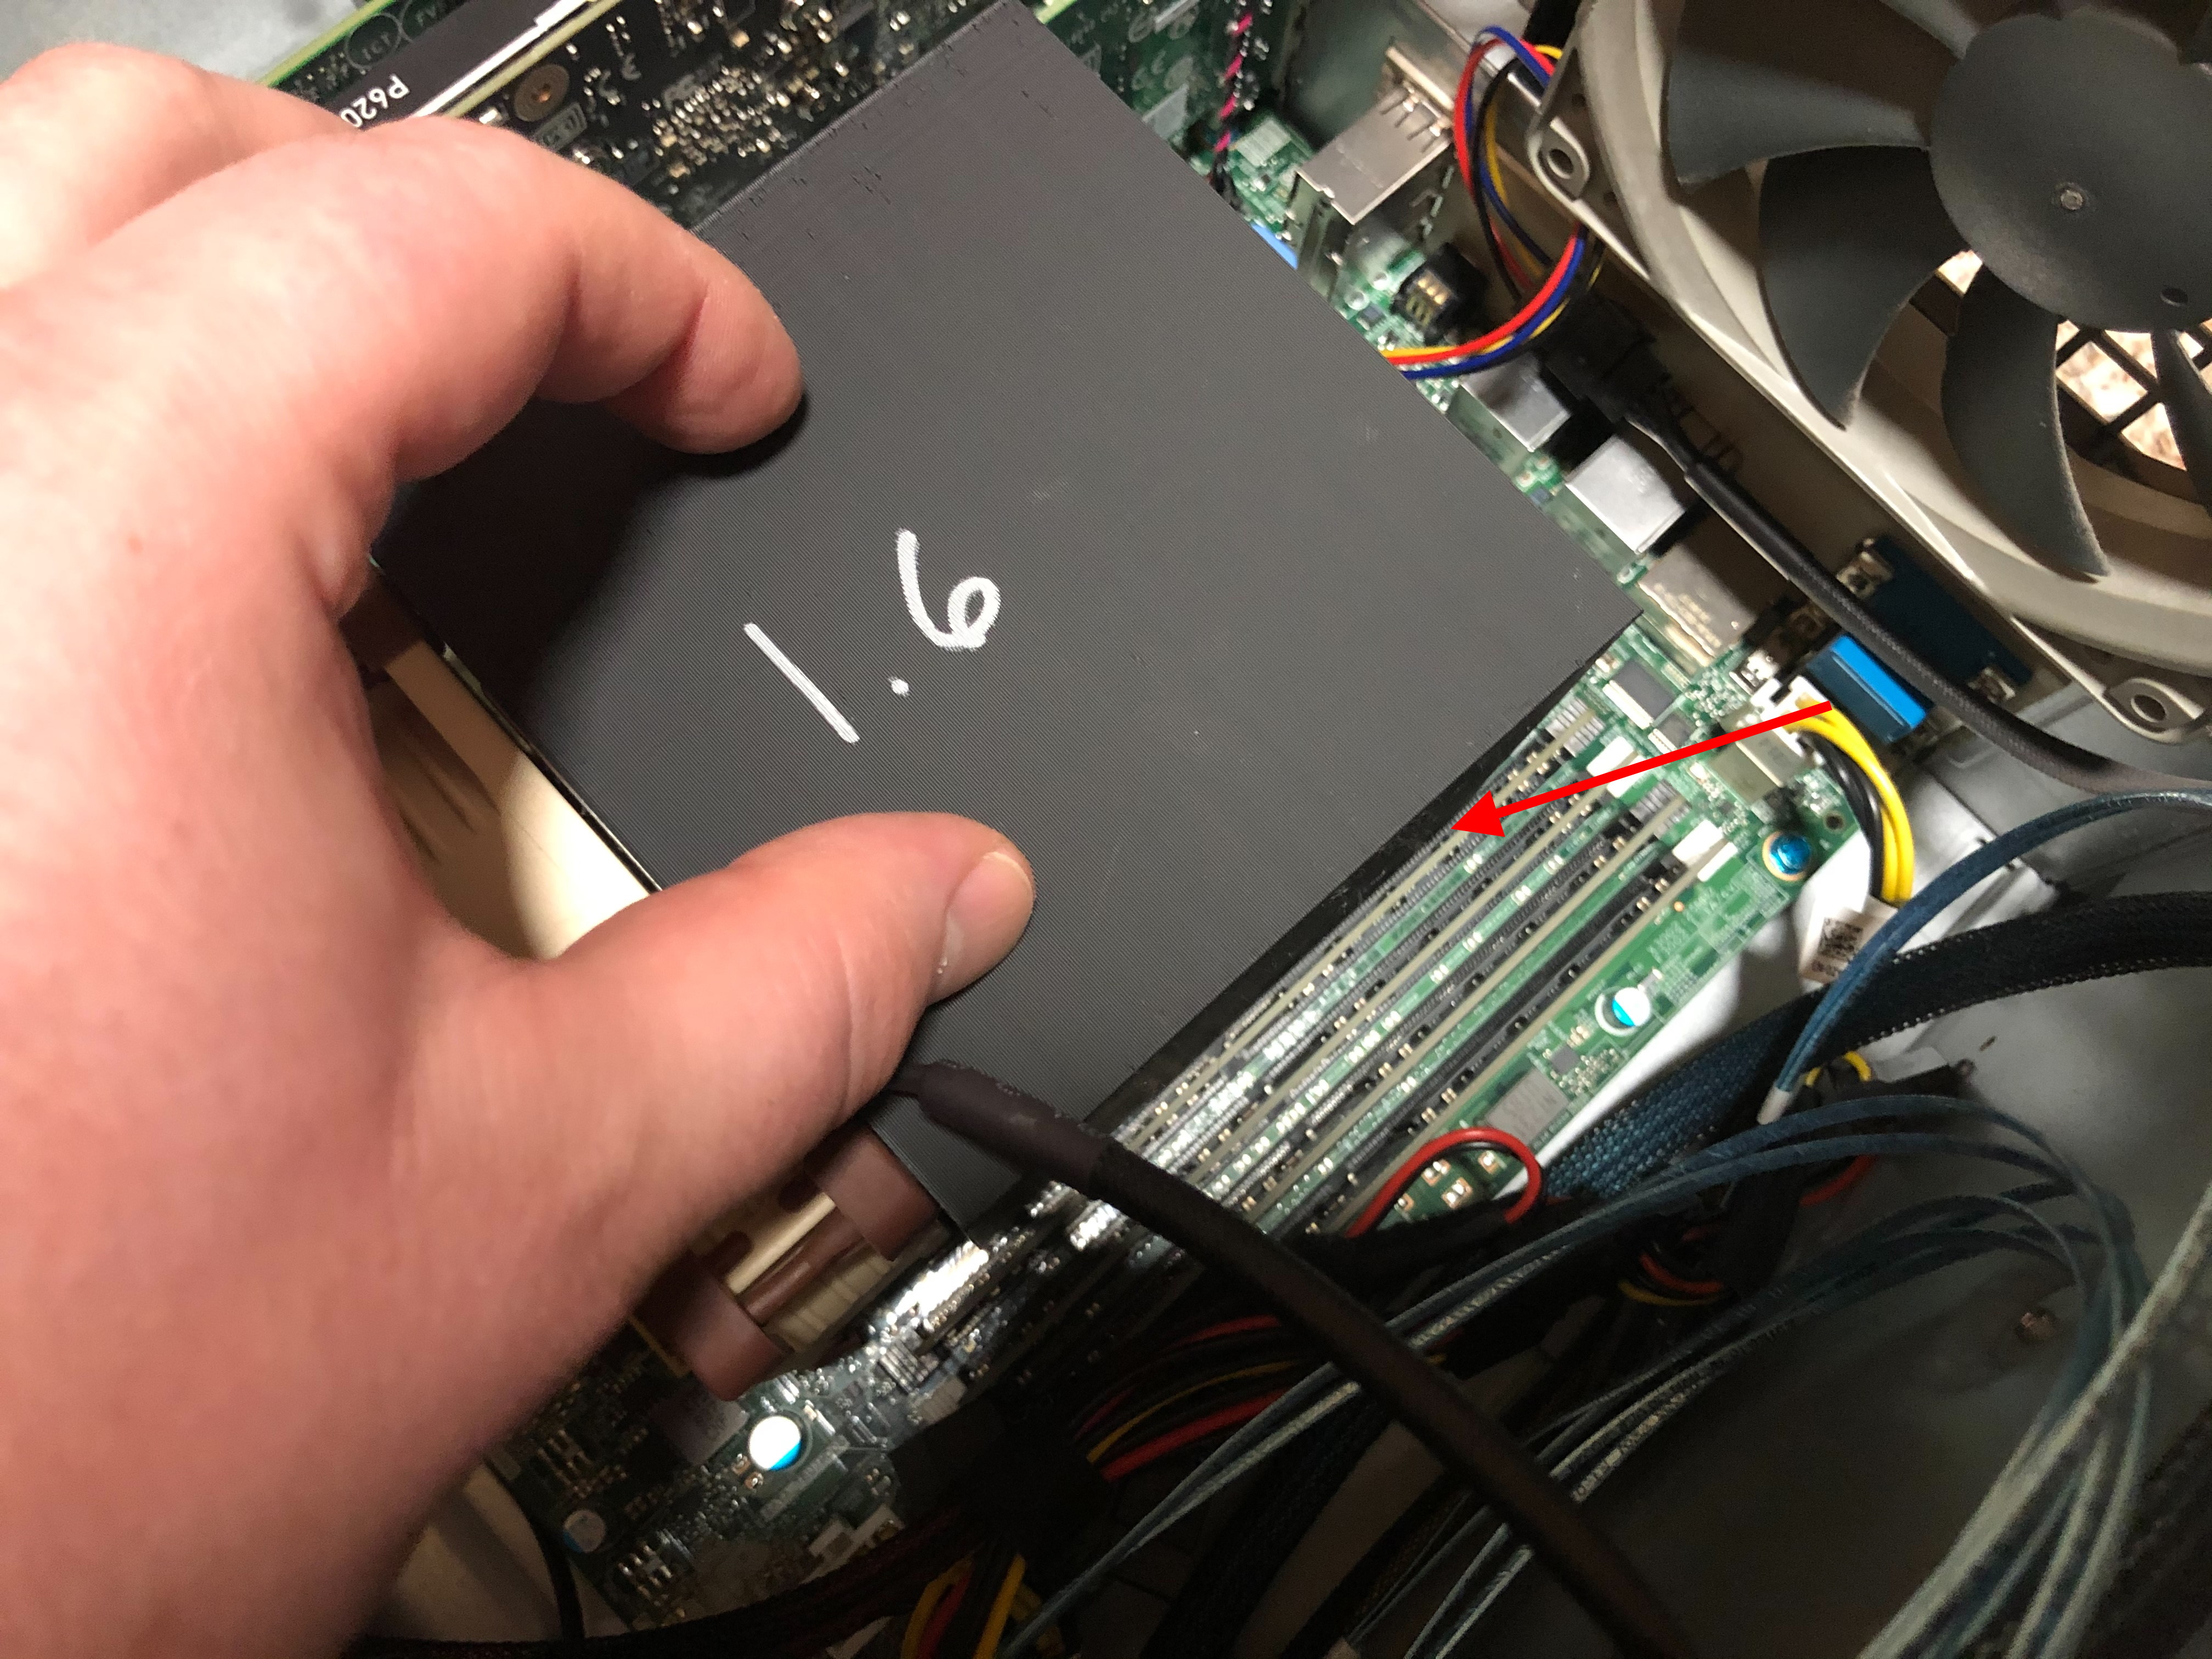
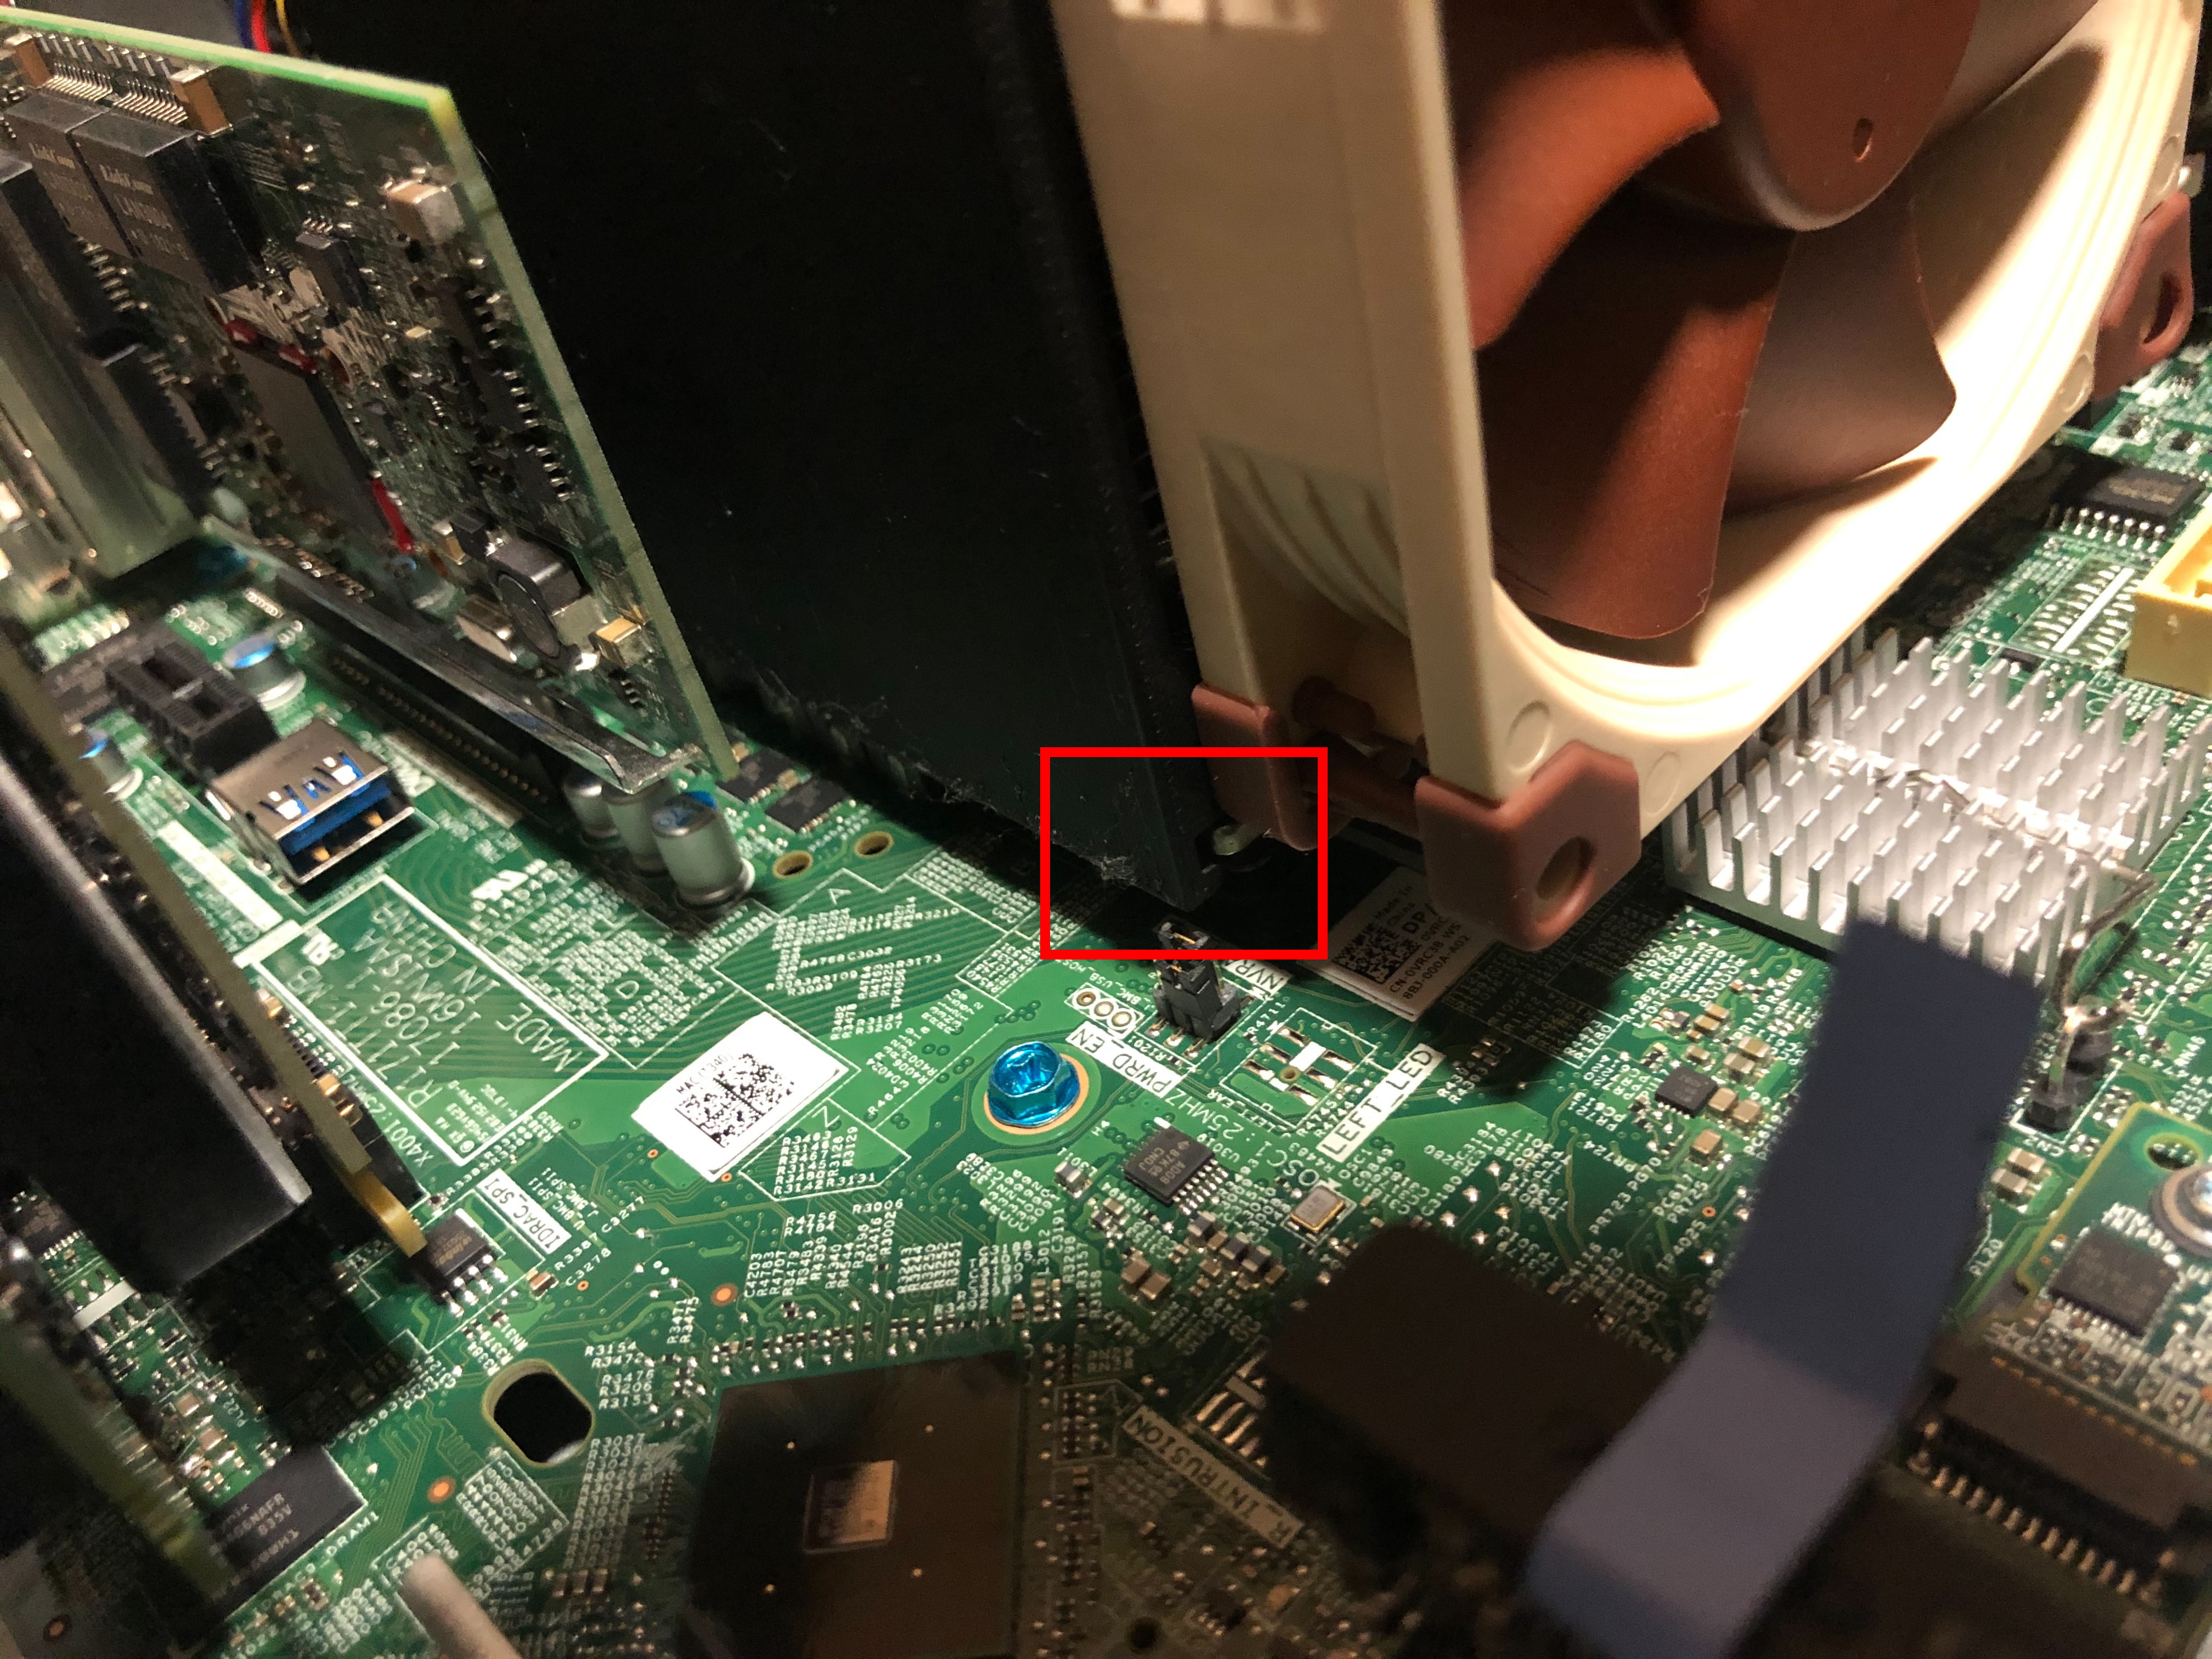
I used a Noctua NF-A9 PWM (92mm*92mm*25mm). I originally planned to buy two and set them up in a push/pull configuration but Amazon sold out. Turns out this was lucky for me because it appears Dells engineers left a really sweet hunk of plastic sticking up from the motherboard which prevents mounting a 25mm thick fan to the back of the shroud:

I see Noctua sells 92mm*92mm*14mm fans that might fit in there. If someone wants to donate two I will totally update the shroud design with two fan mounts and post an update. Based on my reading I don’t think a push/pull setup will benefit overall temperatures much though since this heatsink is pretty small and has a simple design.
Ok, what you probably care about, was there a performance improvement in cooling over my original zap strap design? Possibly.
I say possibly because I stupidly didn’t blow out my server of dust before starting all of this. I ended up blowing the dust out during some size checks but before installing the shroud. Here are my recorded temperatures:

- Transcoding a Bluray, all CPU workload with the old cooling setup, average temperature of 80c
- I blew the dust out of the case. You can see I ended up dropping my average idle load temperatures by 5c
- Point where I installed the new shroud
- Transcoding a Bluray, all CPU workload with the shroud installed, there is a 15c drop compared to (1) at an average temperature of 65c. This is probably partially the shroud and partially blowing out all the dust
Another discrepancy between (1) and (4) is the fan itself. Originally I installed a NF-B9 redux-1600 PWM which only runs at 1600RPM and pushes 64.3m3/h of air. The new fan is a NF-A9 PWM that runs at 2000RPM and pushes 78.9m3/h of air.
All that being said, I’m happy with ~65c at peak load and I can’t hear a thing. Idle temps seem to be roughly the same.
Now for what you’re probably here for, the STL file: Dell T340 Heatsink Shroud v1.6
You can also find it on Thingiverse.
I printed at 0.3mm. I’d recommend doing 0.2mm to hopefully make it a bit stronger so you don’t have to be as careful when installing the fan. 100% infill. You might also want to rotate the print so the fan screw holes are flat on the bed.
Alternatively you can skip ALL of this and try CJ’s suggestion he recently posted on my Part 1 which is a BIOS setting change.
Update 2022-08-12 – Here is the last 365 days of temperatures. The spike to 72c is likely the CPU under 100% load for a sustained amount of time. I think my Cookie Clicker VM was causing it.

The BIOS setting did not make that big a difference on my T340. I went with Noctua and shroud and am pretty happy with performance and sound. I cannot hear a thing!
Thank you for the thingverse file which made this super easy to do.
Hi :)
I have one of those loud T340 at one of my customers office. The BIOS setting did not really reduce the sound, so I also went the Noctua-route. (which is fitting, being in austria)
Here is my version of it: https://imgur.com/a/OA5m1TQ
I used:
* Noctua NF-P12 redux-1700 PWM in the back
* Noctua NF-A14 PWM in the front, above the harddisks
* Noctua NF-A9 PWM and Noctua NF-A914 PWM on the heatsink
* Noctua NA-FC1 Fan Controller
For the CPU Fans I modified your design, and added the holes for the second fan, and I also cut out holes. I hope that that way the second fan can suck more air in. (also, it reduced print time)
I split the model in half, so that I can print it without support, and used PETG filament
With the Prime95 stress test I get about the same temperatures as with the original setup.
Thanks for your work! It really helped a lot and made this silencing process very easy. :)
That is awesome! Do you have a STL to share?
Not yet, I’ll redo it because I made a mistake when mirroring your fan-holder-holes. It’s a bit too wide..
I’ll post it on thingiverse as a remix :)
So,.. tomorrow I can try the new version, and if time allows I’ll also compare it to your design with just the one fan :)
I made a small OpenSCAD script to create my version:
https://gist.github.com/crazy-weasel/cf7c682c909191e079feb39abe80ee47
Also on thingiverse: https://www.thingiverse.com/thing:5412379
Looks great! Does would this fit in a T430? It appears to use the same/similar heatsink but I wanted to make sure.
I honestly don’t know. I only have access to my T340.
I recently acquired a T330. The fan inside doesn’t bother me much, yet. But I think the fan of the power supply is making a pulsing noise. I even changed the power supply to another model, but the pulsing remained.
It may be written in the articles, but did you make any changes to the power supply?
I did not make any changes to the PSU on my server. Just the main case fan.
So, no pulsing noise at your site?
None that I could hear when my server was in my office. It has since been moved to my crawl space so I can’t hear it anyone. Last time I was down there I didn’t notice anything.
After modding the PSU I found out, that the pulsing noise is indeed the main fan. So, I replaced it with a Corsair ML120, set a fan offset of 25% in iDRAC and enjoy a nearly silent server :)
Excellent. Glad it wasn’t the PSU fan. That would be much harder to deal with.
I managed to put a Noctua D15 into my T340. The process almost voids the warranty. :( After you put standard 115X mounting backplane onto the back board, the Notua backplane will hit the support arch under the motherboard…. So a “little” downward push in needed for the arch…
Still under fine tuning as the back Artic P14 not reports correct PWN to the board. So the DRAC shows “Fan 1 RPM is less than the lower warning threshold” massage and yellow blinking.
But the rig is silent. CPU: Xeon E_2136 Room temp: 20C, case fan off.
Idle temps: 30-32C, prime95 max heat temps: 68-70C
Wow. Thanks for the details. I did completely remove the motherboard from my T340 trying to find a way to put a mount back there. I gave up.
Is this the back plate you used? https://www.amazon.ca/ASHATA-Backplate-Heatsink-Bracket-Backplane/dp/B07YLNDFNQ
Nope just ripped a standard mount from an old consumer motherboard (115x lm). And used the noctua backplane over it.
The socket is a standard FCLGA1151.
My next plan is to get some M3 threaded rods to mount the Noctua upper mount to the original DELL backplane, BUT the screws have a very special thread size…
Good luck. FWIW I haven’t changed a thing since these blog posts and things are still working great.
Even your first solution was very good and quiet, i did it way back on an other T340…
But i don’t have a 3d print machine, so i went on with your Noctua idea (as i had a Noctua D15 in spare, because i switched my rig to water) and posted my results here, as this is best blog / thread about how to make the my T340 quiet.
I will post the detail here if i can get the cooler mounted properly with the original backplate, i have the Noctua D15 and a Thermalright Silver Arrow to test it.
The machine under full stress load was quiter then my other rig with water cooling….
Thanks for sharing.
Hello,
First, thanks a lot Eric, I spent a lot of time trying to downgrade my IDRAC9 on my T340 to control the fans but I couldn’t go lower than 4.40.40 version.
I’m trying to mode the fans now, as you did and Ordered Noctua fans (the A versions).
I was wondering if you kept the big black tunnel for cooling or not ? (the one by default that you see when you open the t340 case)
I did not keep the airflow guide. I didn’t find it added anything to reduce temps and just got in the way.