Lets get this right out of the way. This is Part 1 because it failed miserably. I figured I might as well document what I did to help save someone else the trouble. Hopefully Part 2 will be how to do this properly.
Alright now that that’s out of the way…
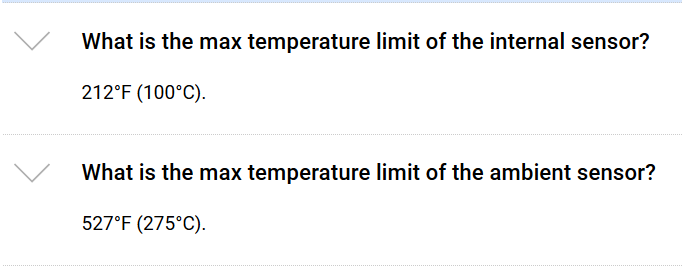
I recently received my Meater Block Kickstarter reward and immediately realized a flaw I would have to find a solution for. The Meater probes are divided roughly in half by a safety marker. The side with pointed tip is a internal temperature probe meant to sit inside meat and never exceed 212F. The rear of the probe (black area) is an ambient temperature probe rated for up to 527F. This is all according to the FAQ on the Meater website.
This is not a problem as long as you have some meat to stick the probe into which coverts pretty much anything you’d want to smoke with one big exception. Ribs.
Ribs are to thin for temperature probes. When smoking ribs I only need to ambient temperature. This is where I realized the problem with the Meater probes. When smoking ribs you’re aiming for 225f-250f which is above the safe temperature for half of the Meater probe. This was a real bummer because I was looking forward to having a super reliable, long range, wireless thermometer to use for everything I smoke.
This got me thinking about what I could do to solve this problem since I haven’t found much online.
The solution I came up with was some kind of protective heat-sink/deflector I could insert the probe into that would prevent the lower temperature tip while still using the ambient part of the probe.
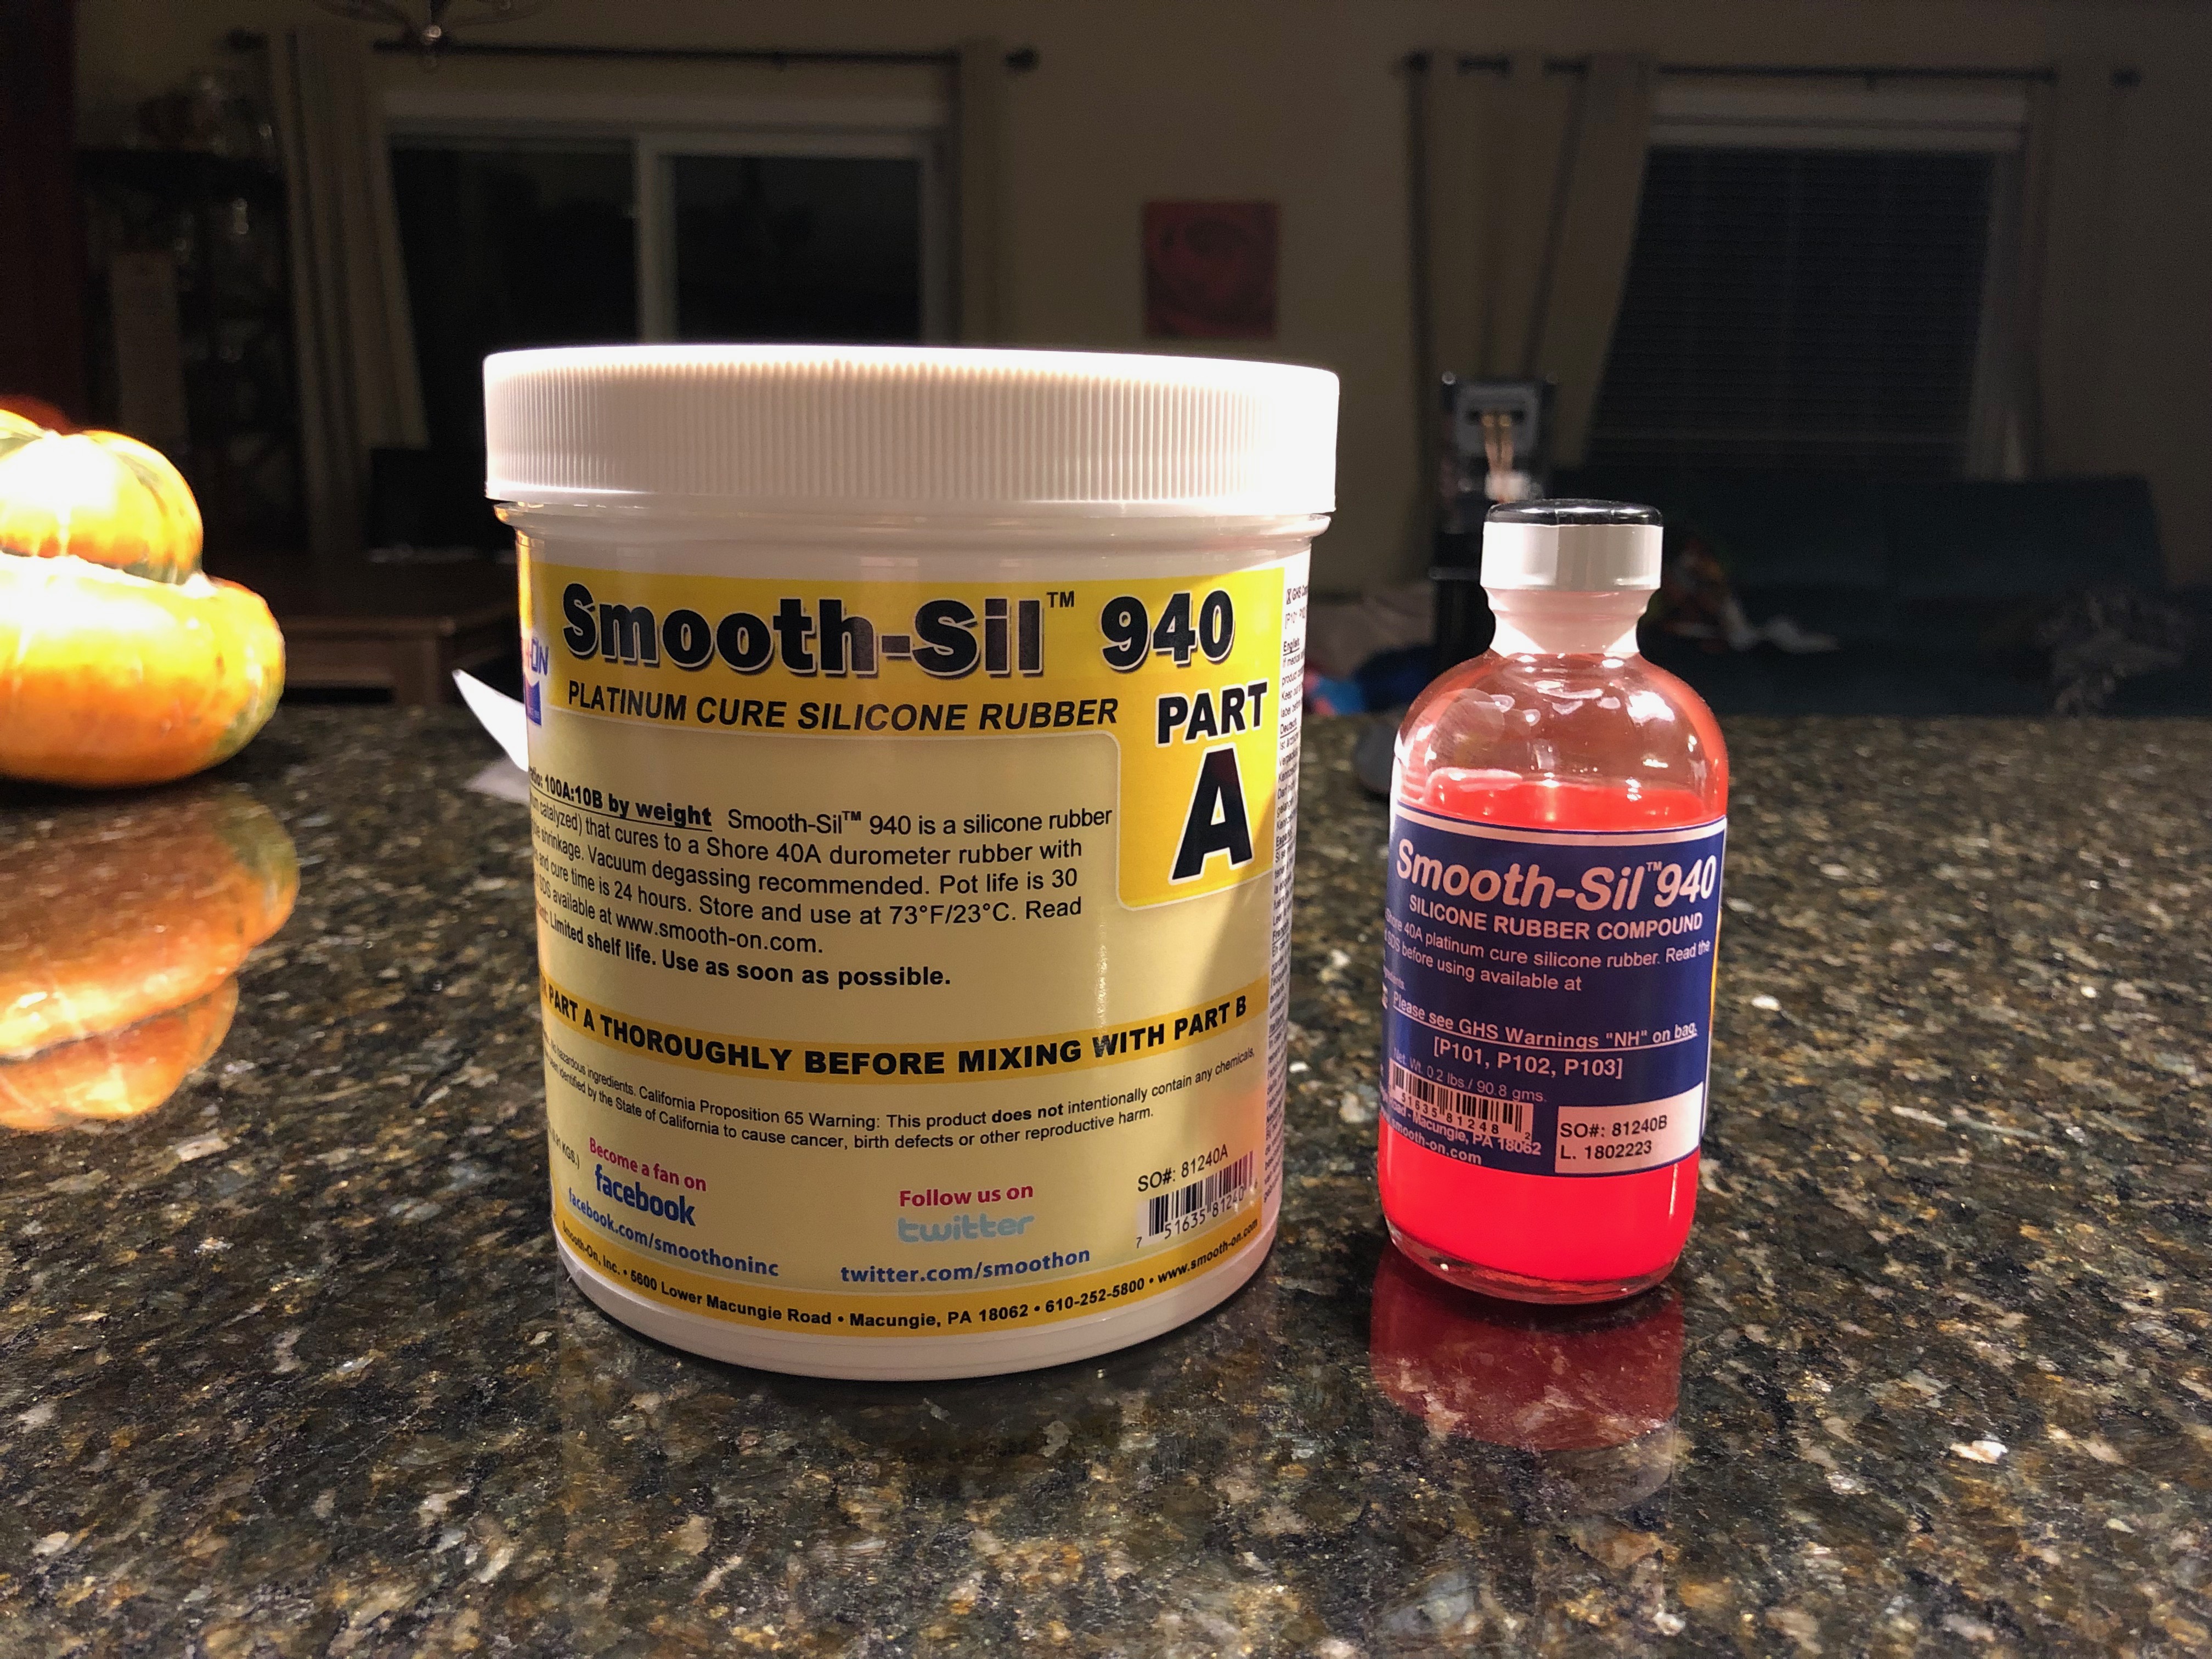
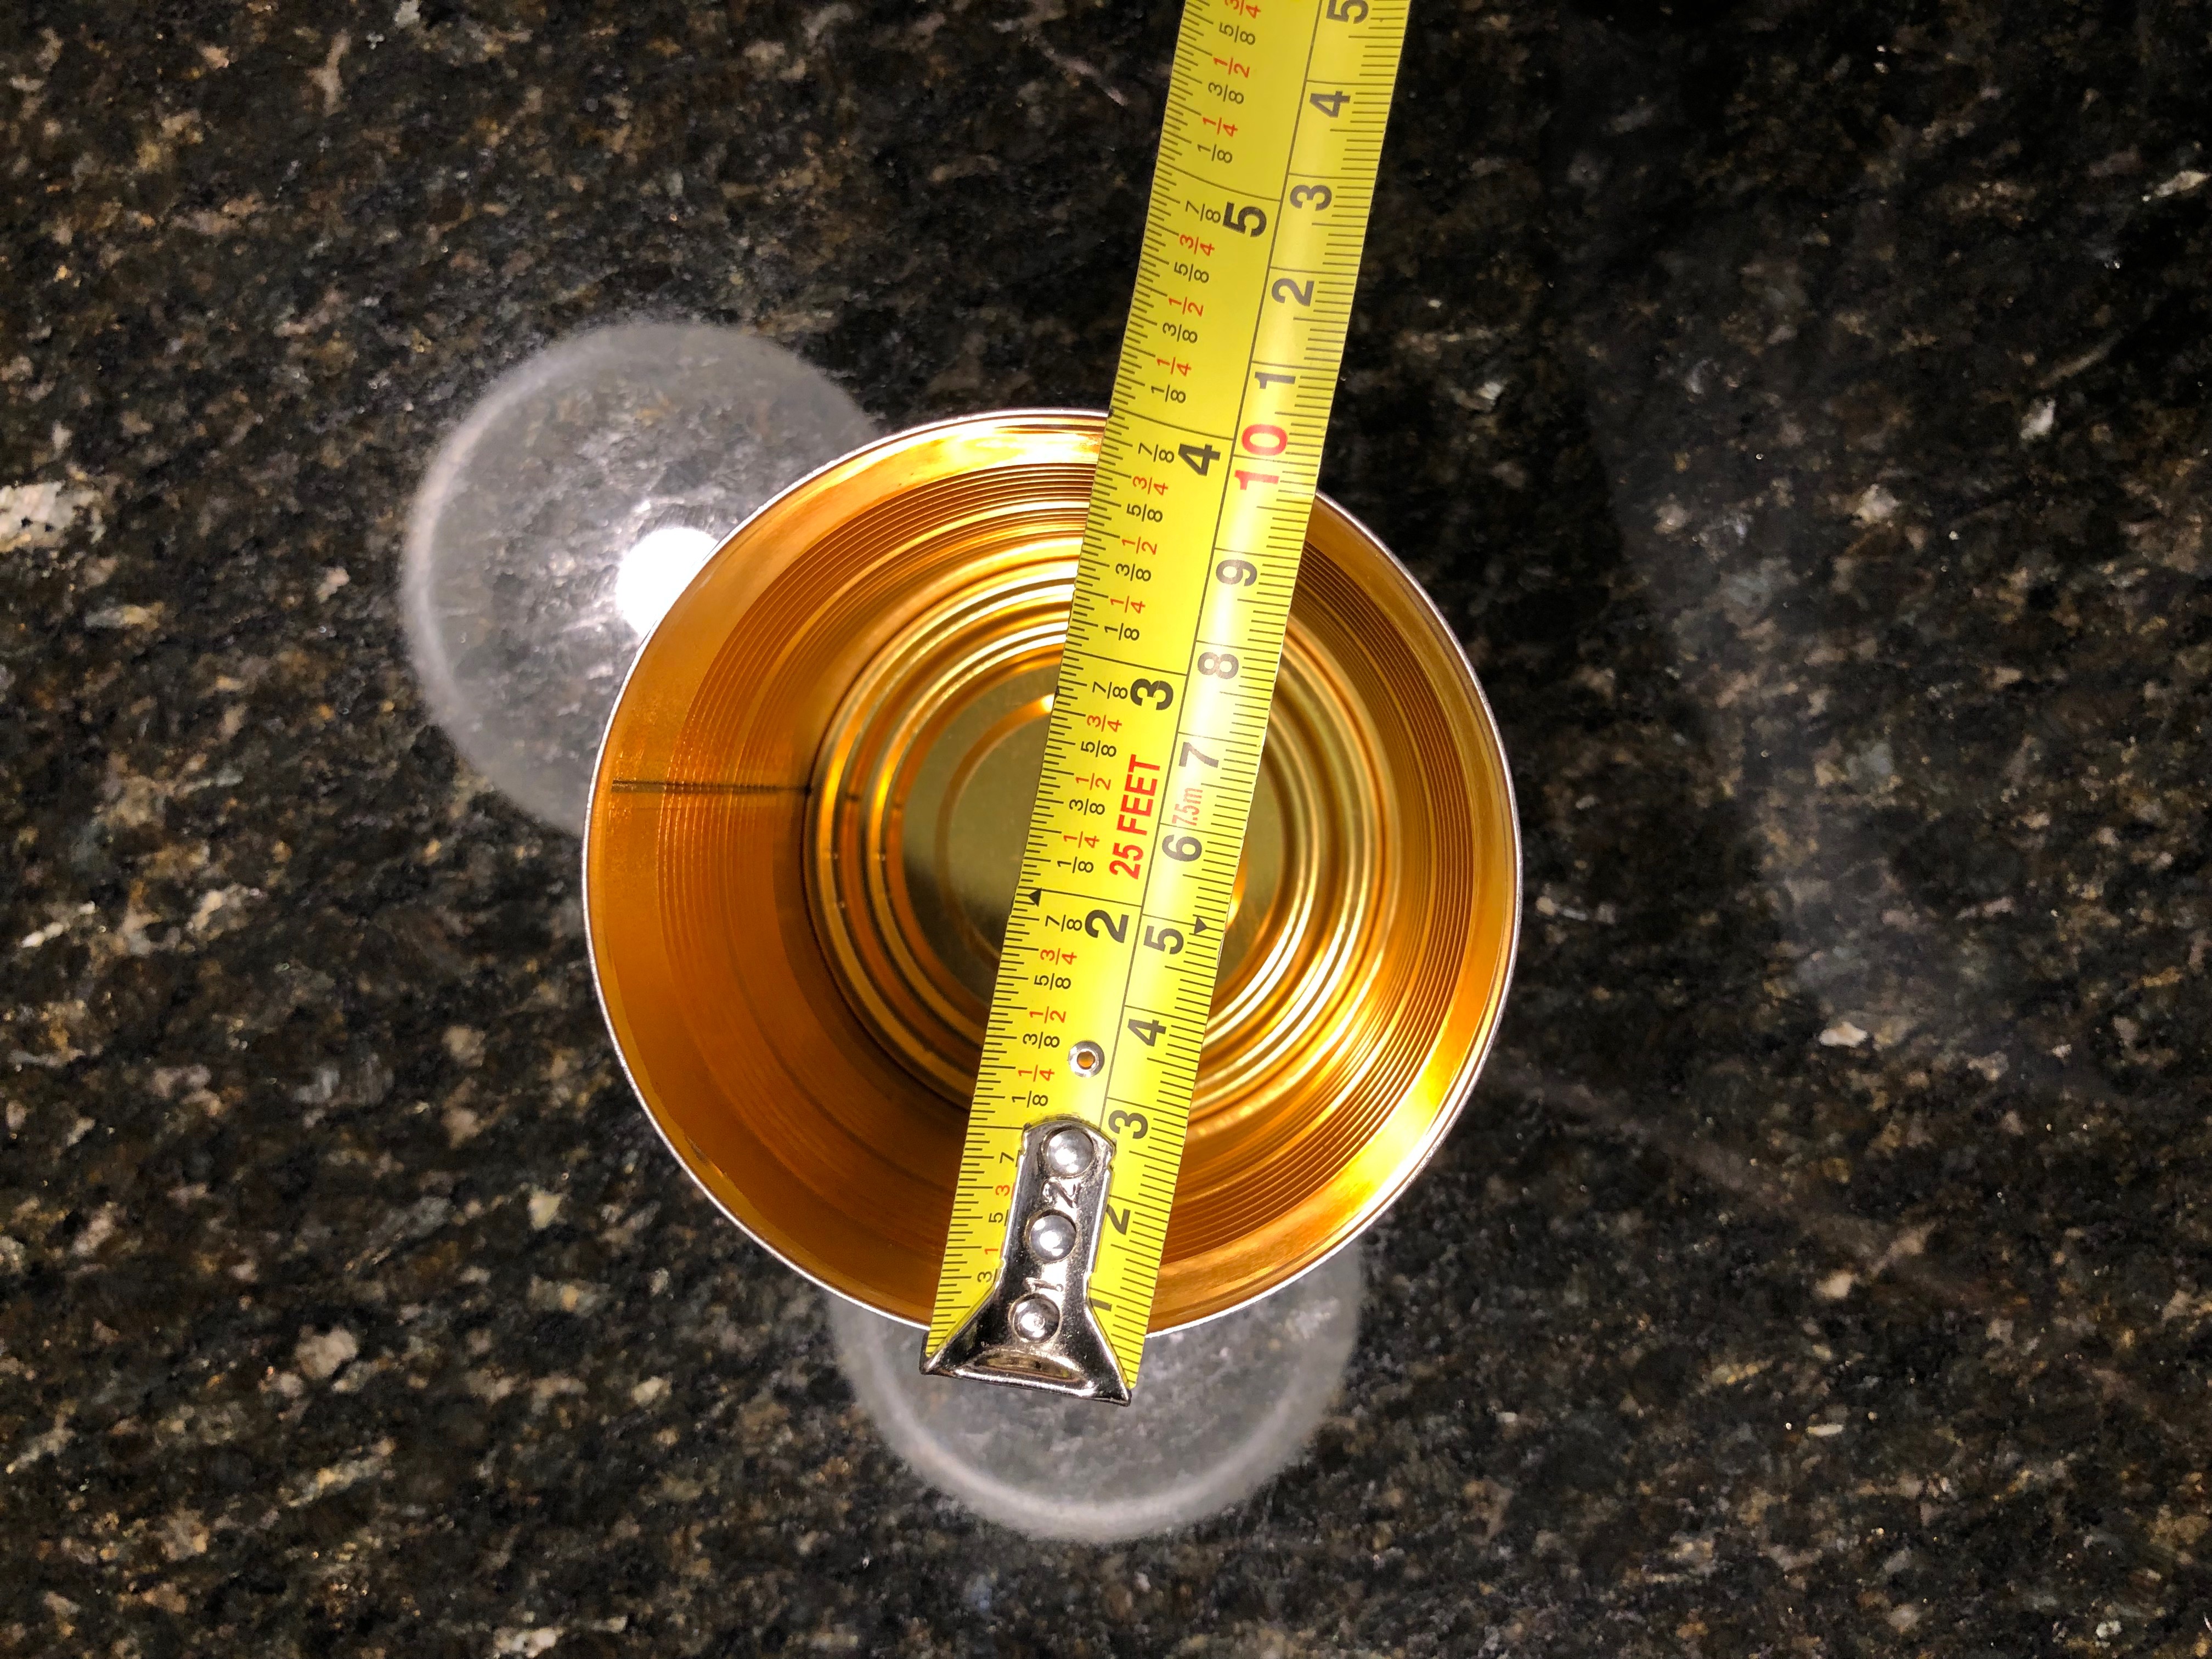
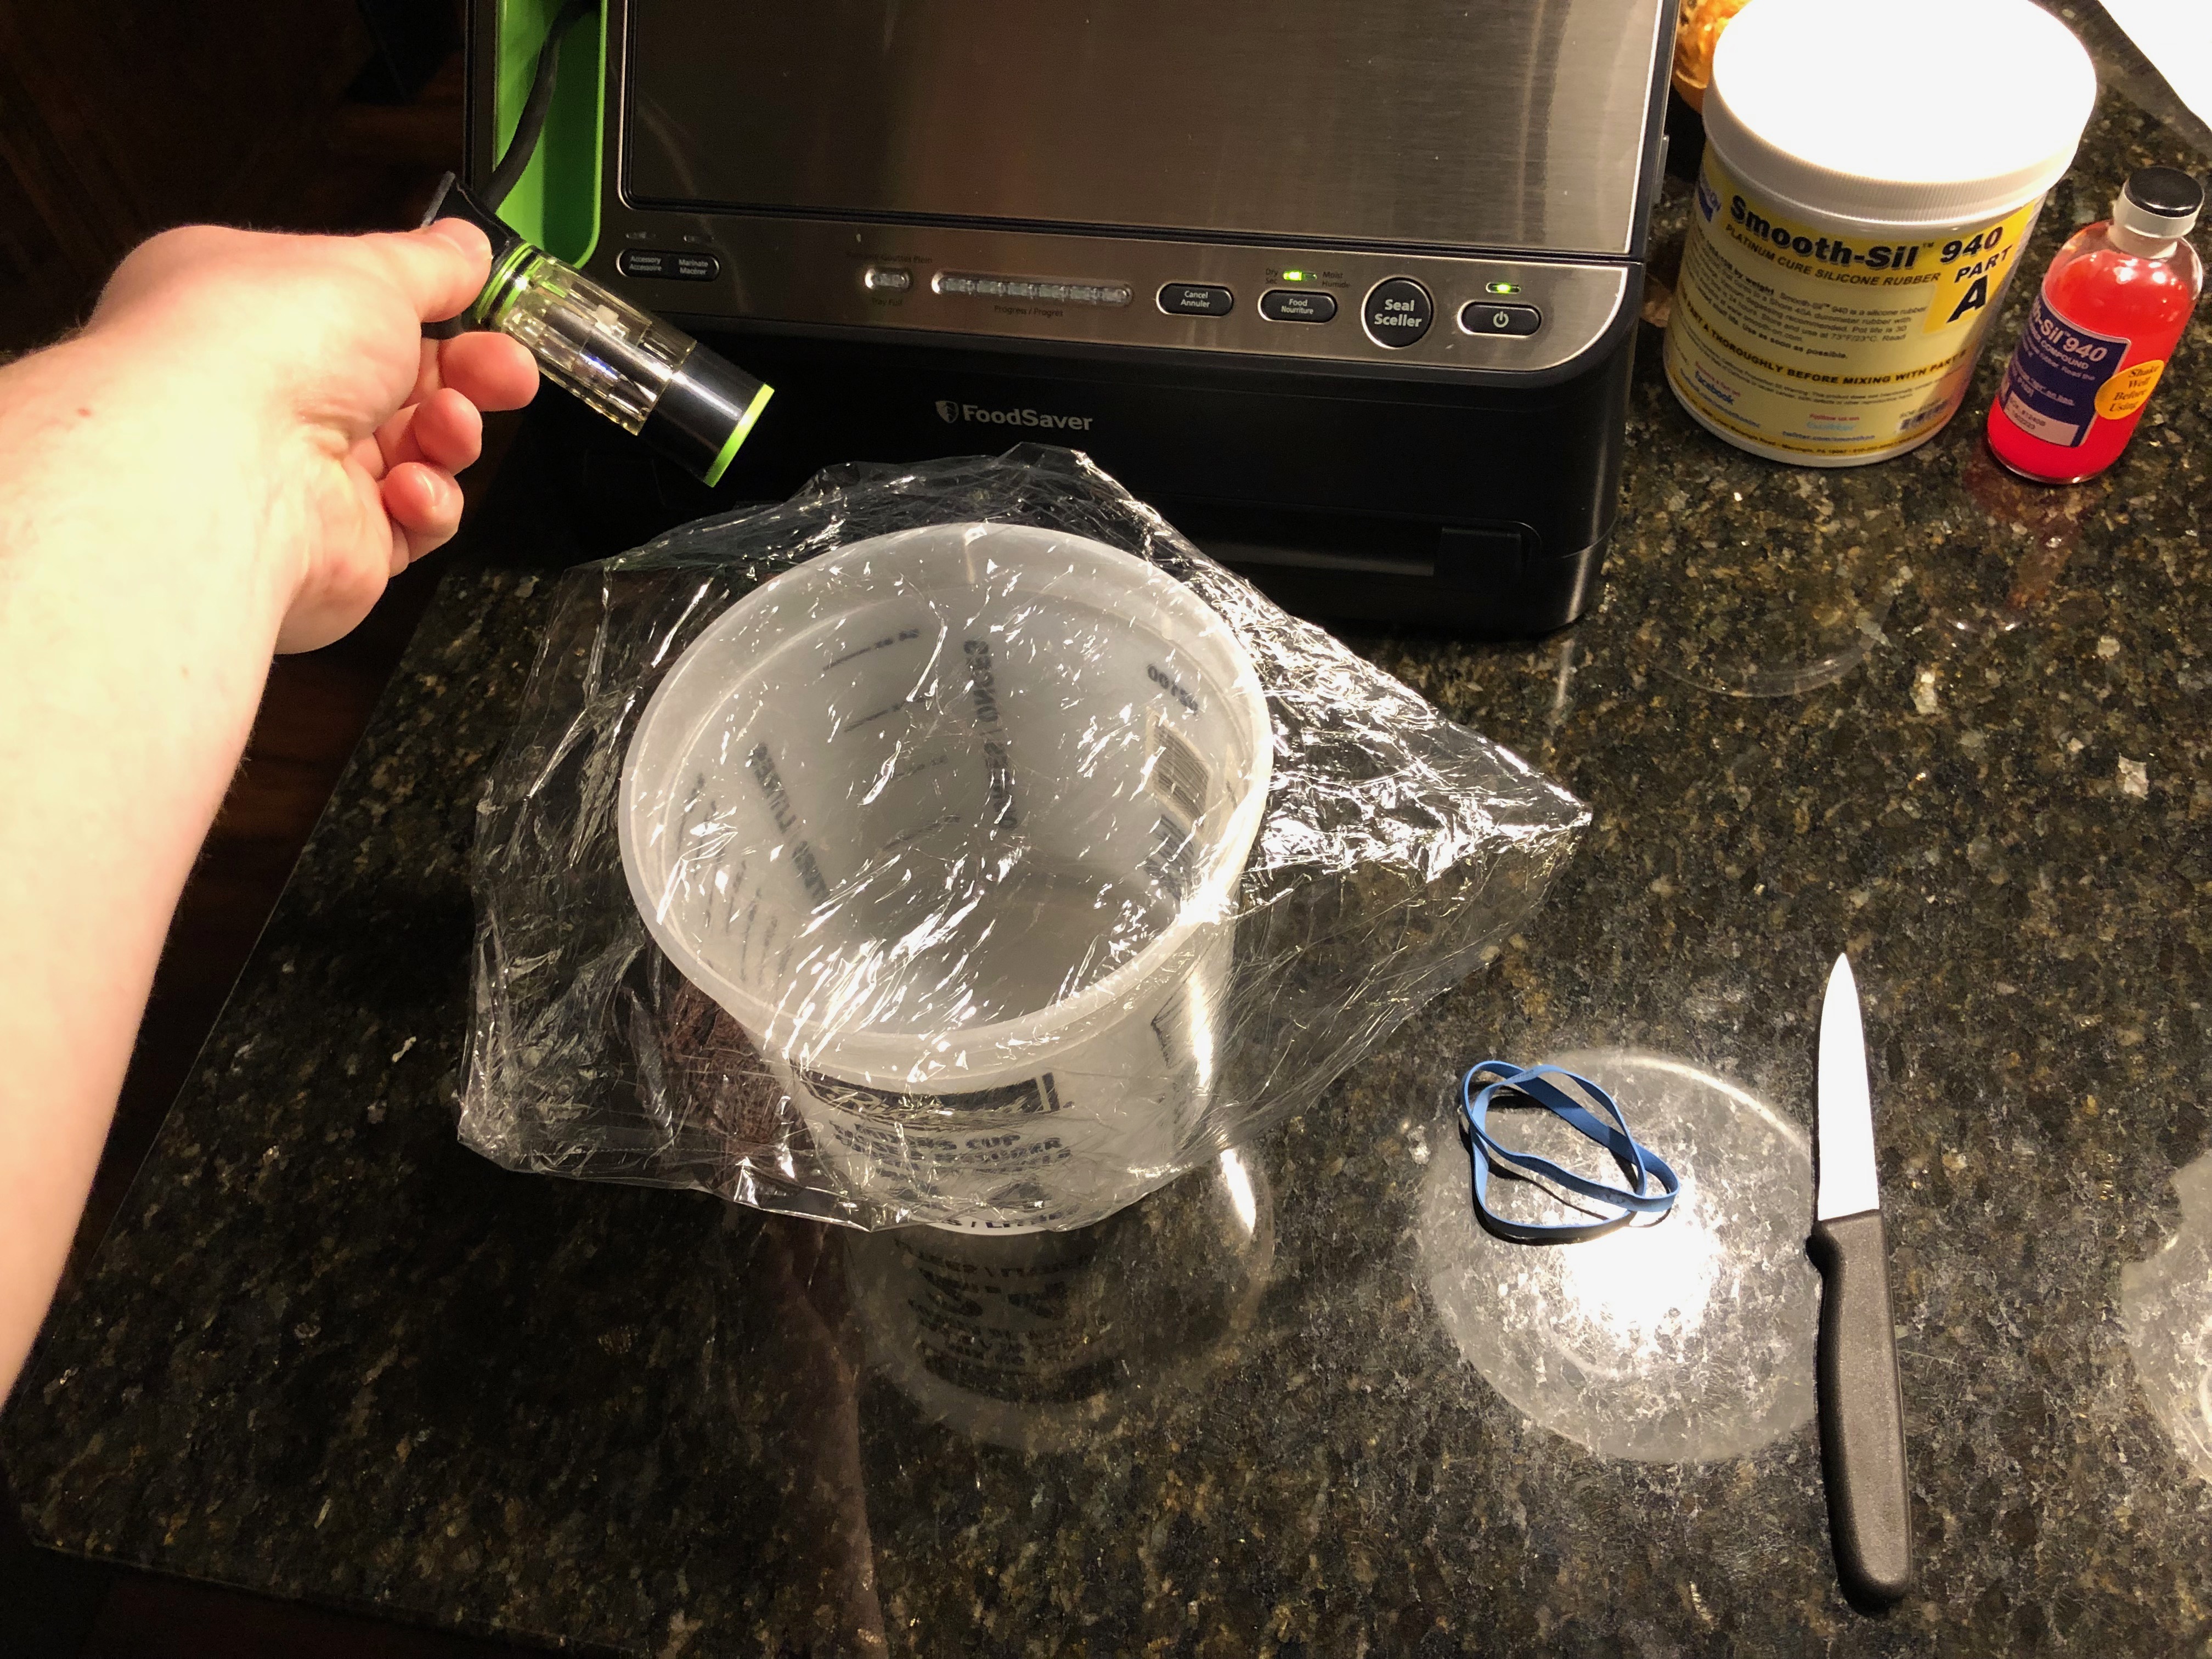
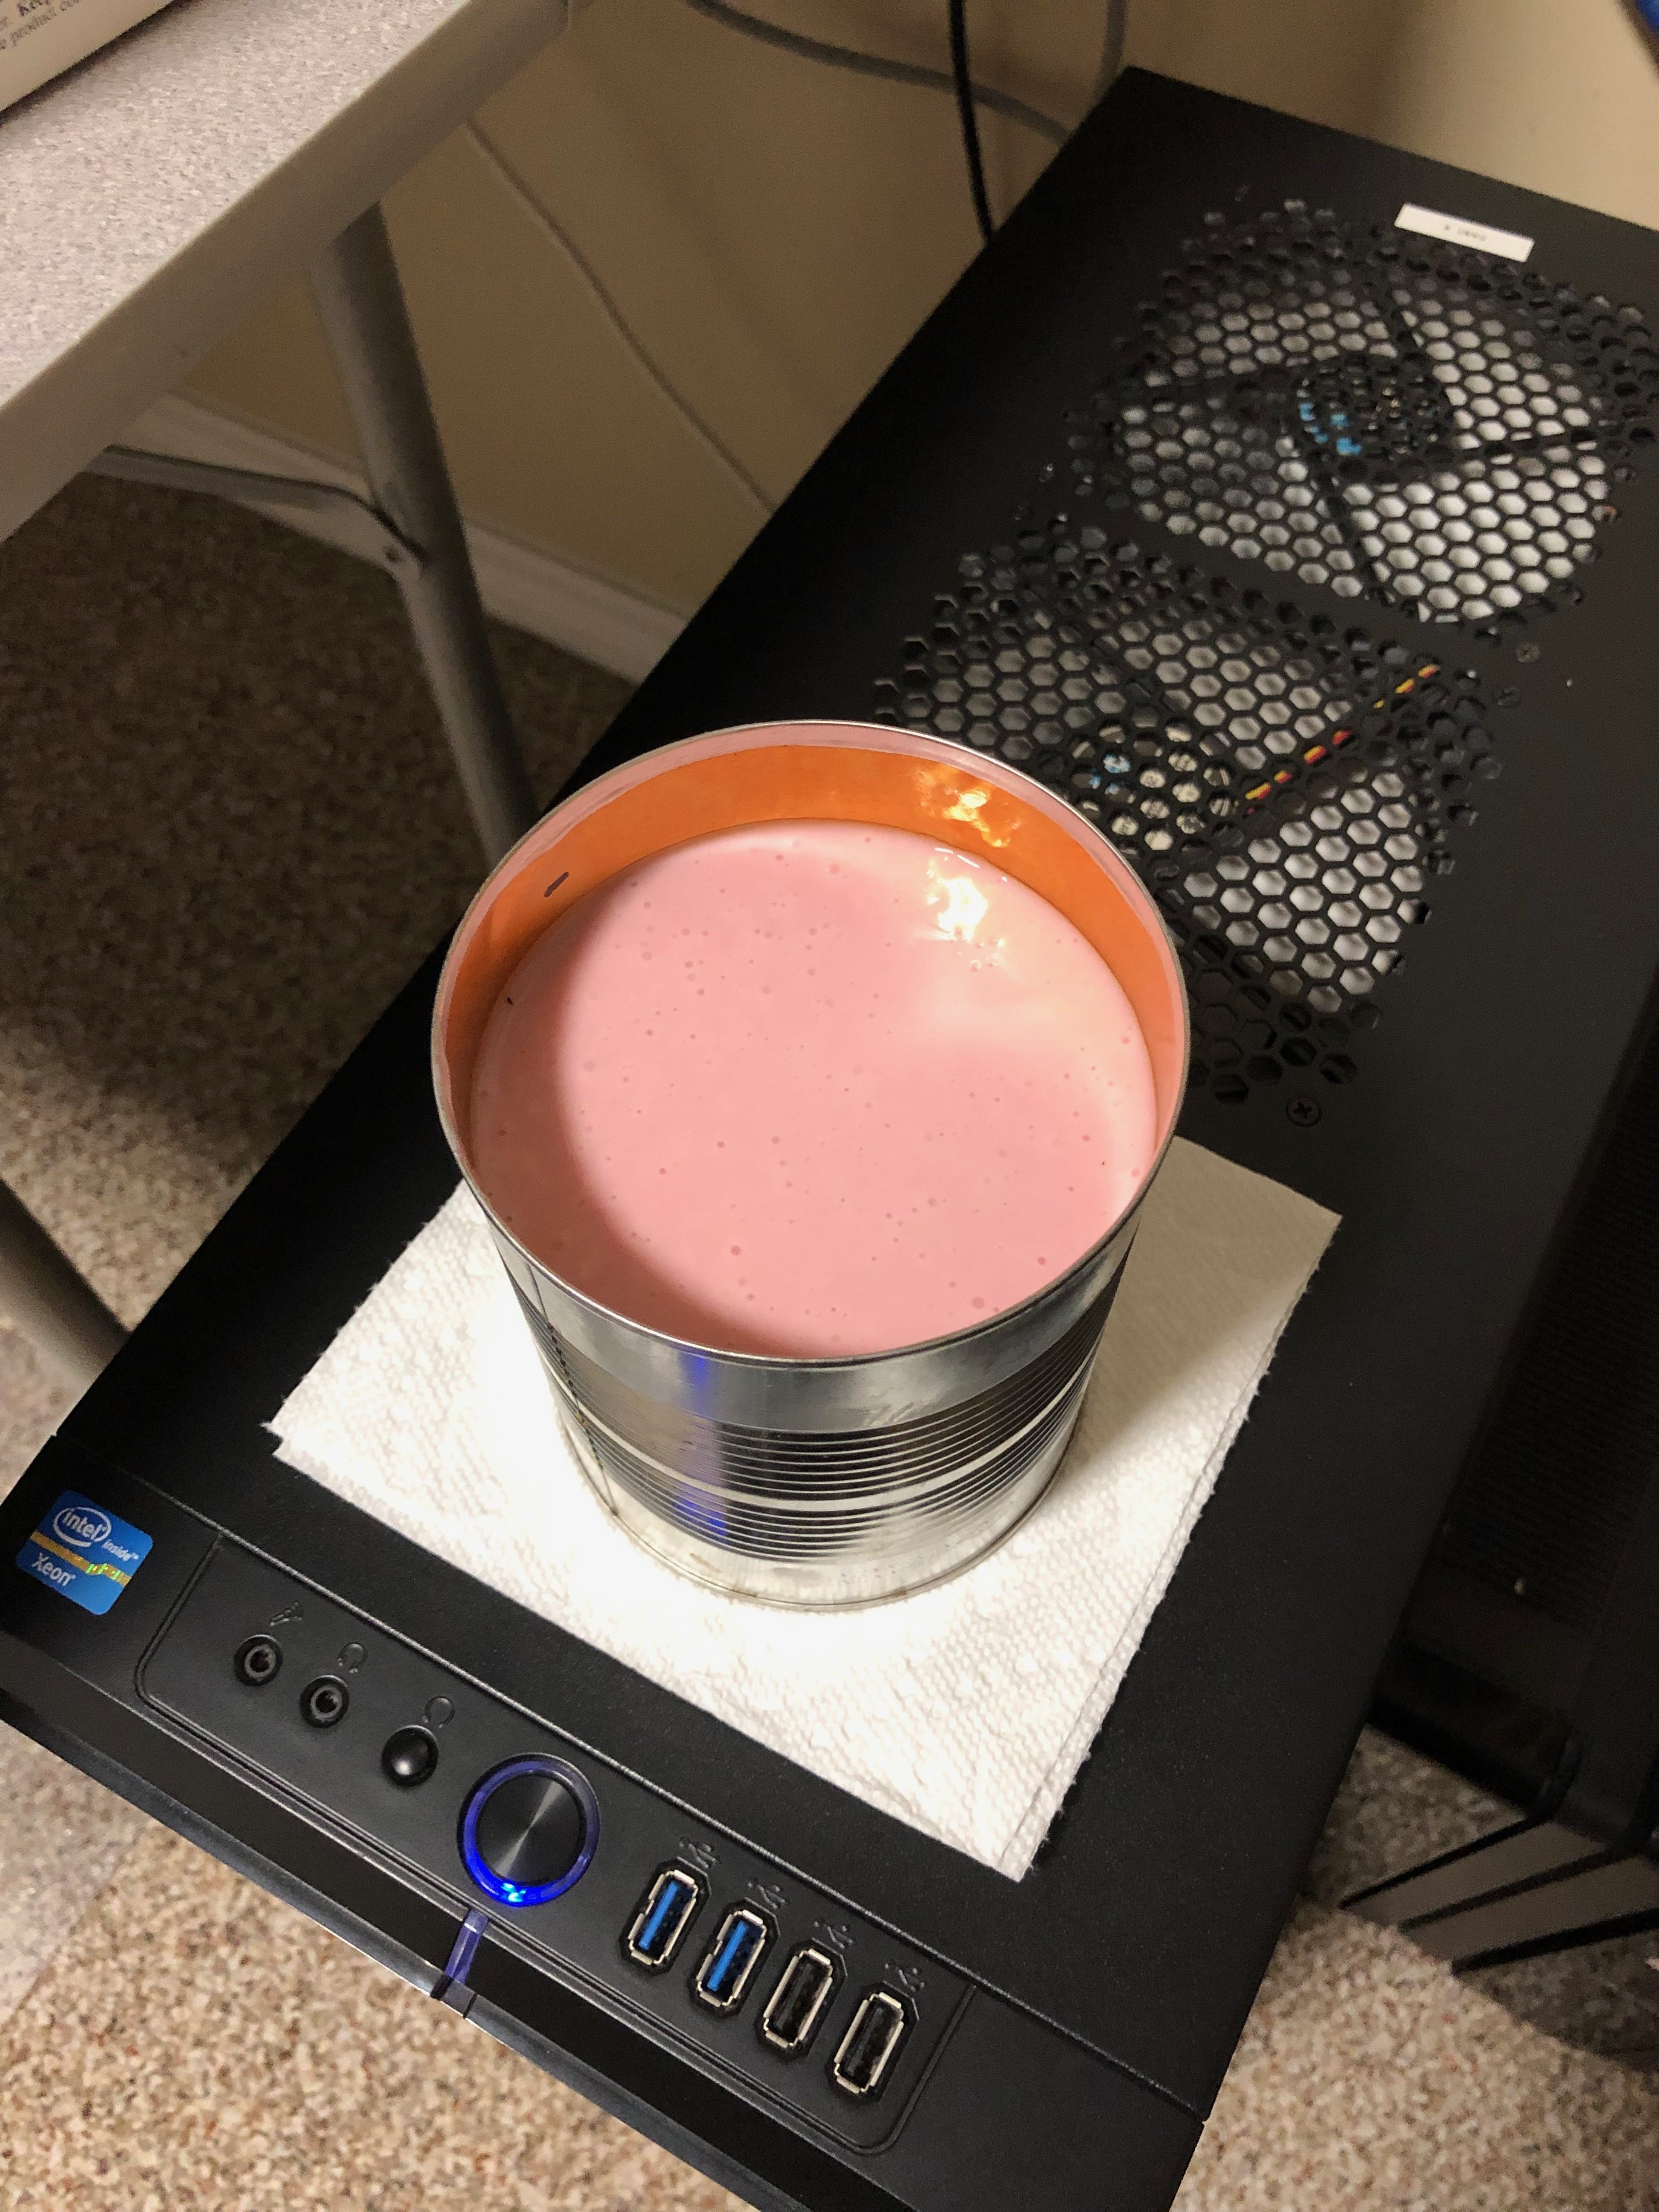
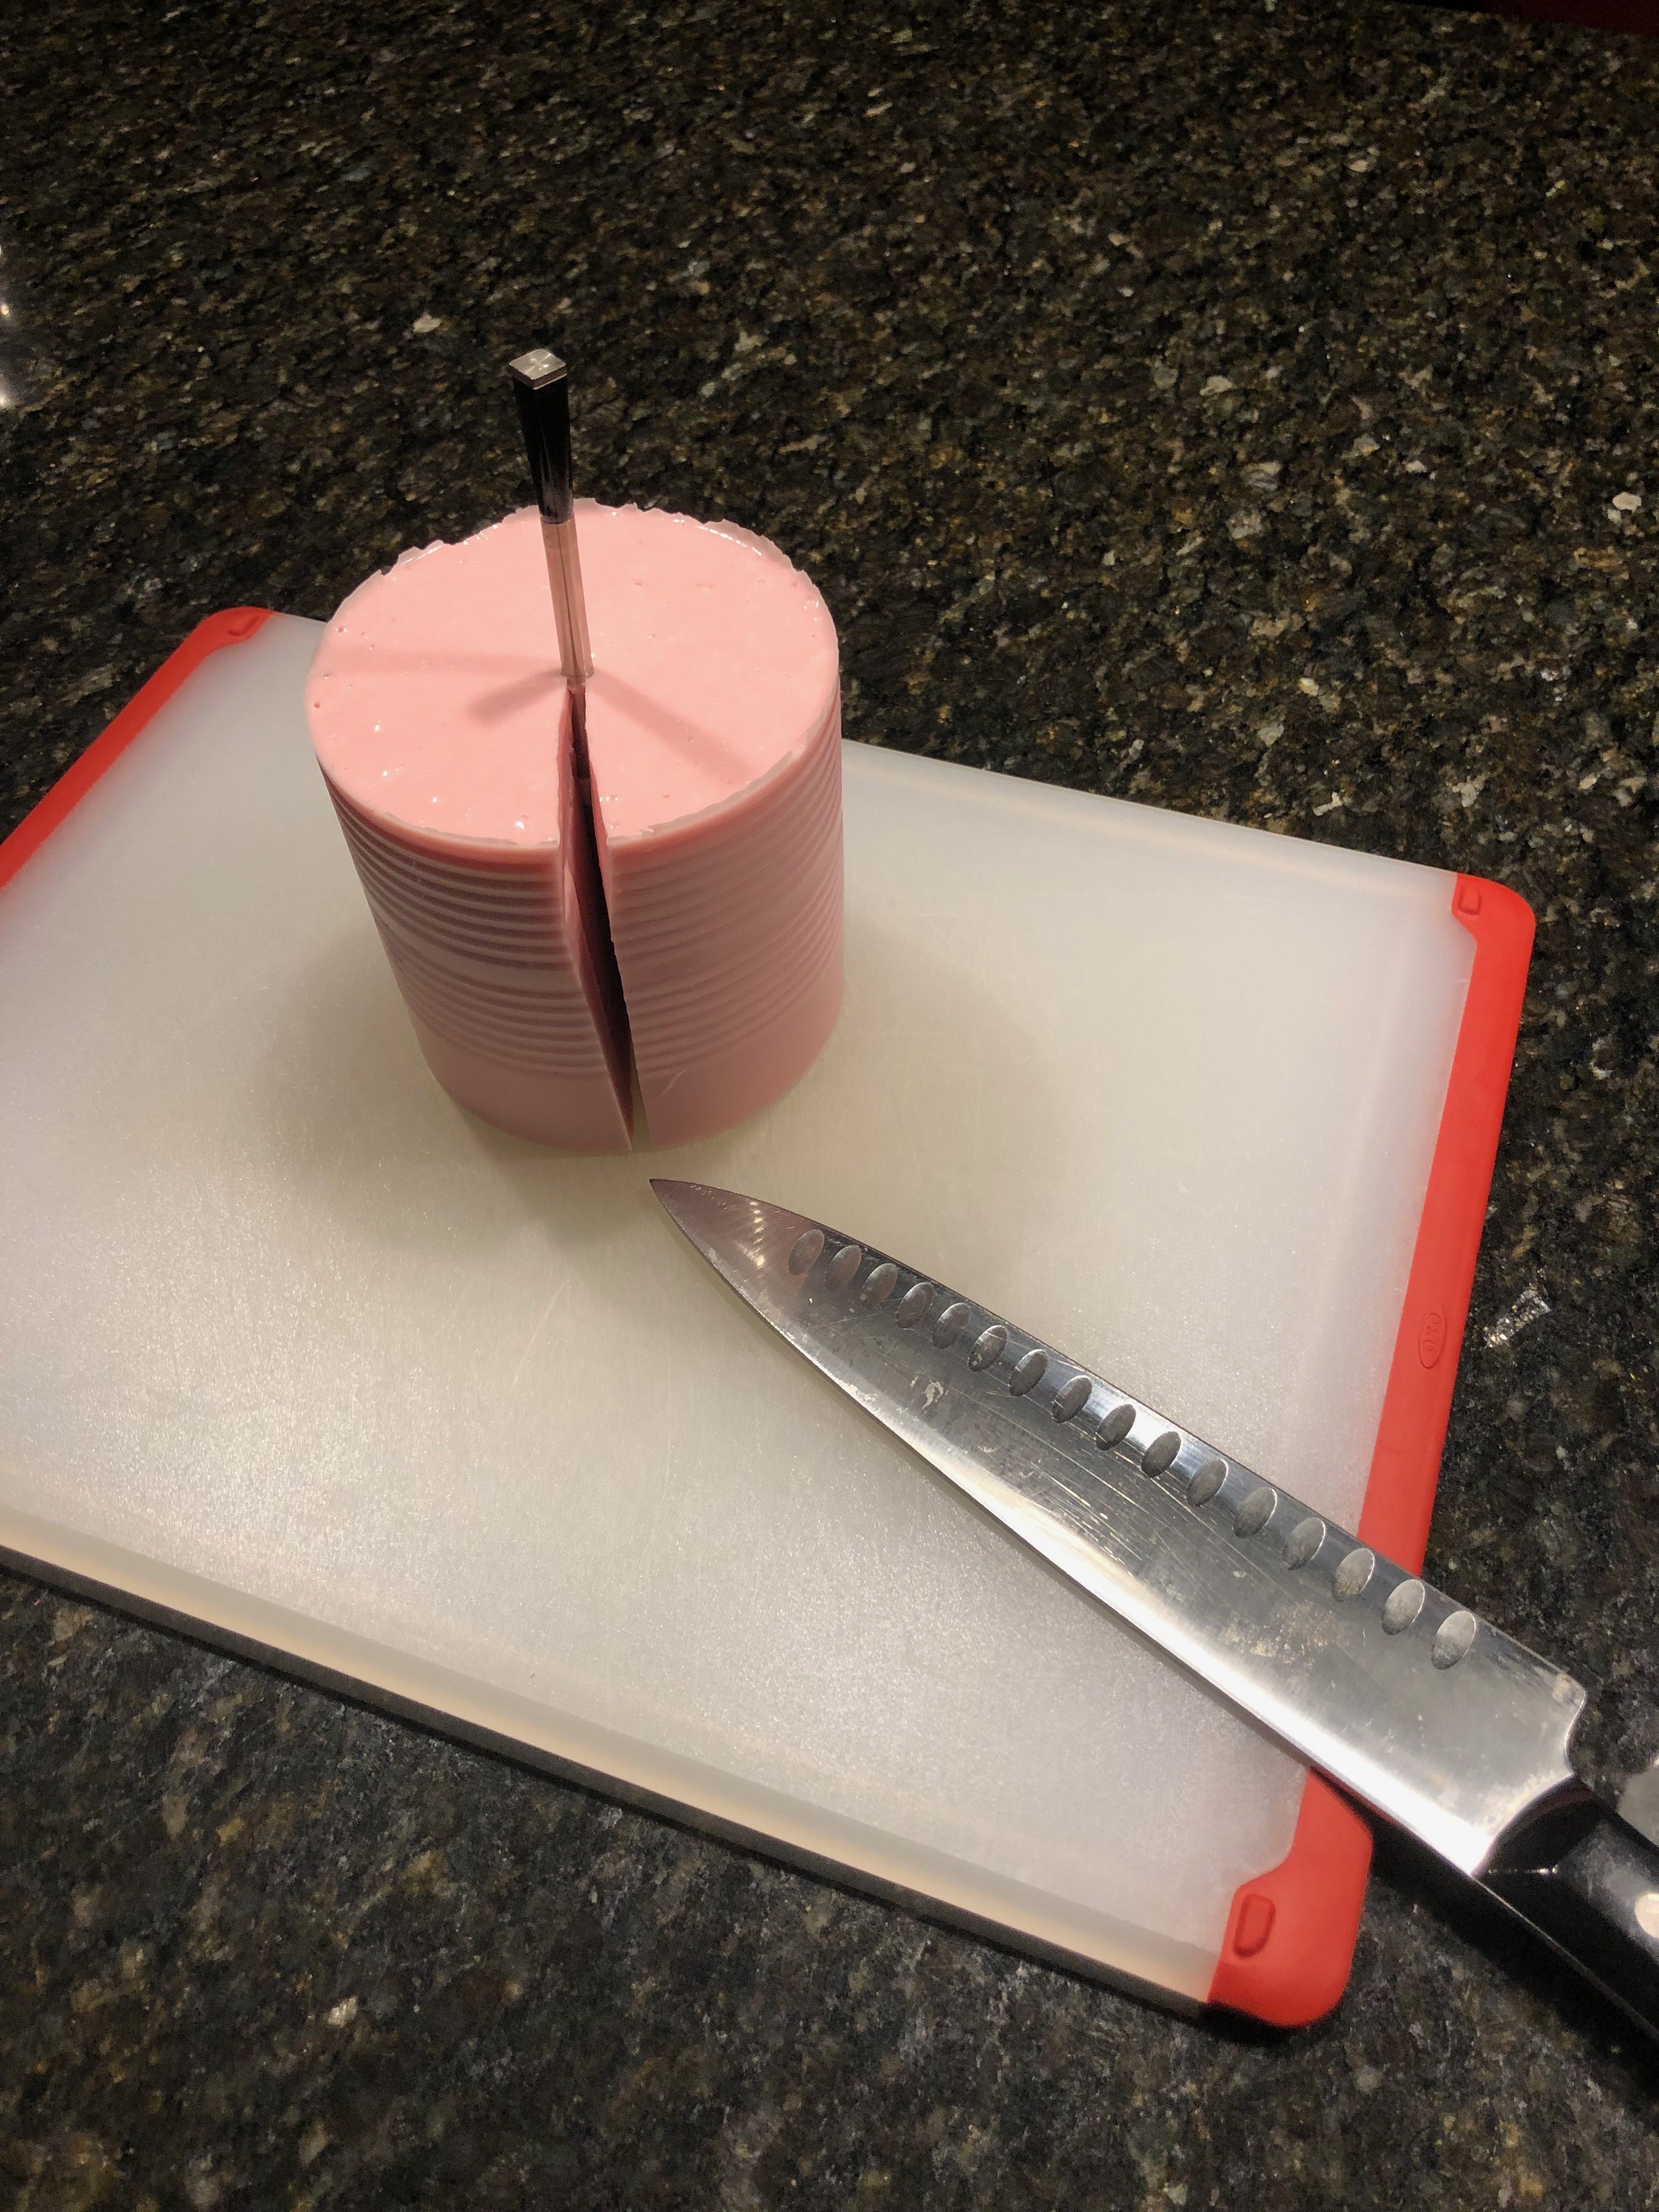
For the material I selected Smooth-Sil 940 Food Safe Silicone. I figured I could mold a simple cylinder using a empty can that I could just insert the probe into and easily remove when done.
My notes and lessons learned from this process can be found at the bottom of this article.
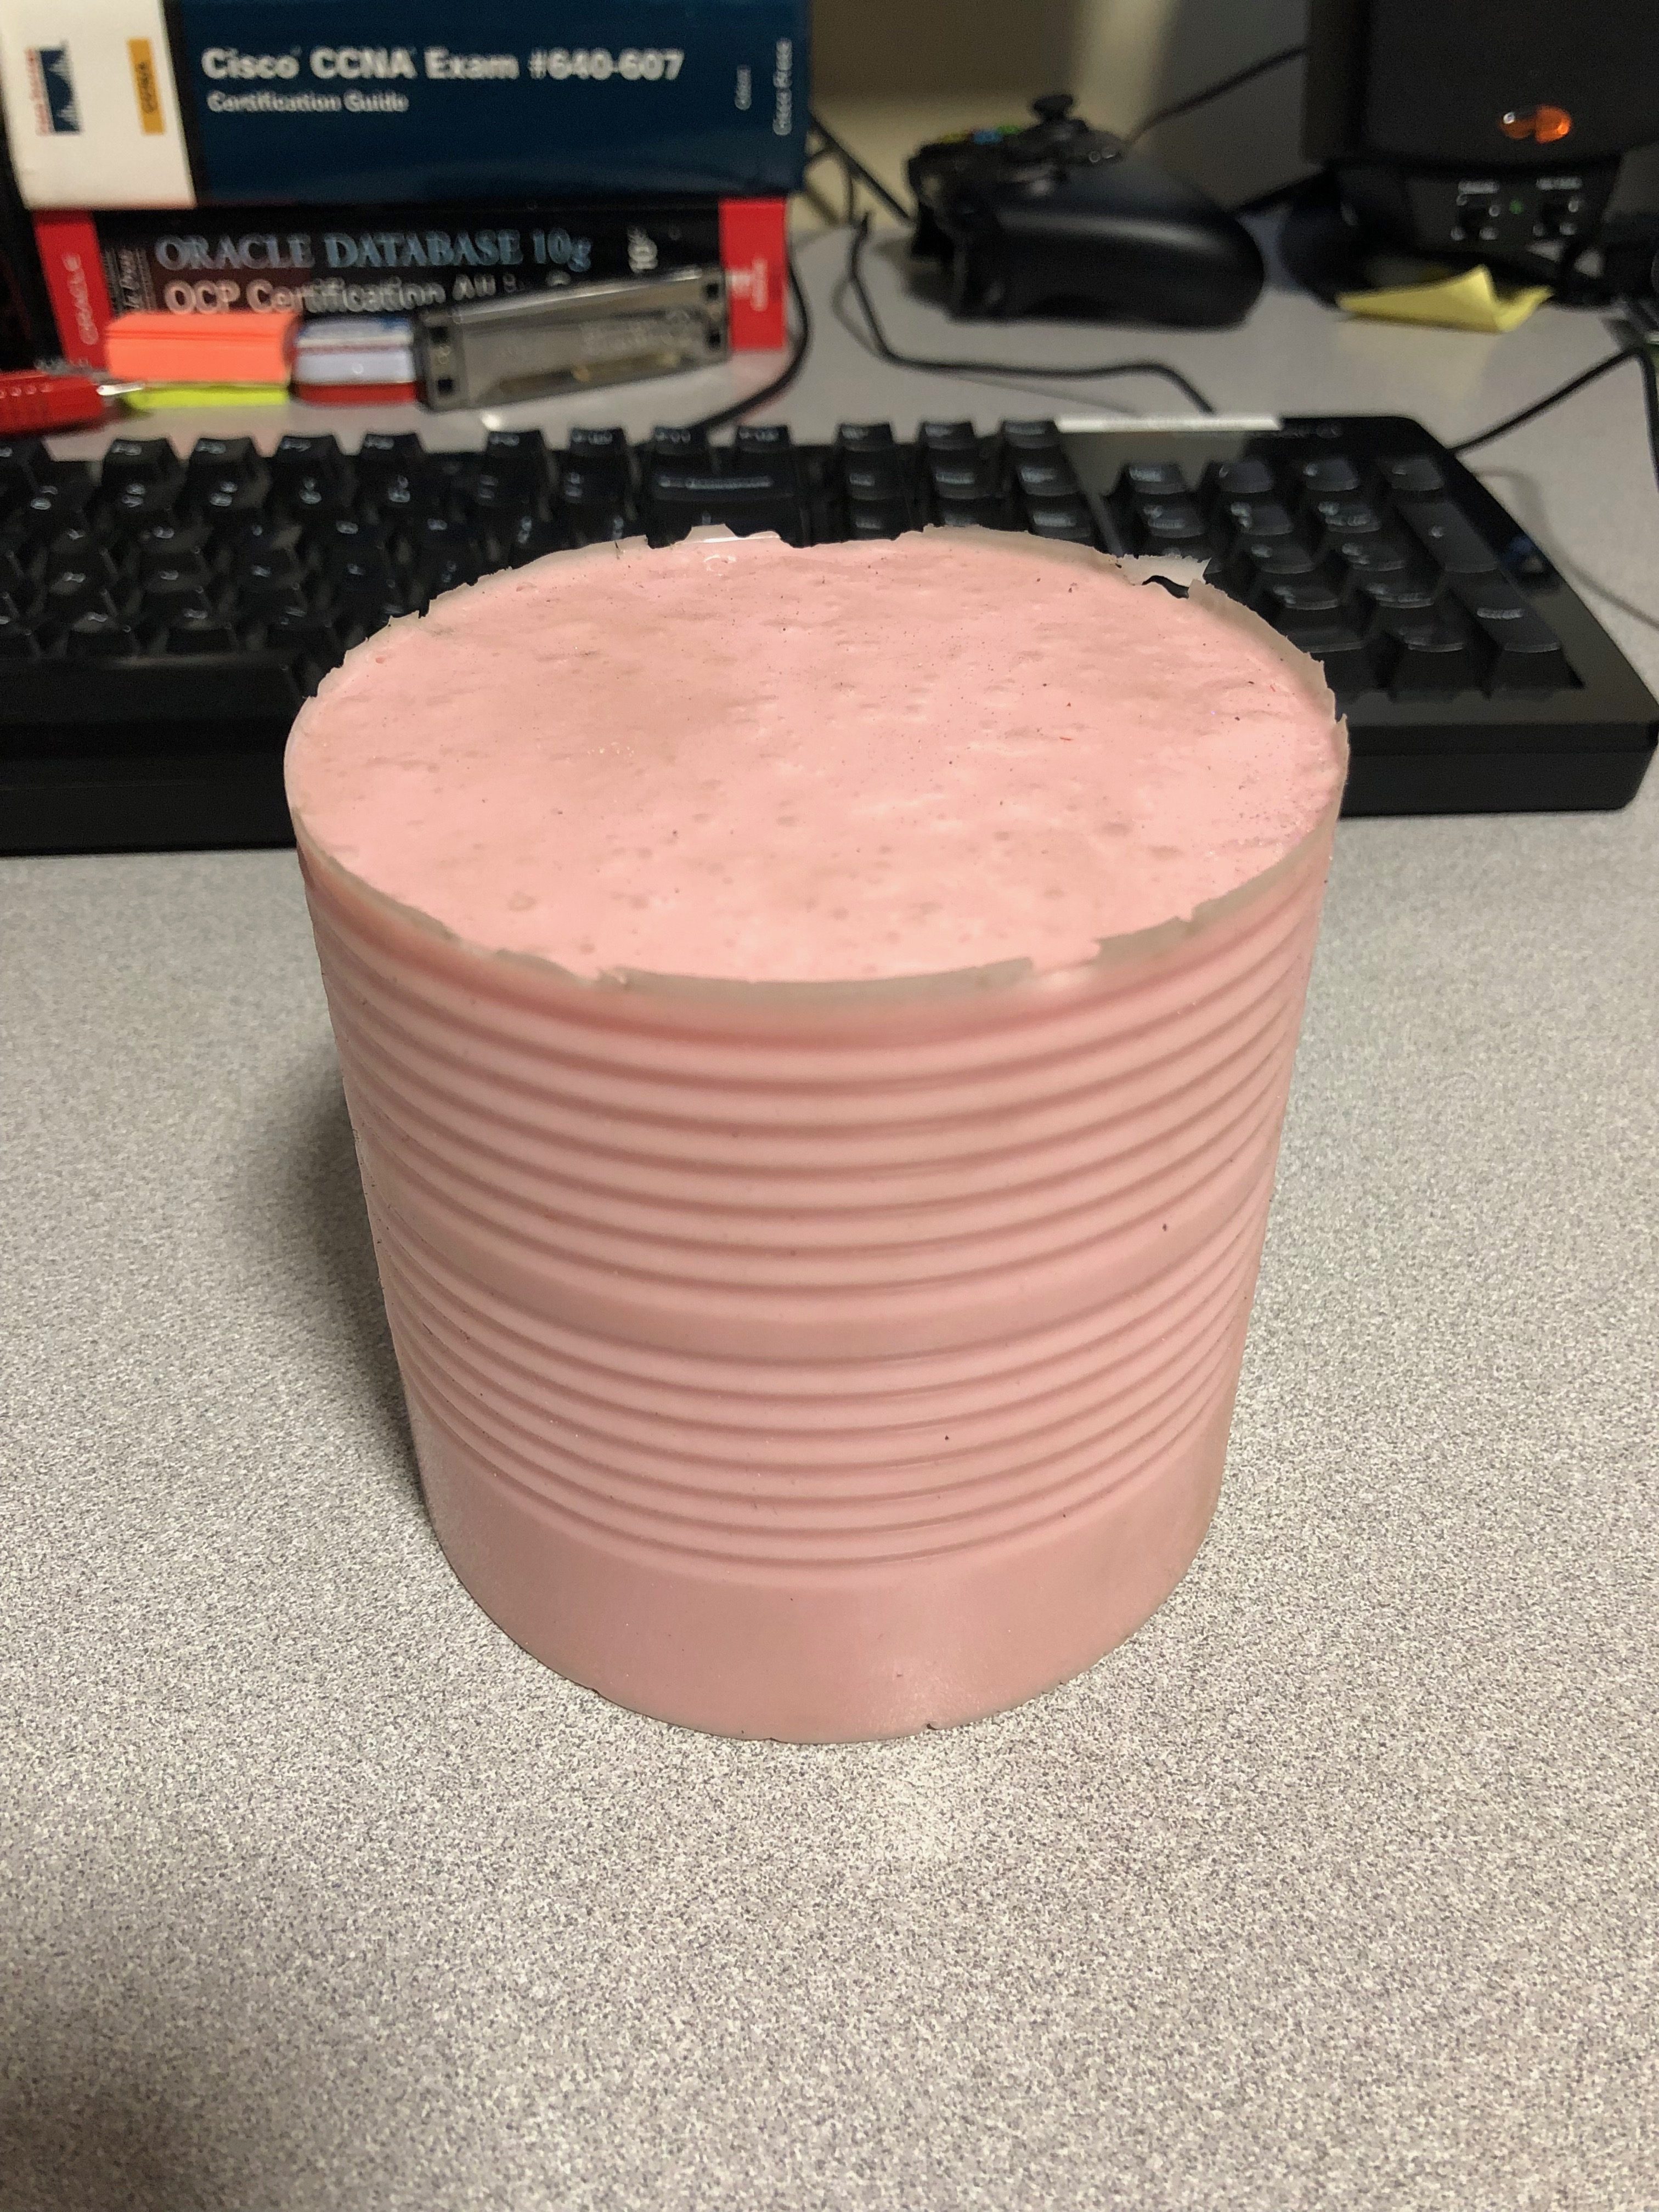
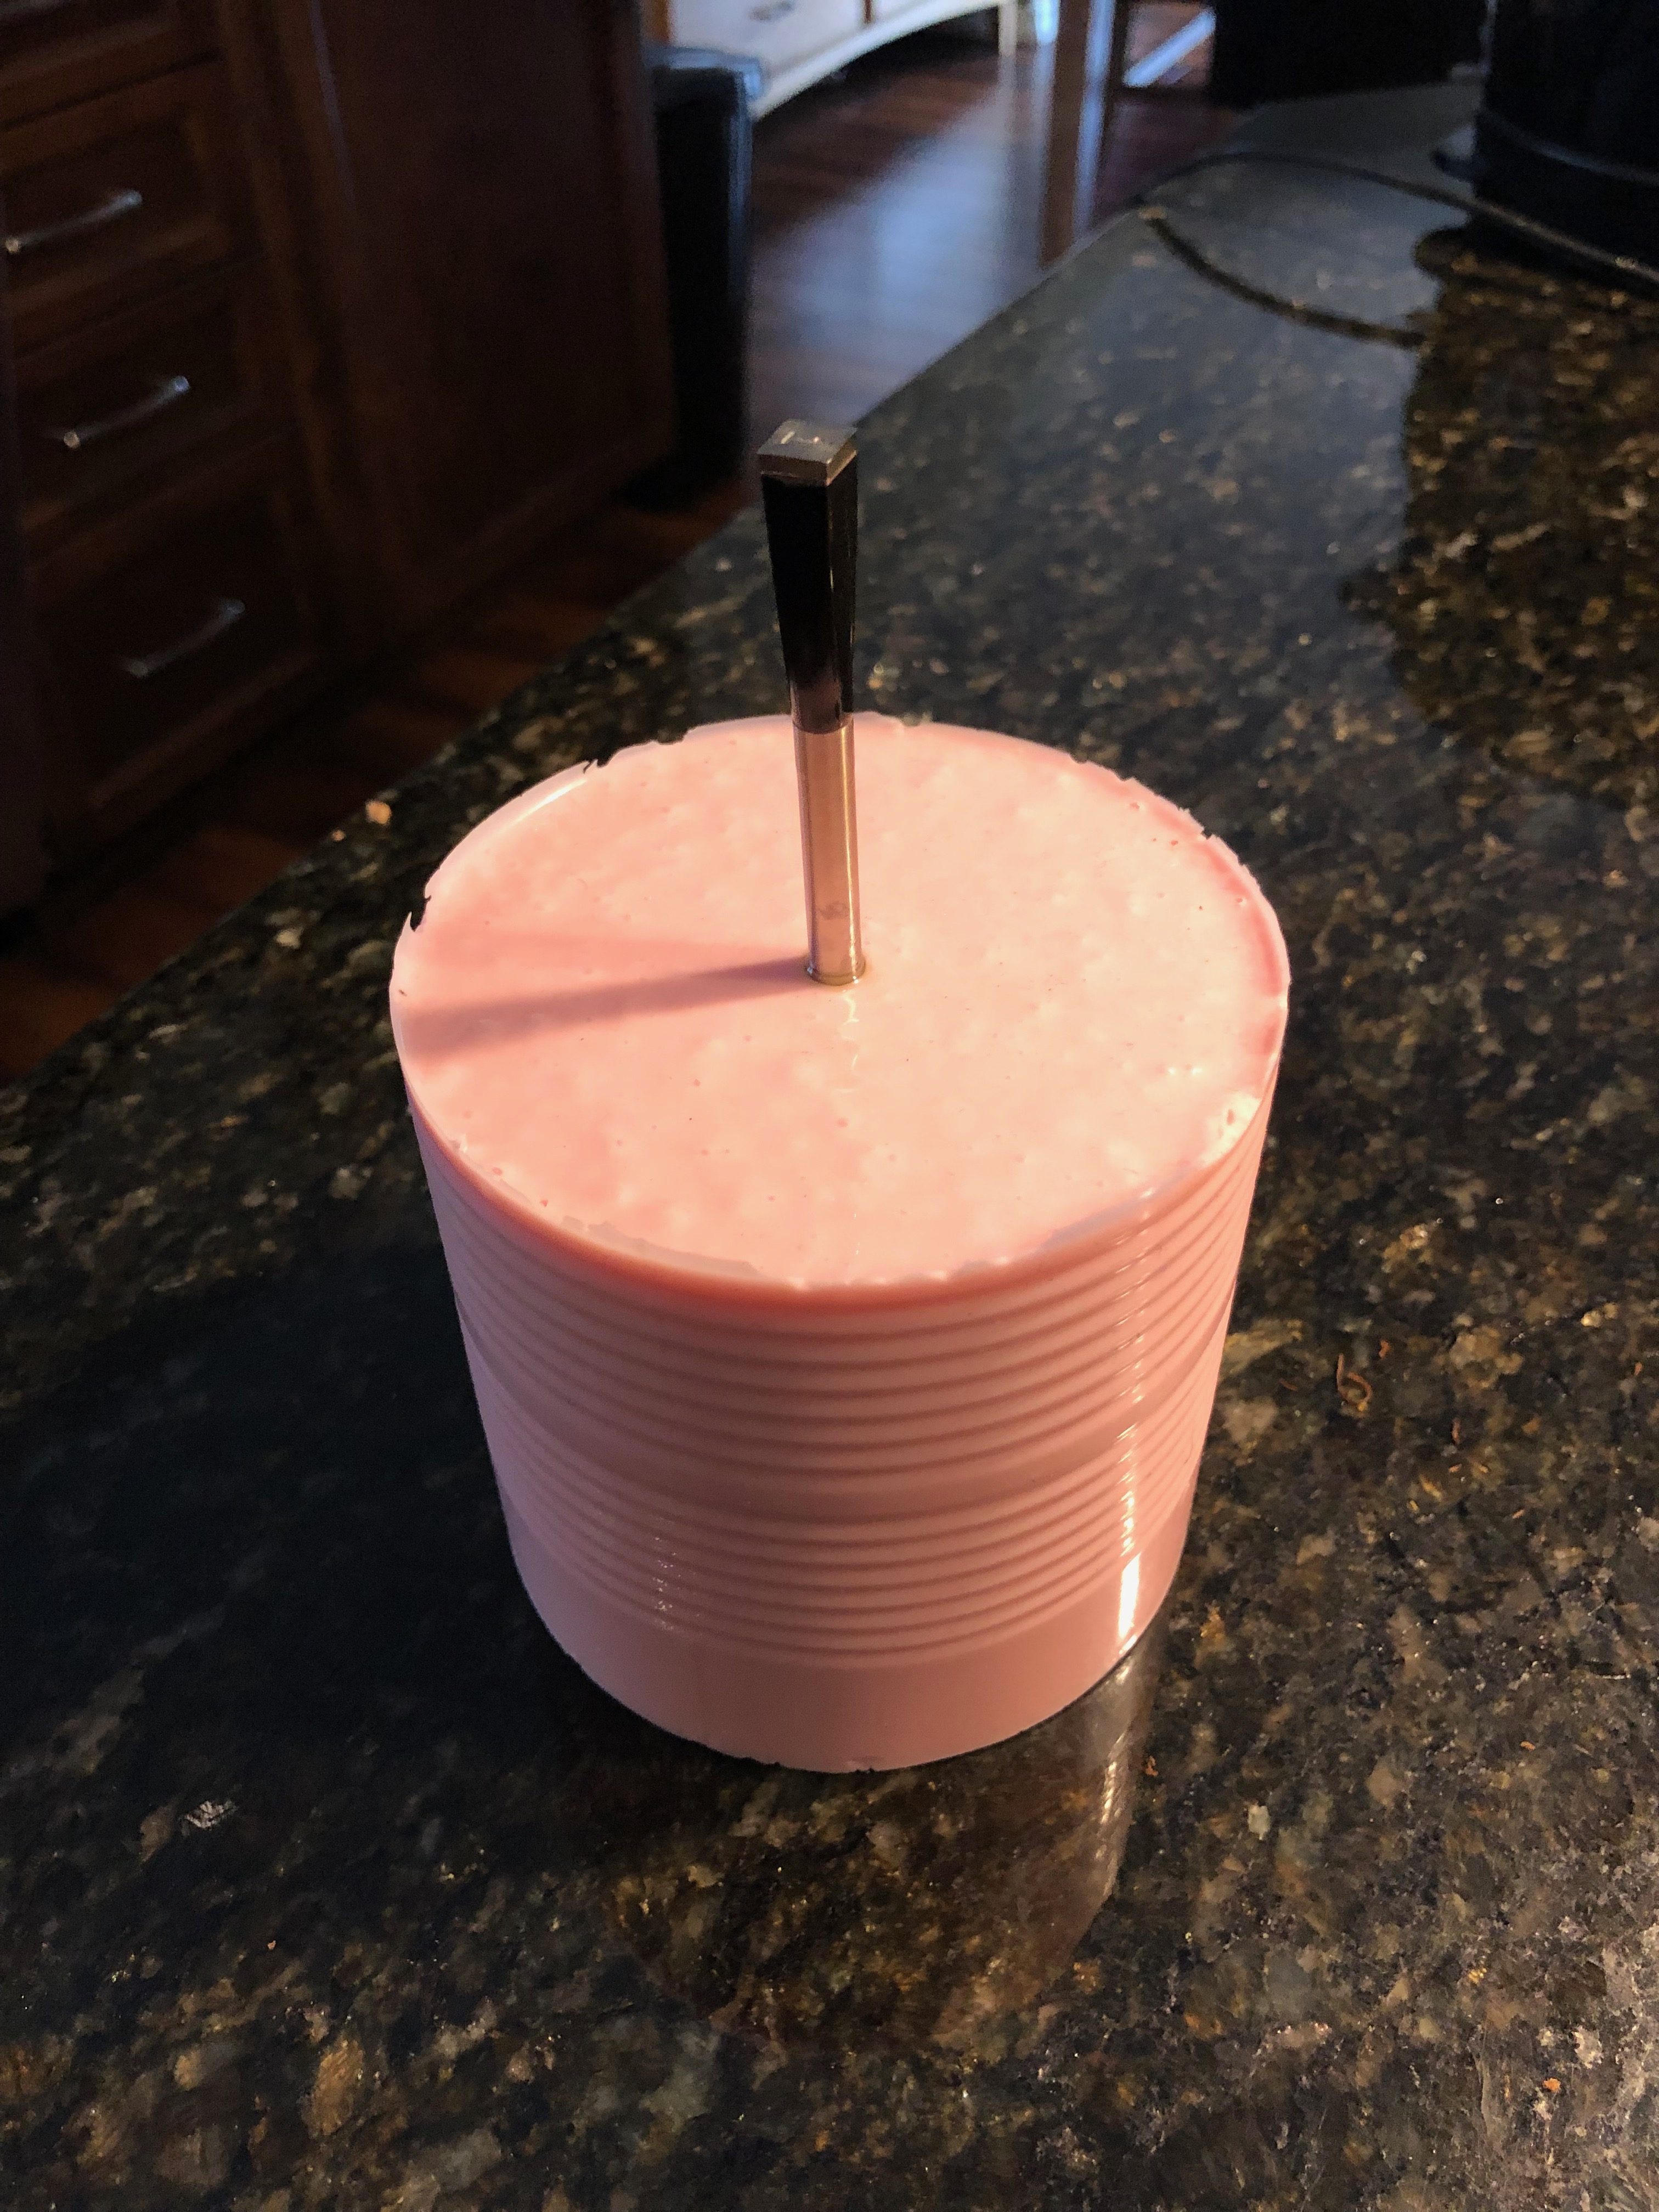
After the 24-hour cure time was up I cut away the can and ended up with my final creation:
I did my initial test. I threw it into my oven at 300f for roughly 1 hour, pulled it out and did a quick check. The results were not promising.
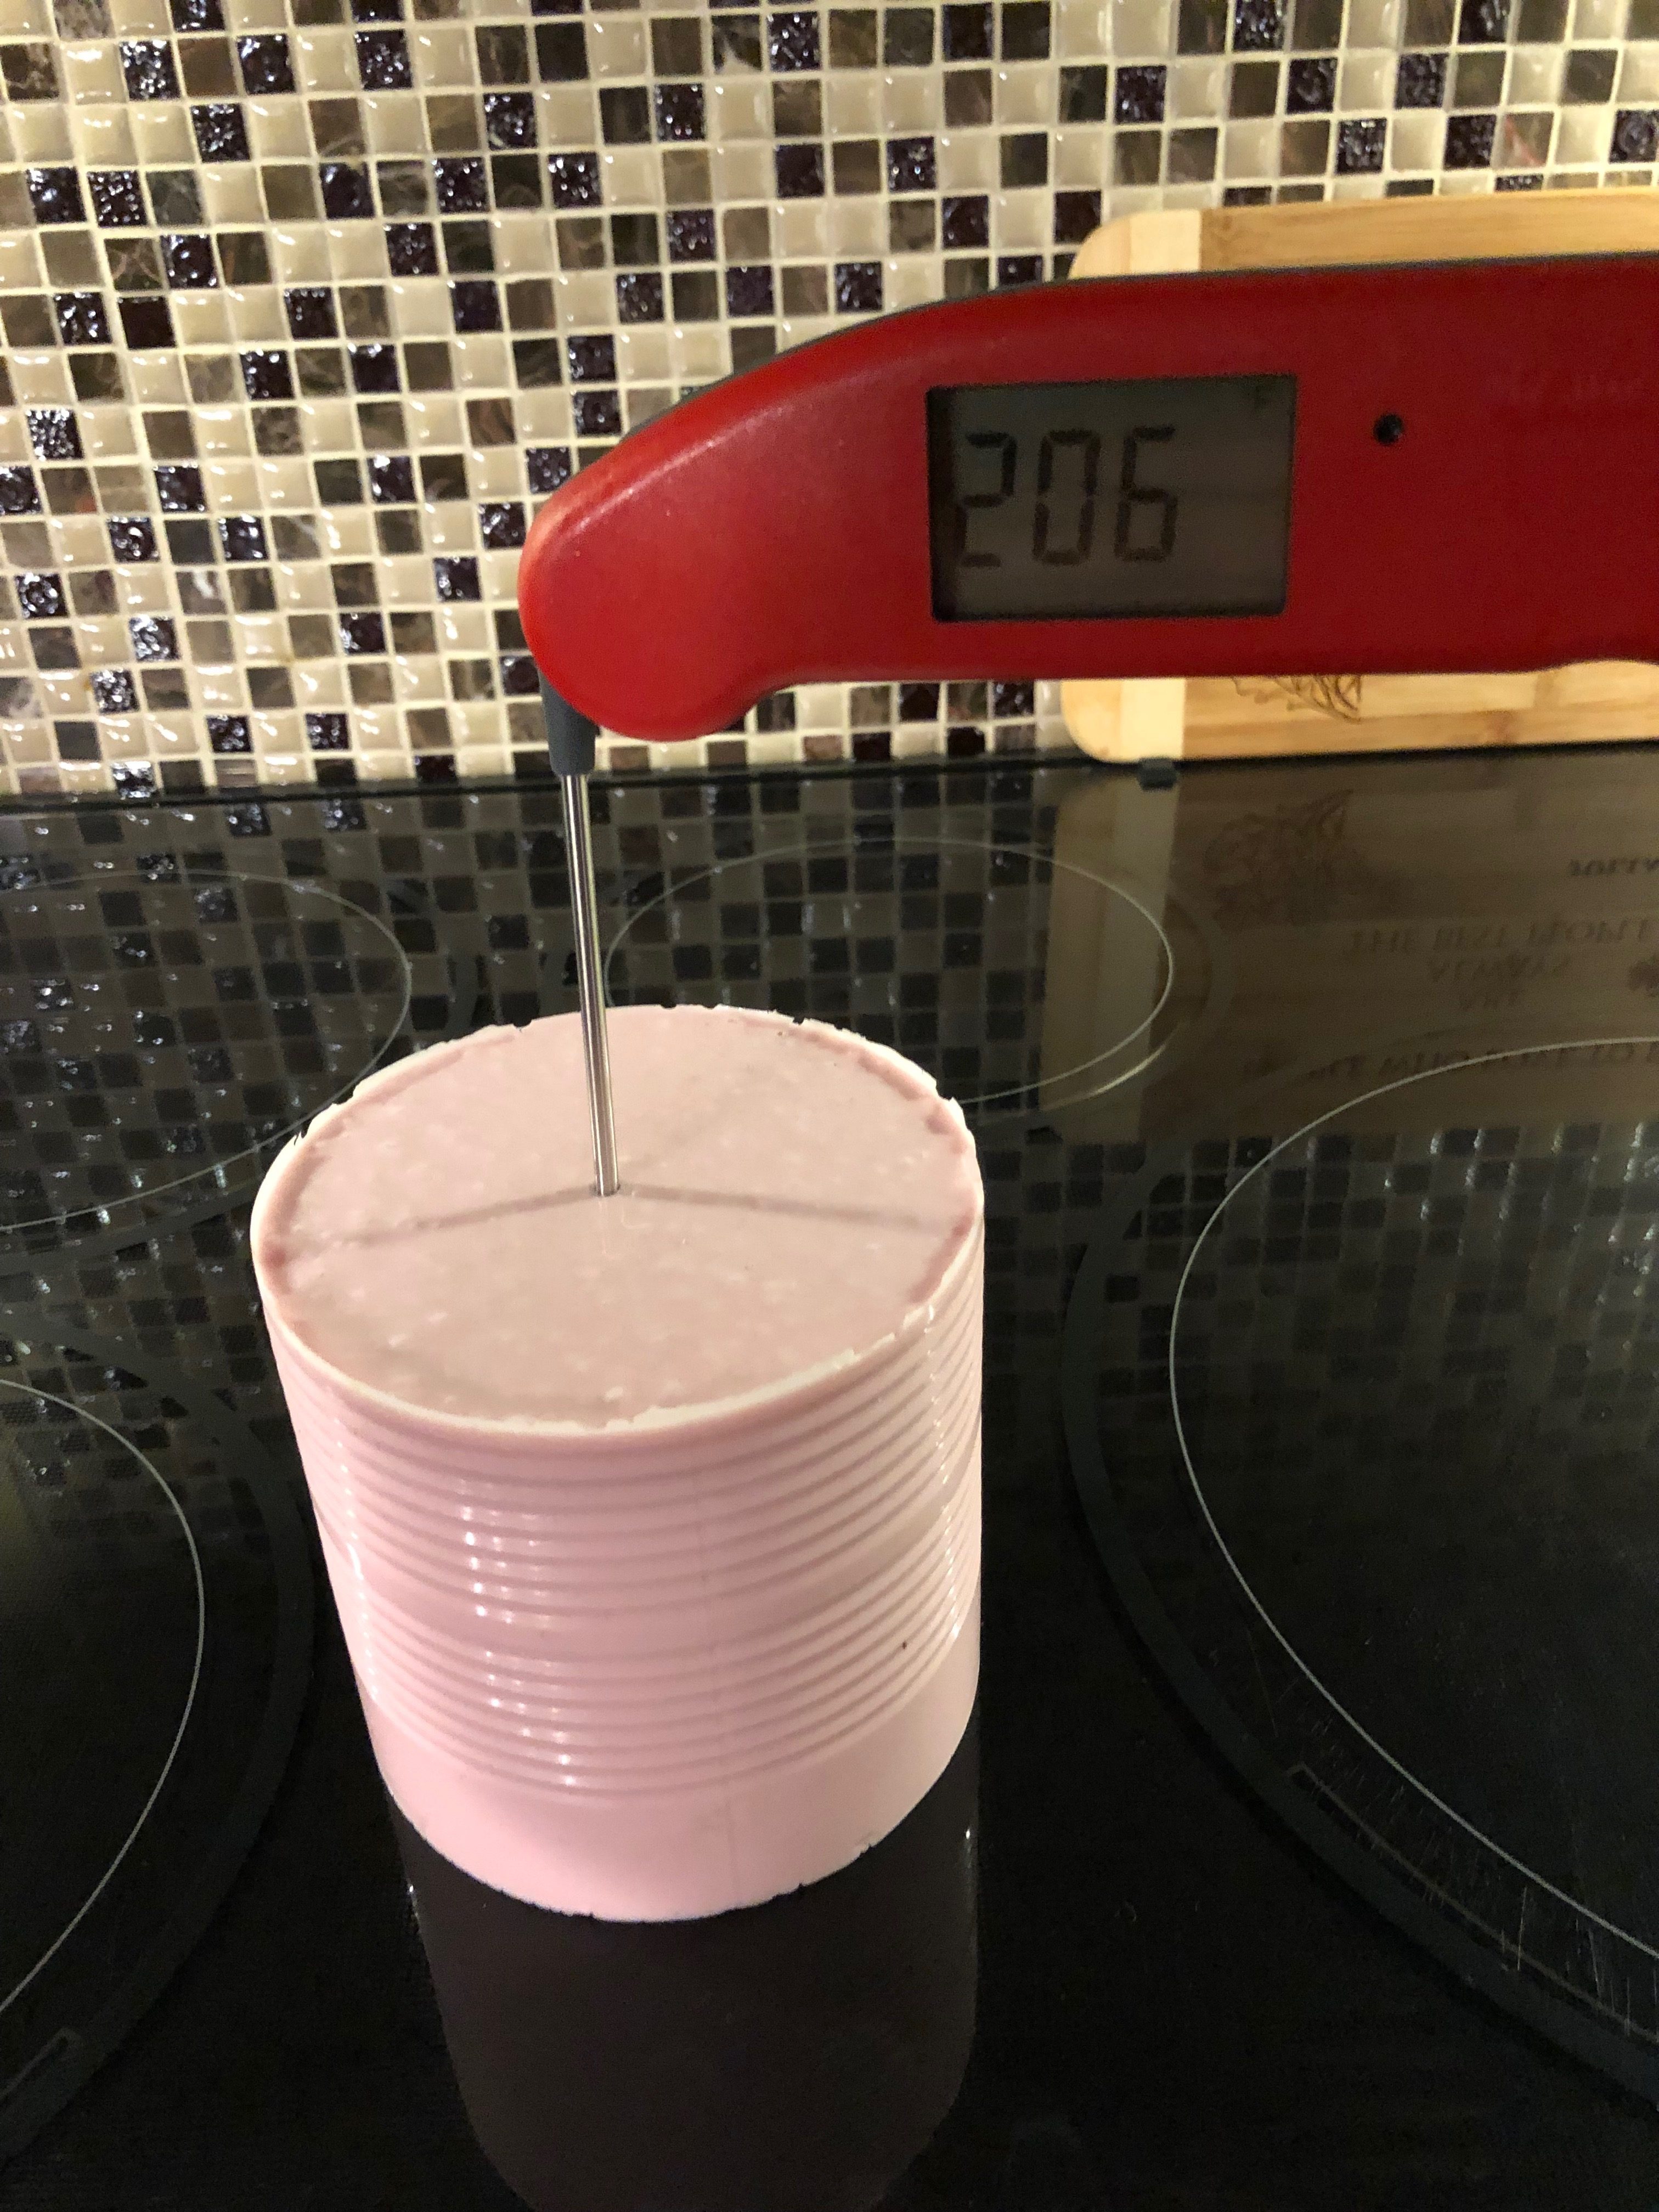
Not wanting to give up hope I proceeded with test 2. I drilled a hole in the center of the silicone so I could easily insert/remove my Meater probe.
I then threw it into the oven at 300f and waited. The results reflected my initial testing:
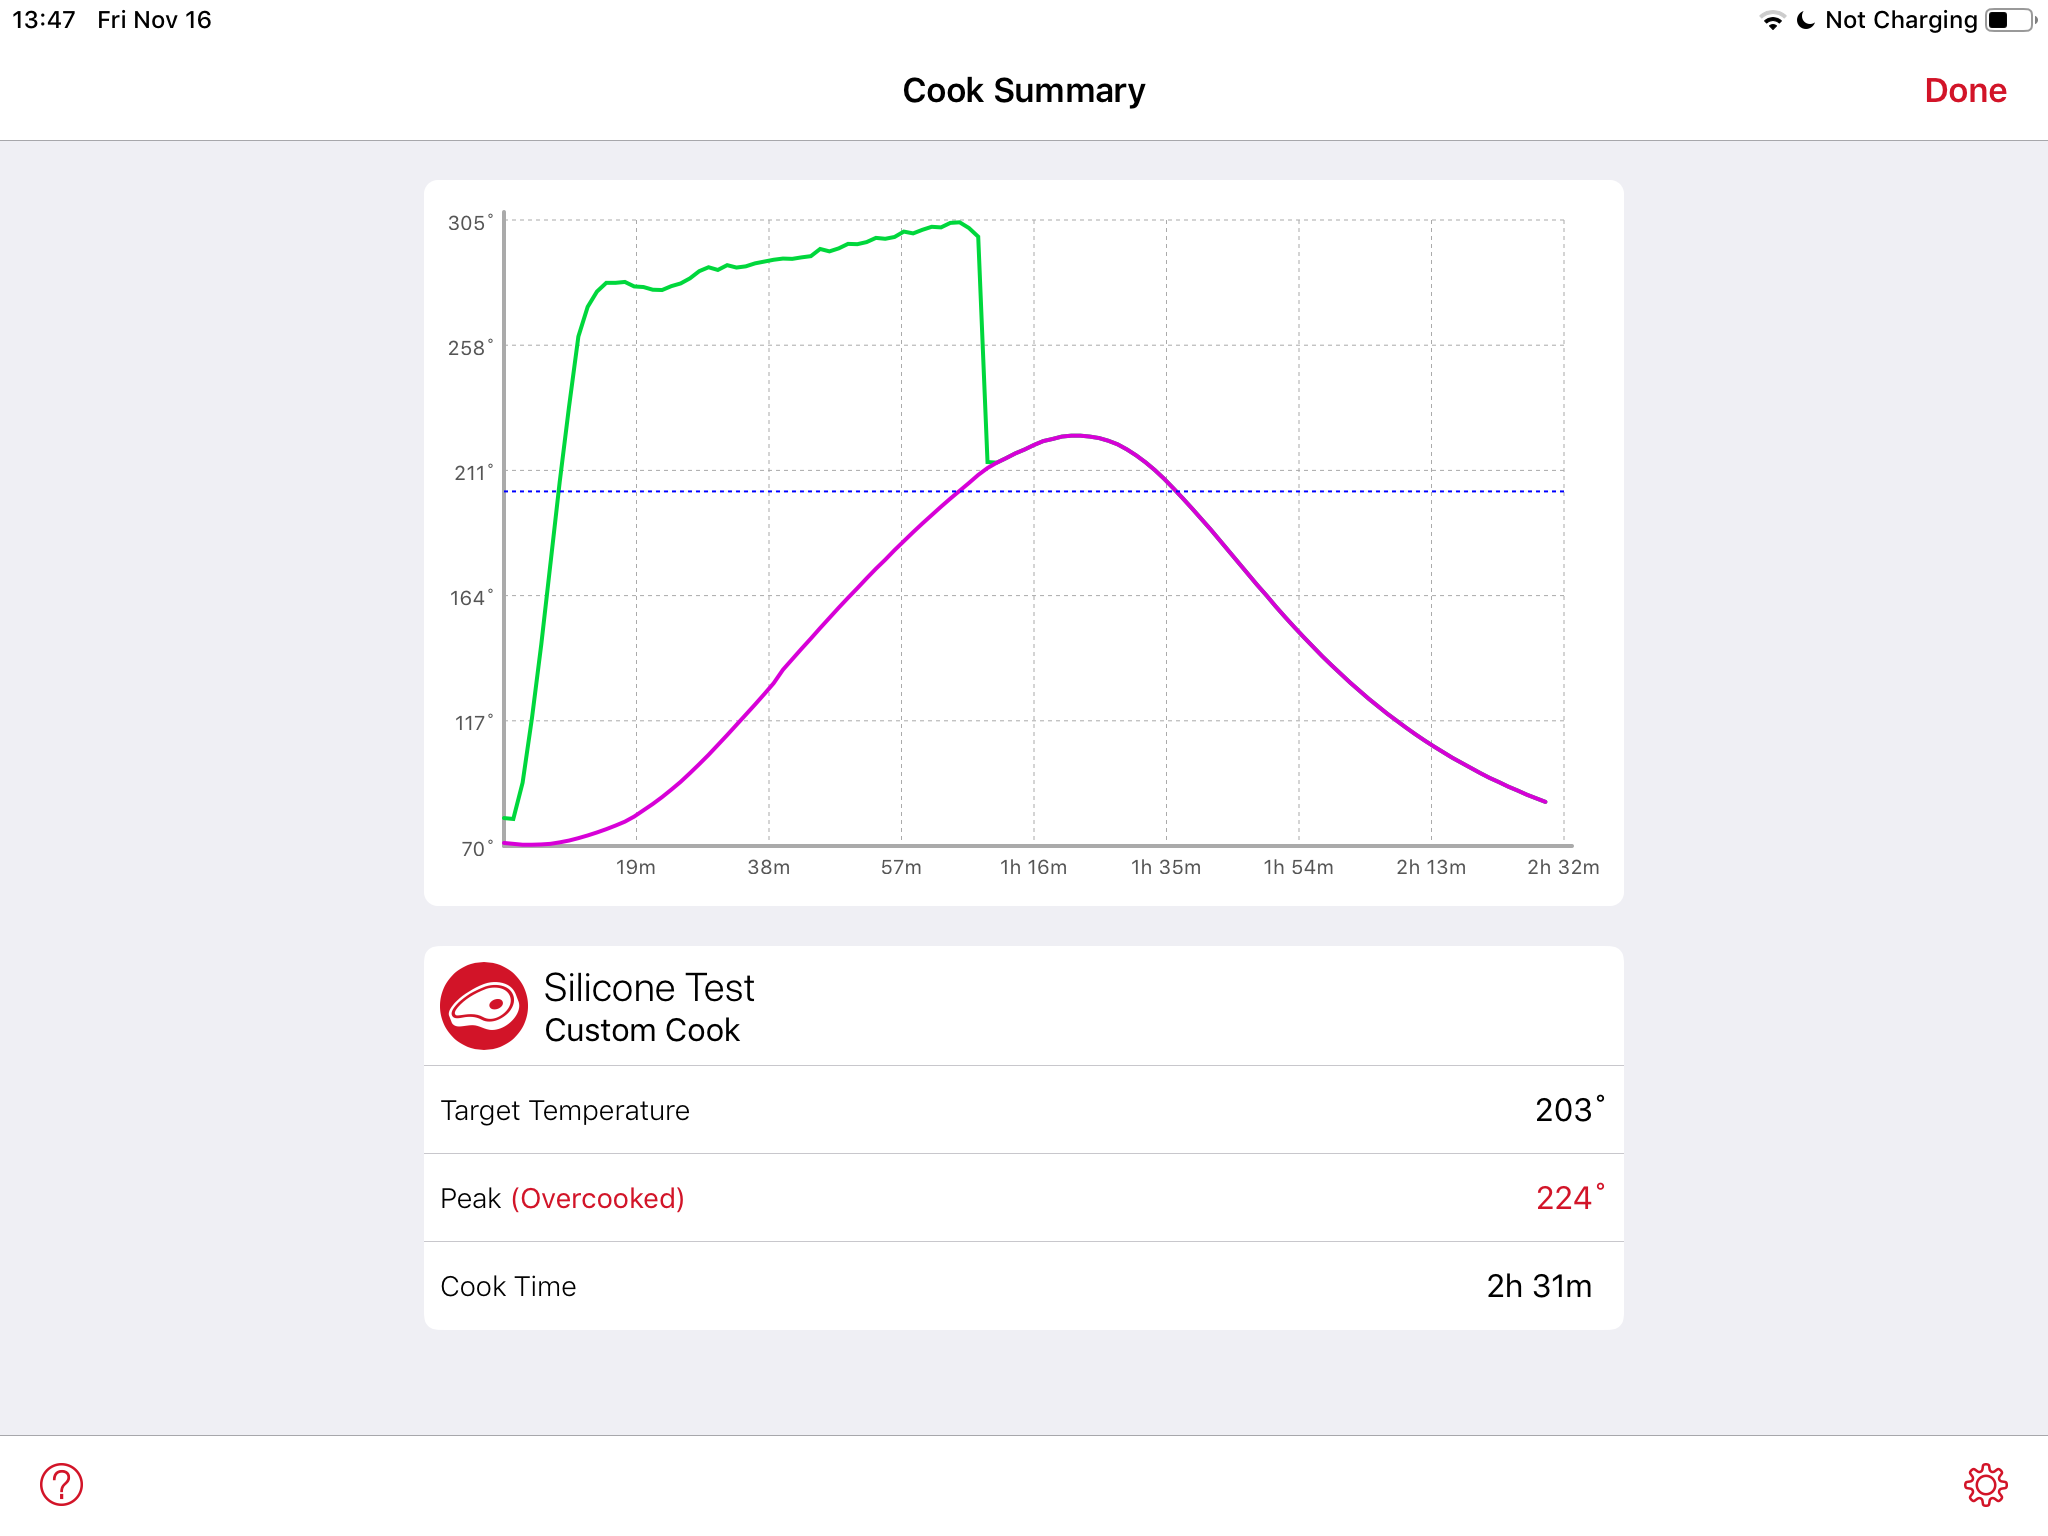
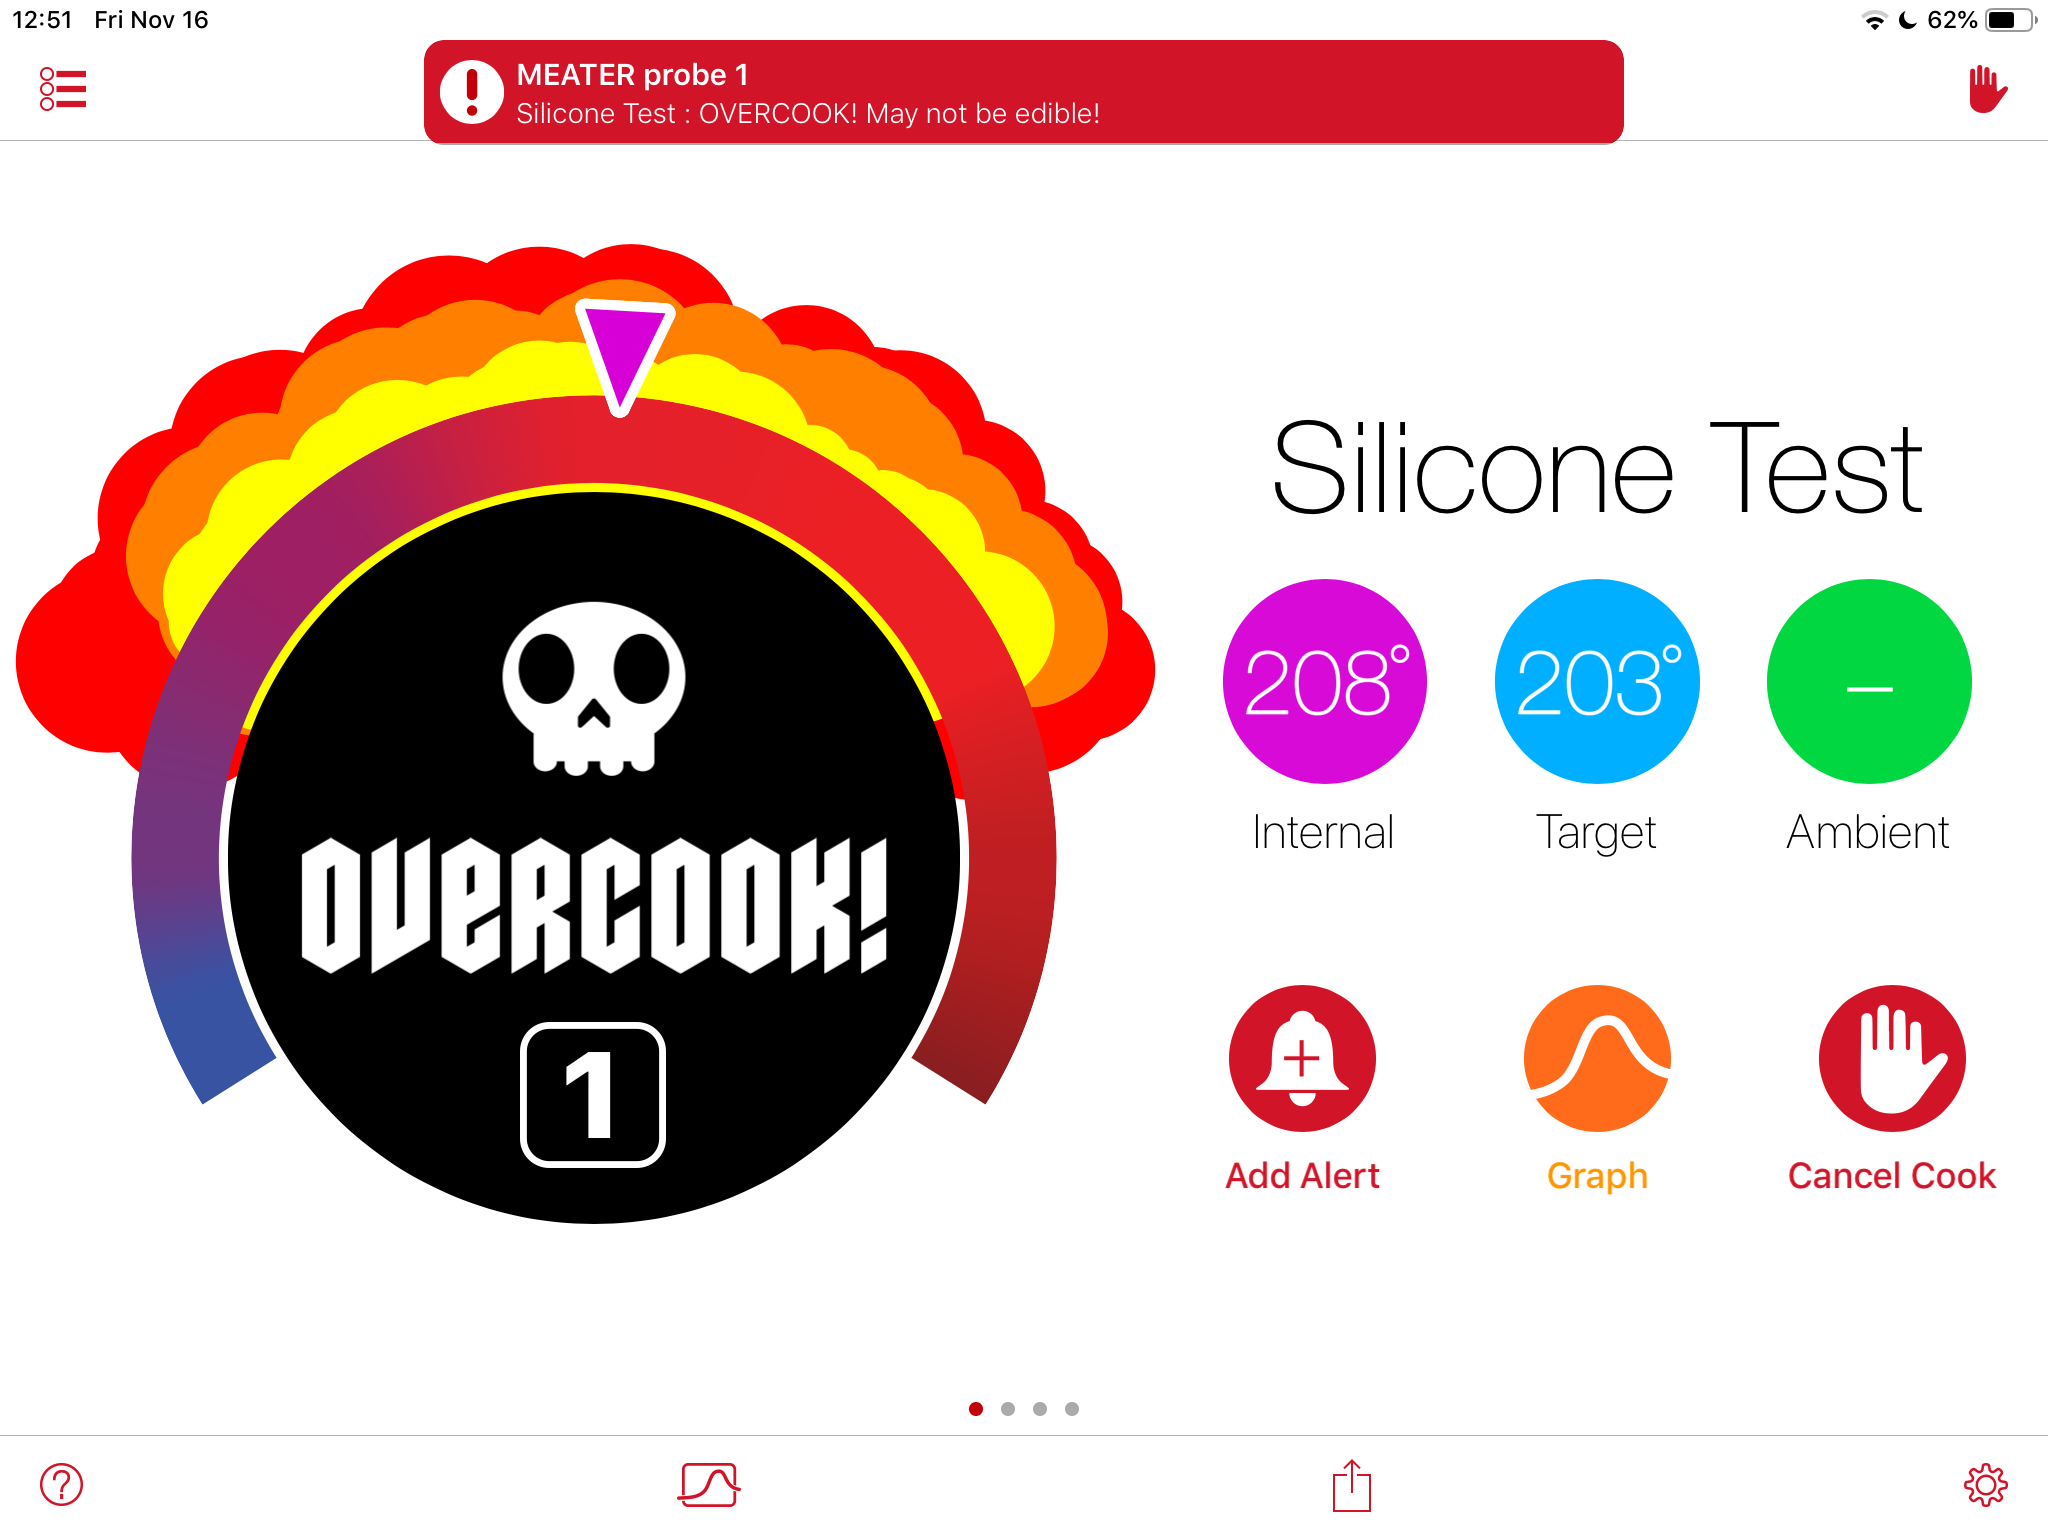
It only took about 1 hour for the sensitive part of the probe to hit 200f. Not good. I need this to sit under 200f for at least 5 hours for ribs. Ideally 8 hours just so I have a nice buffer.
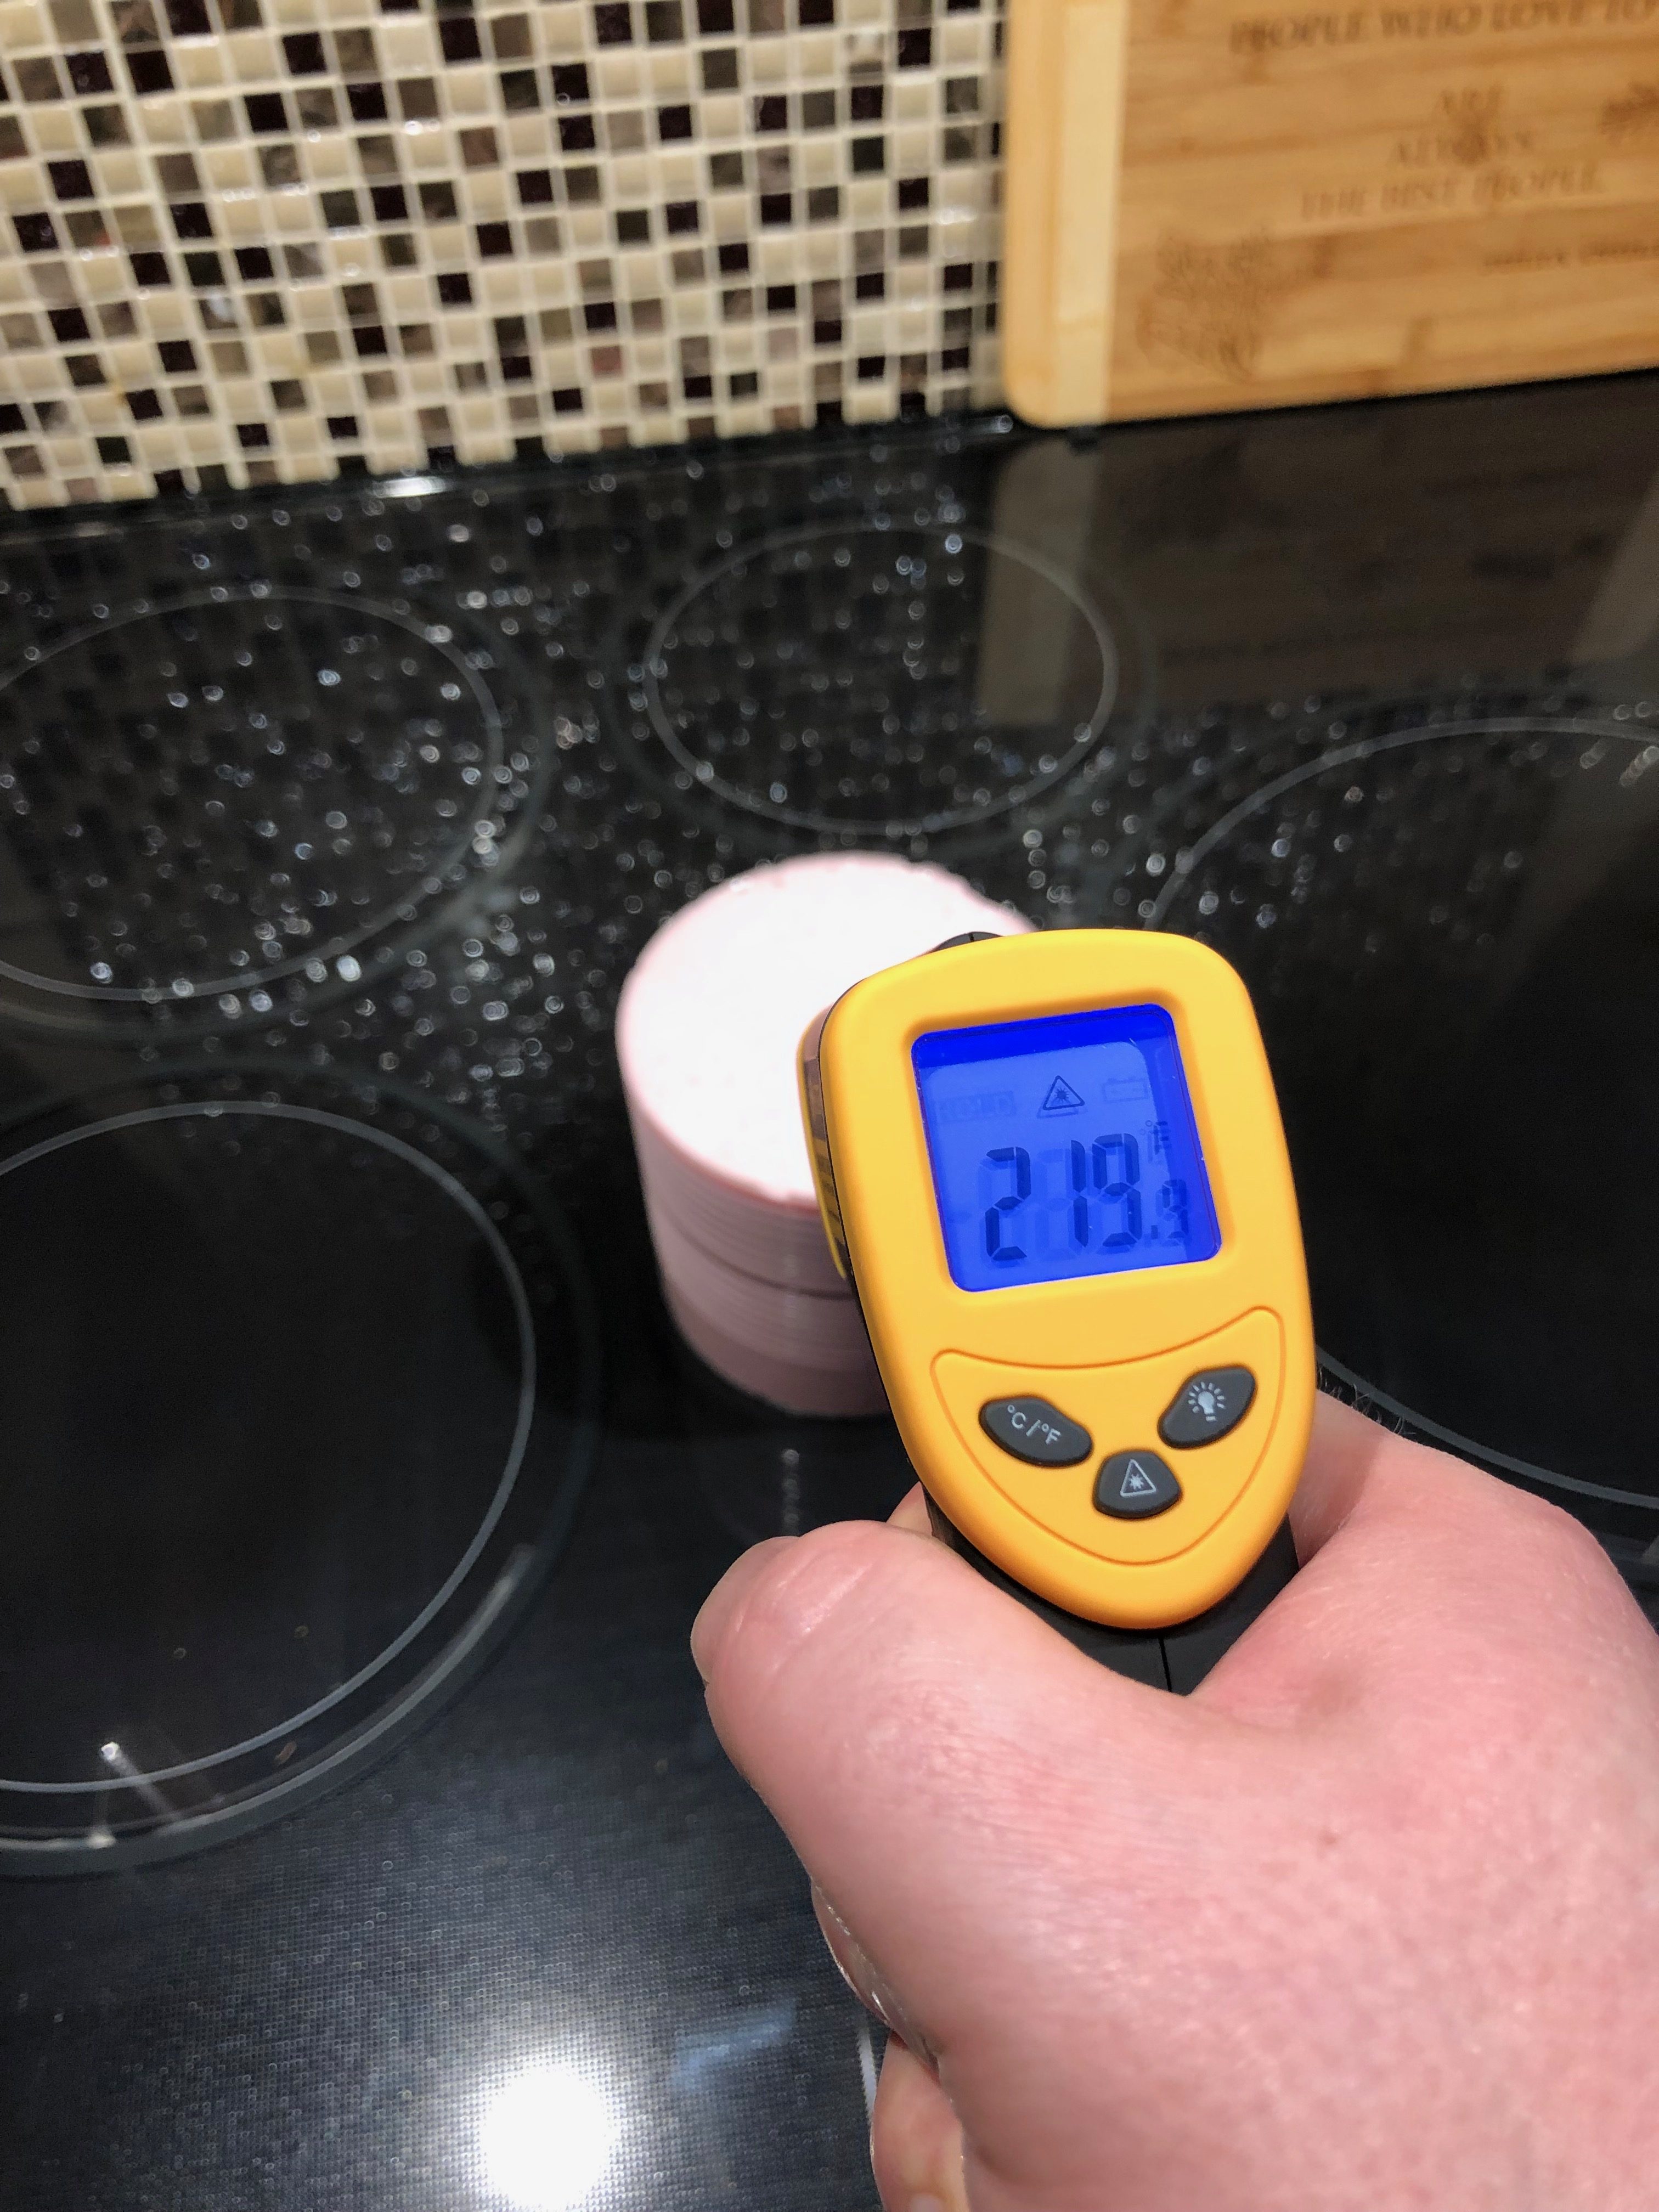
Another thing I forgot about during this test was carry over. The probe actually got up to 224f before it started dropping. I couldn’t pull the probe out so I ended up dumping the silicone into my sink, filled it with cold water and dumped a bunch of ice in. Fortunately I did not kill my probe. It looks like the Meater folks built in a nice buffer for idiots like me.


At this point I figured this idea was a flop but I wanted to try one more thing. I let the silicone cool back down to 70f (the original temperature of Test 2) and then wrapped it in a layer of aluminum foil hoping that might deflect some heat.
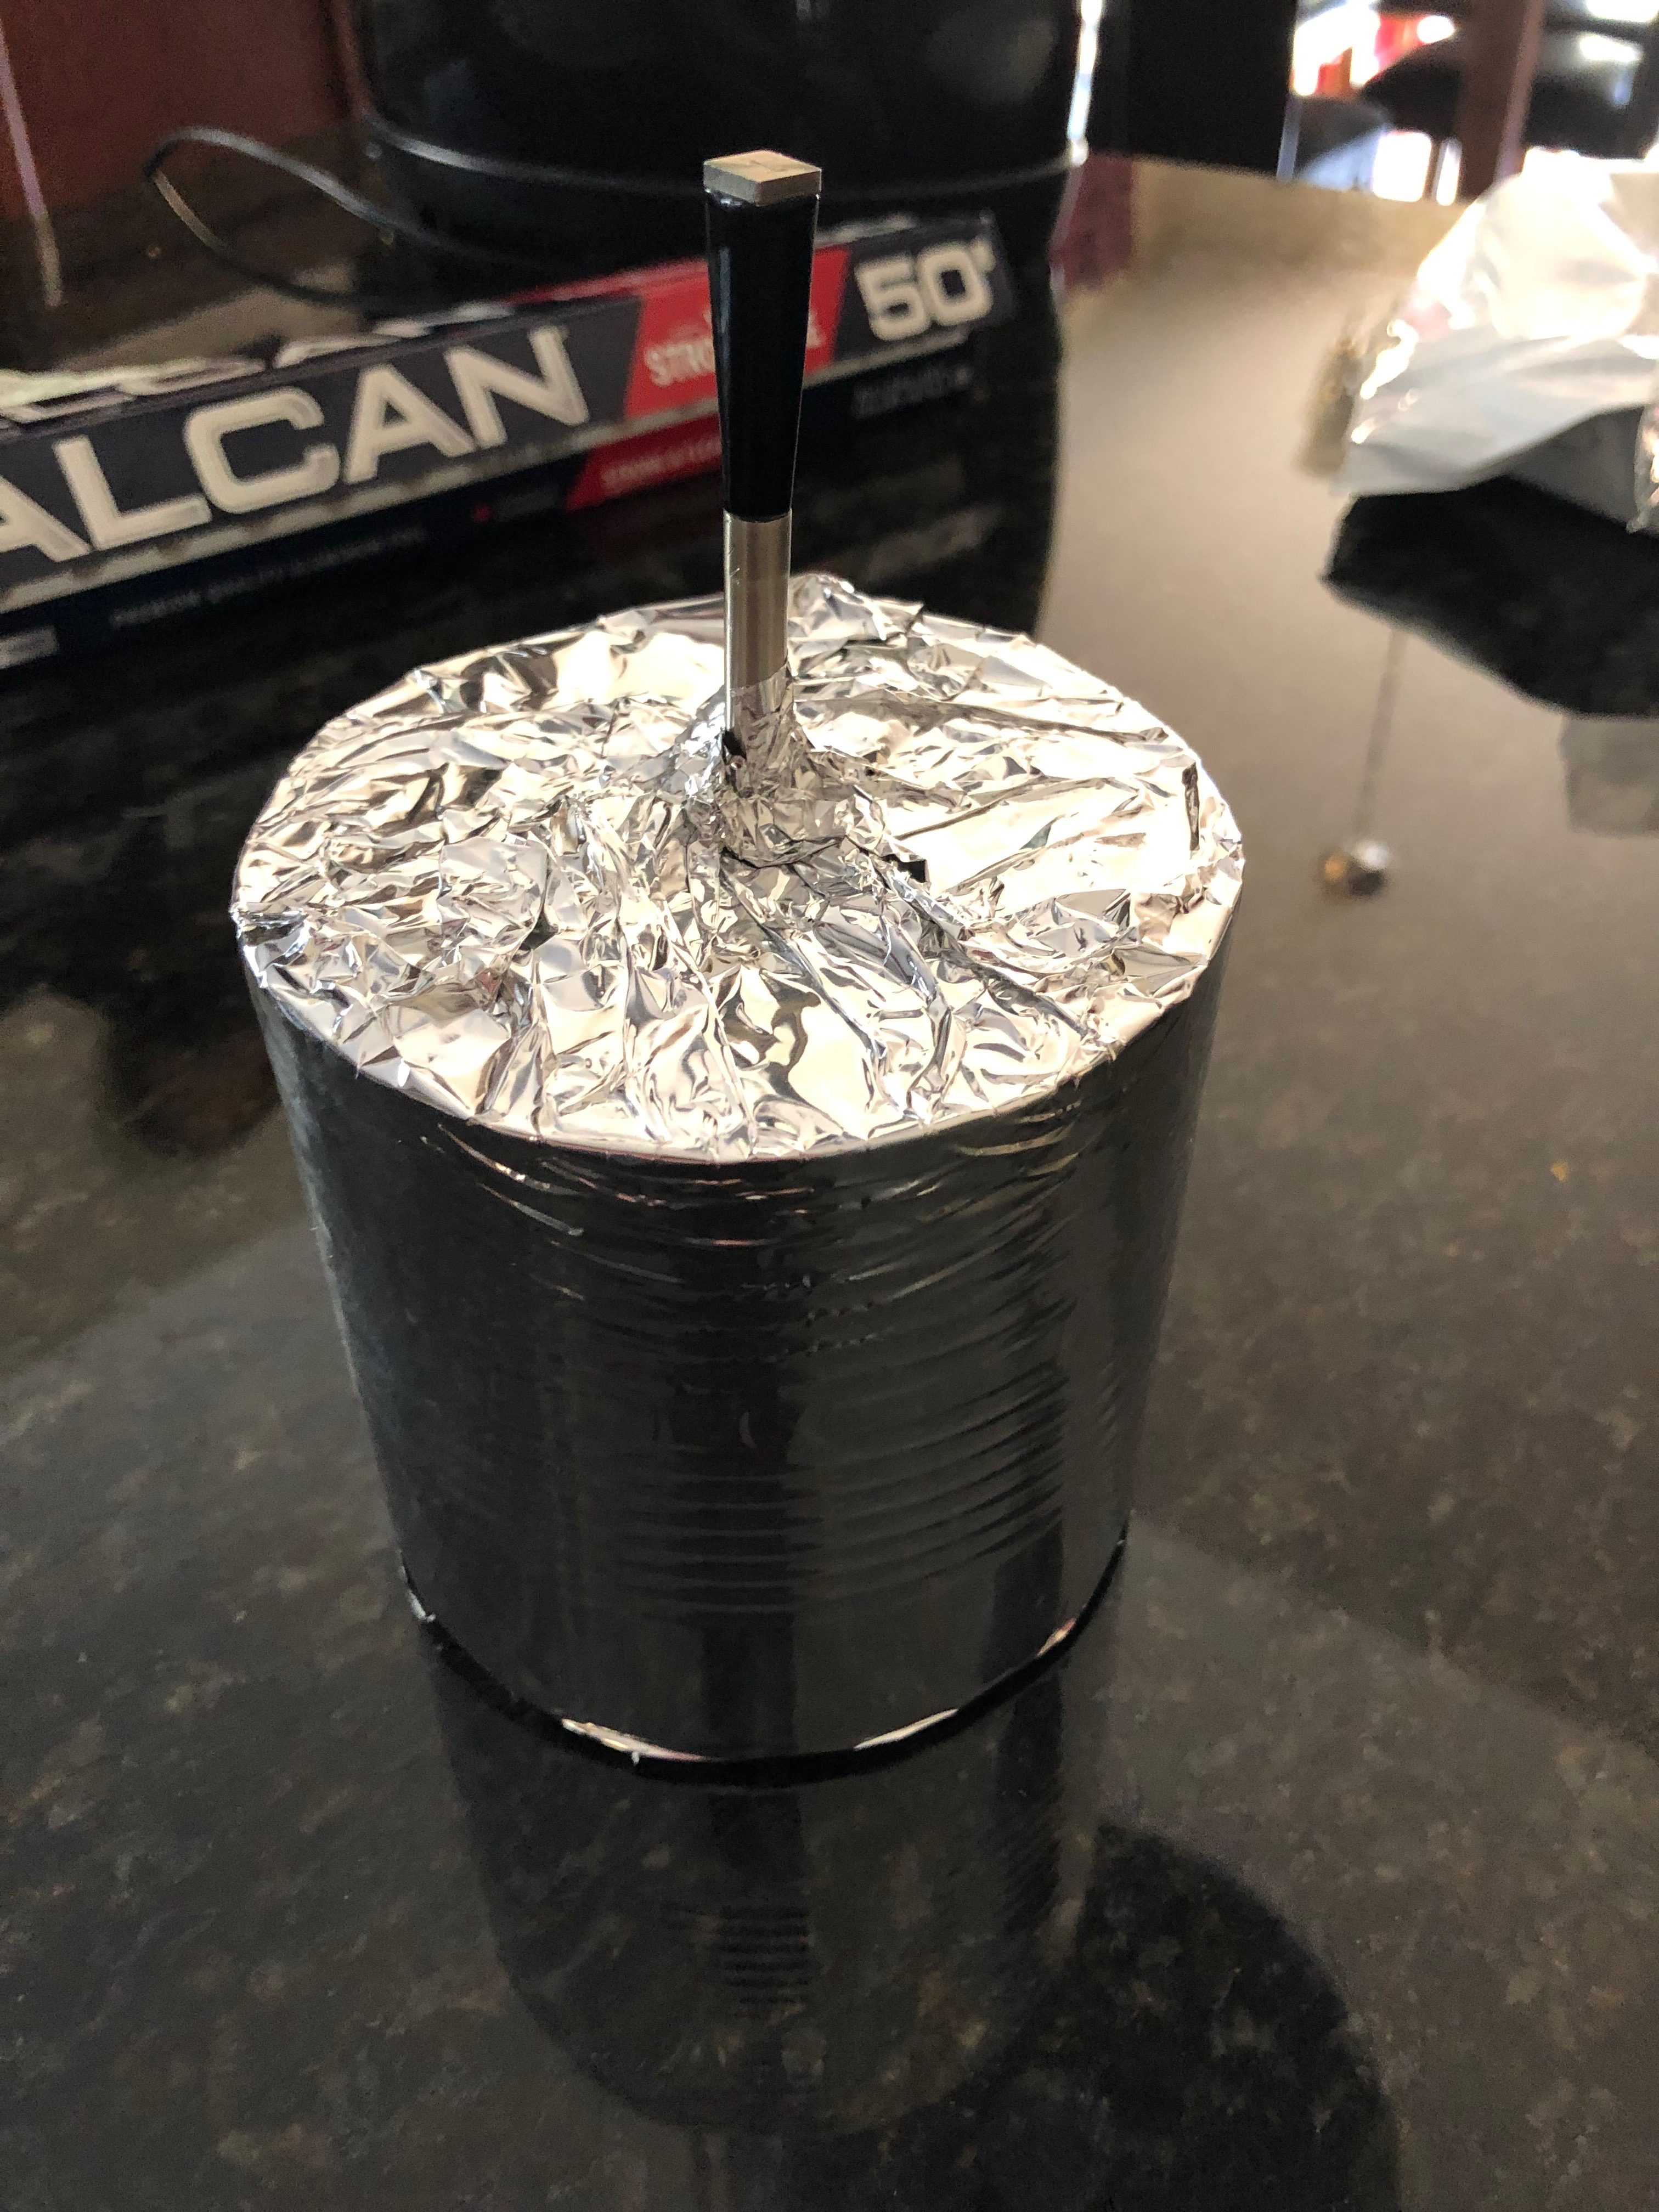
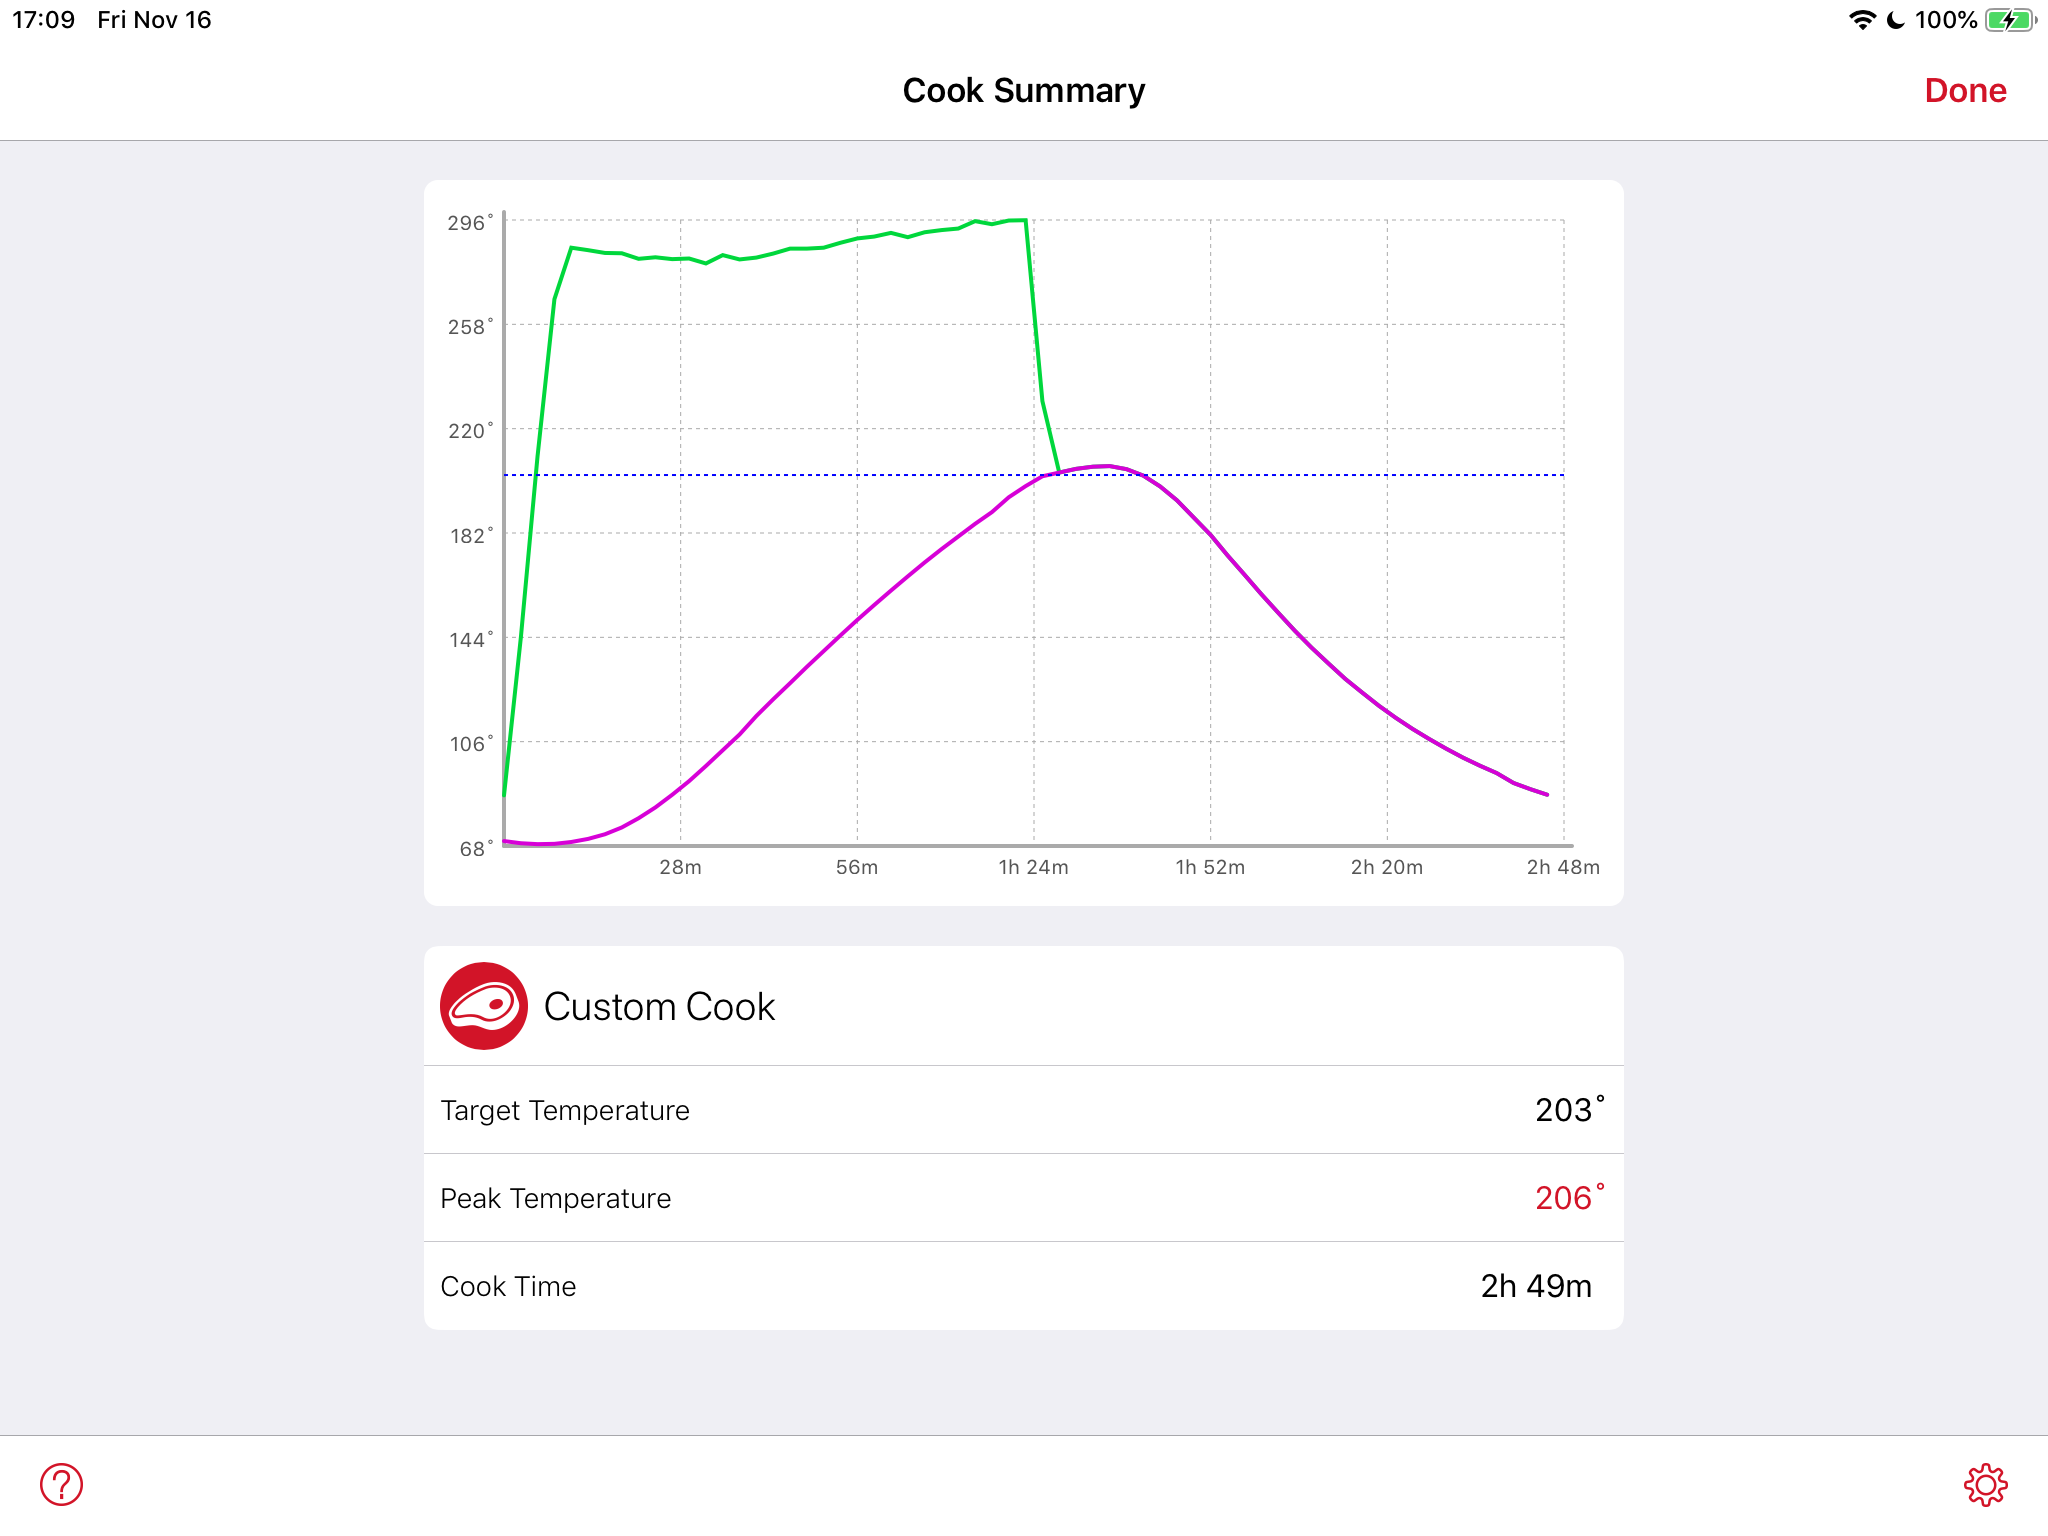
The results were slightly better but no where near my goal of 5-8 hours. The aluminum foil gave me an extra ~30 minutes. I also pulled the probe right at 200f and threw it back into the ice water to avoid the red screen of death from the previous test.
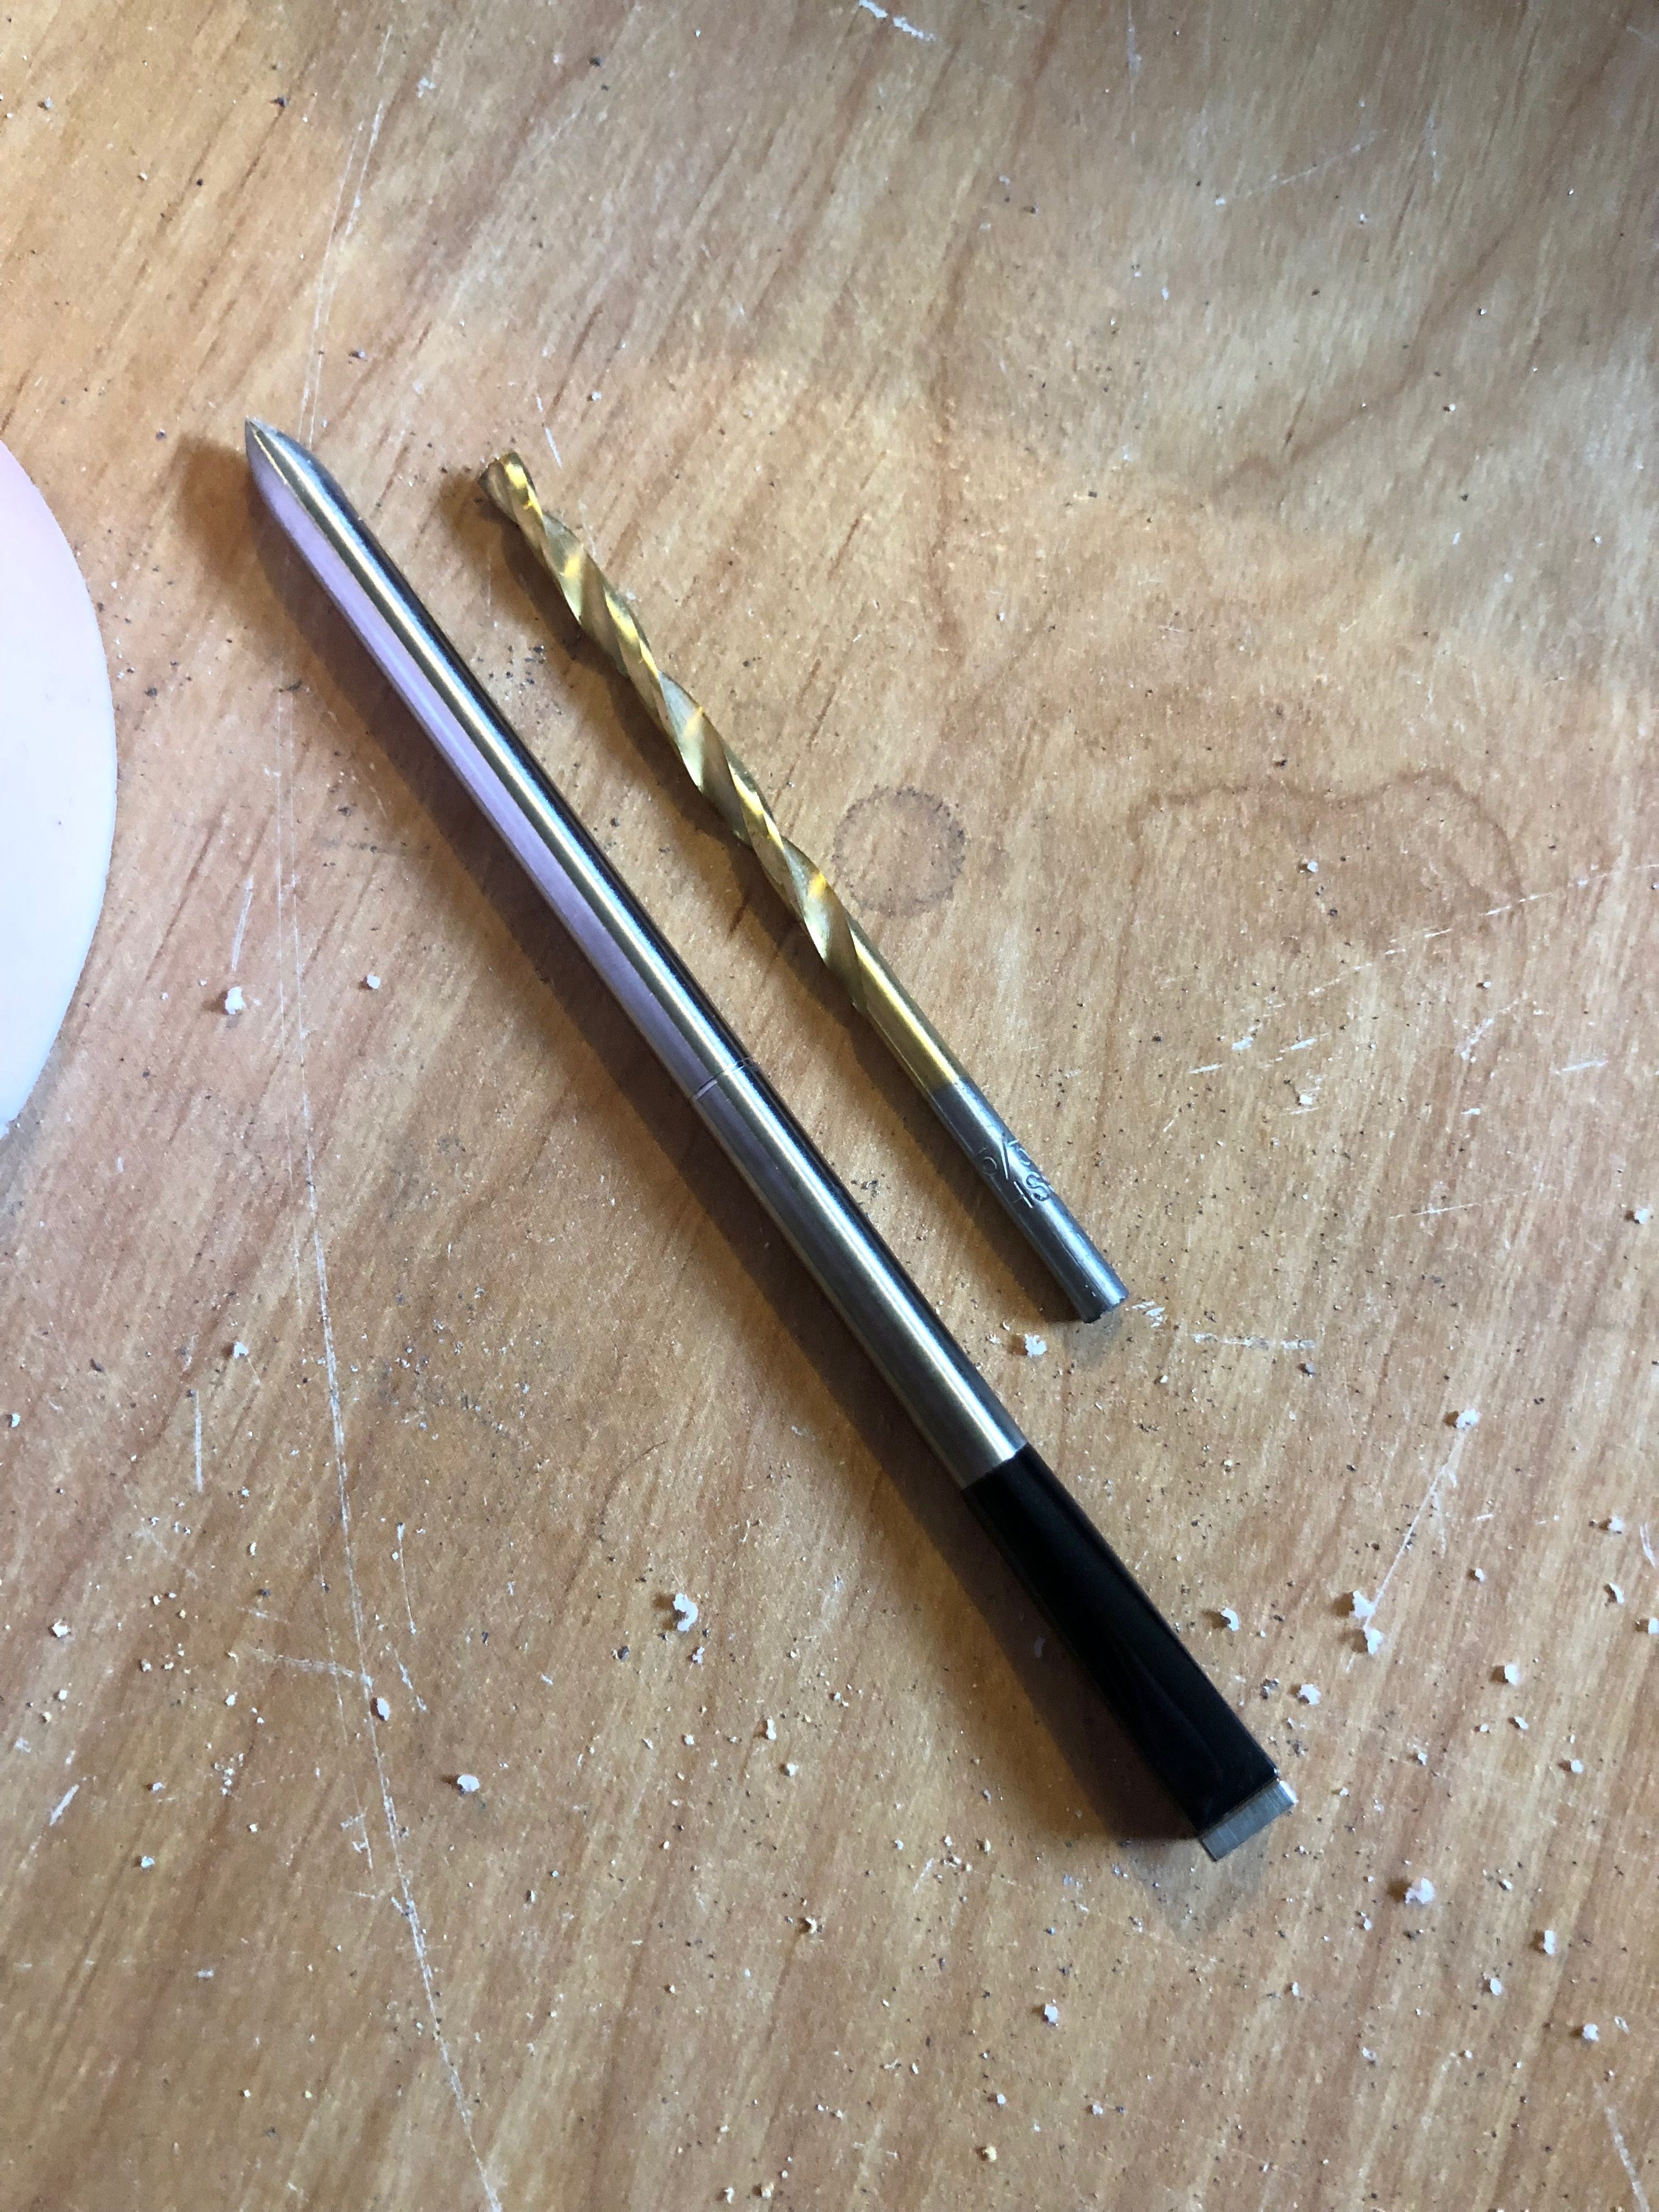
To get my probe out I had to cut open the silicone.
My conclusion is that food safe silicone alone is not going to be enough to solve this problem for me. I’m going back to the drawing board and will post a Part 2 if I figure anything out.
If anyone here actually knows something about materials, heat deflection/resistance and has a solution to this problem please drop me a comment below.
Appendix 1
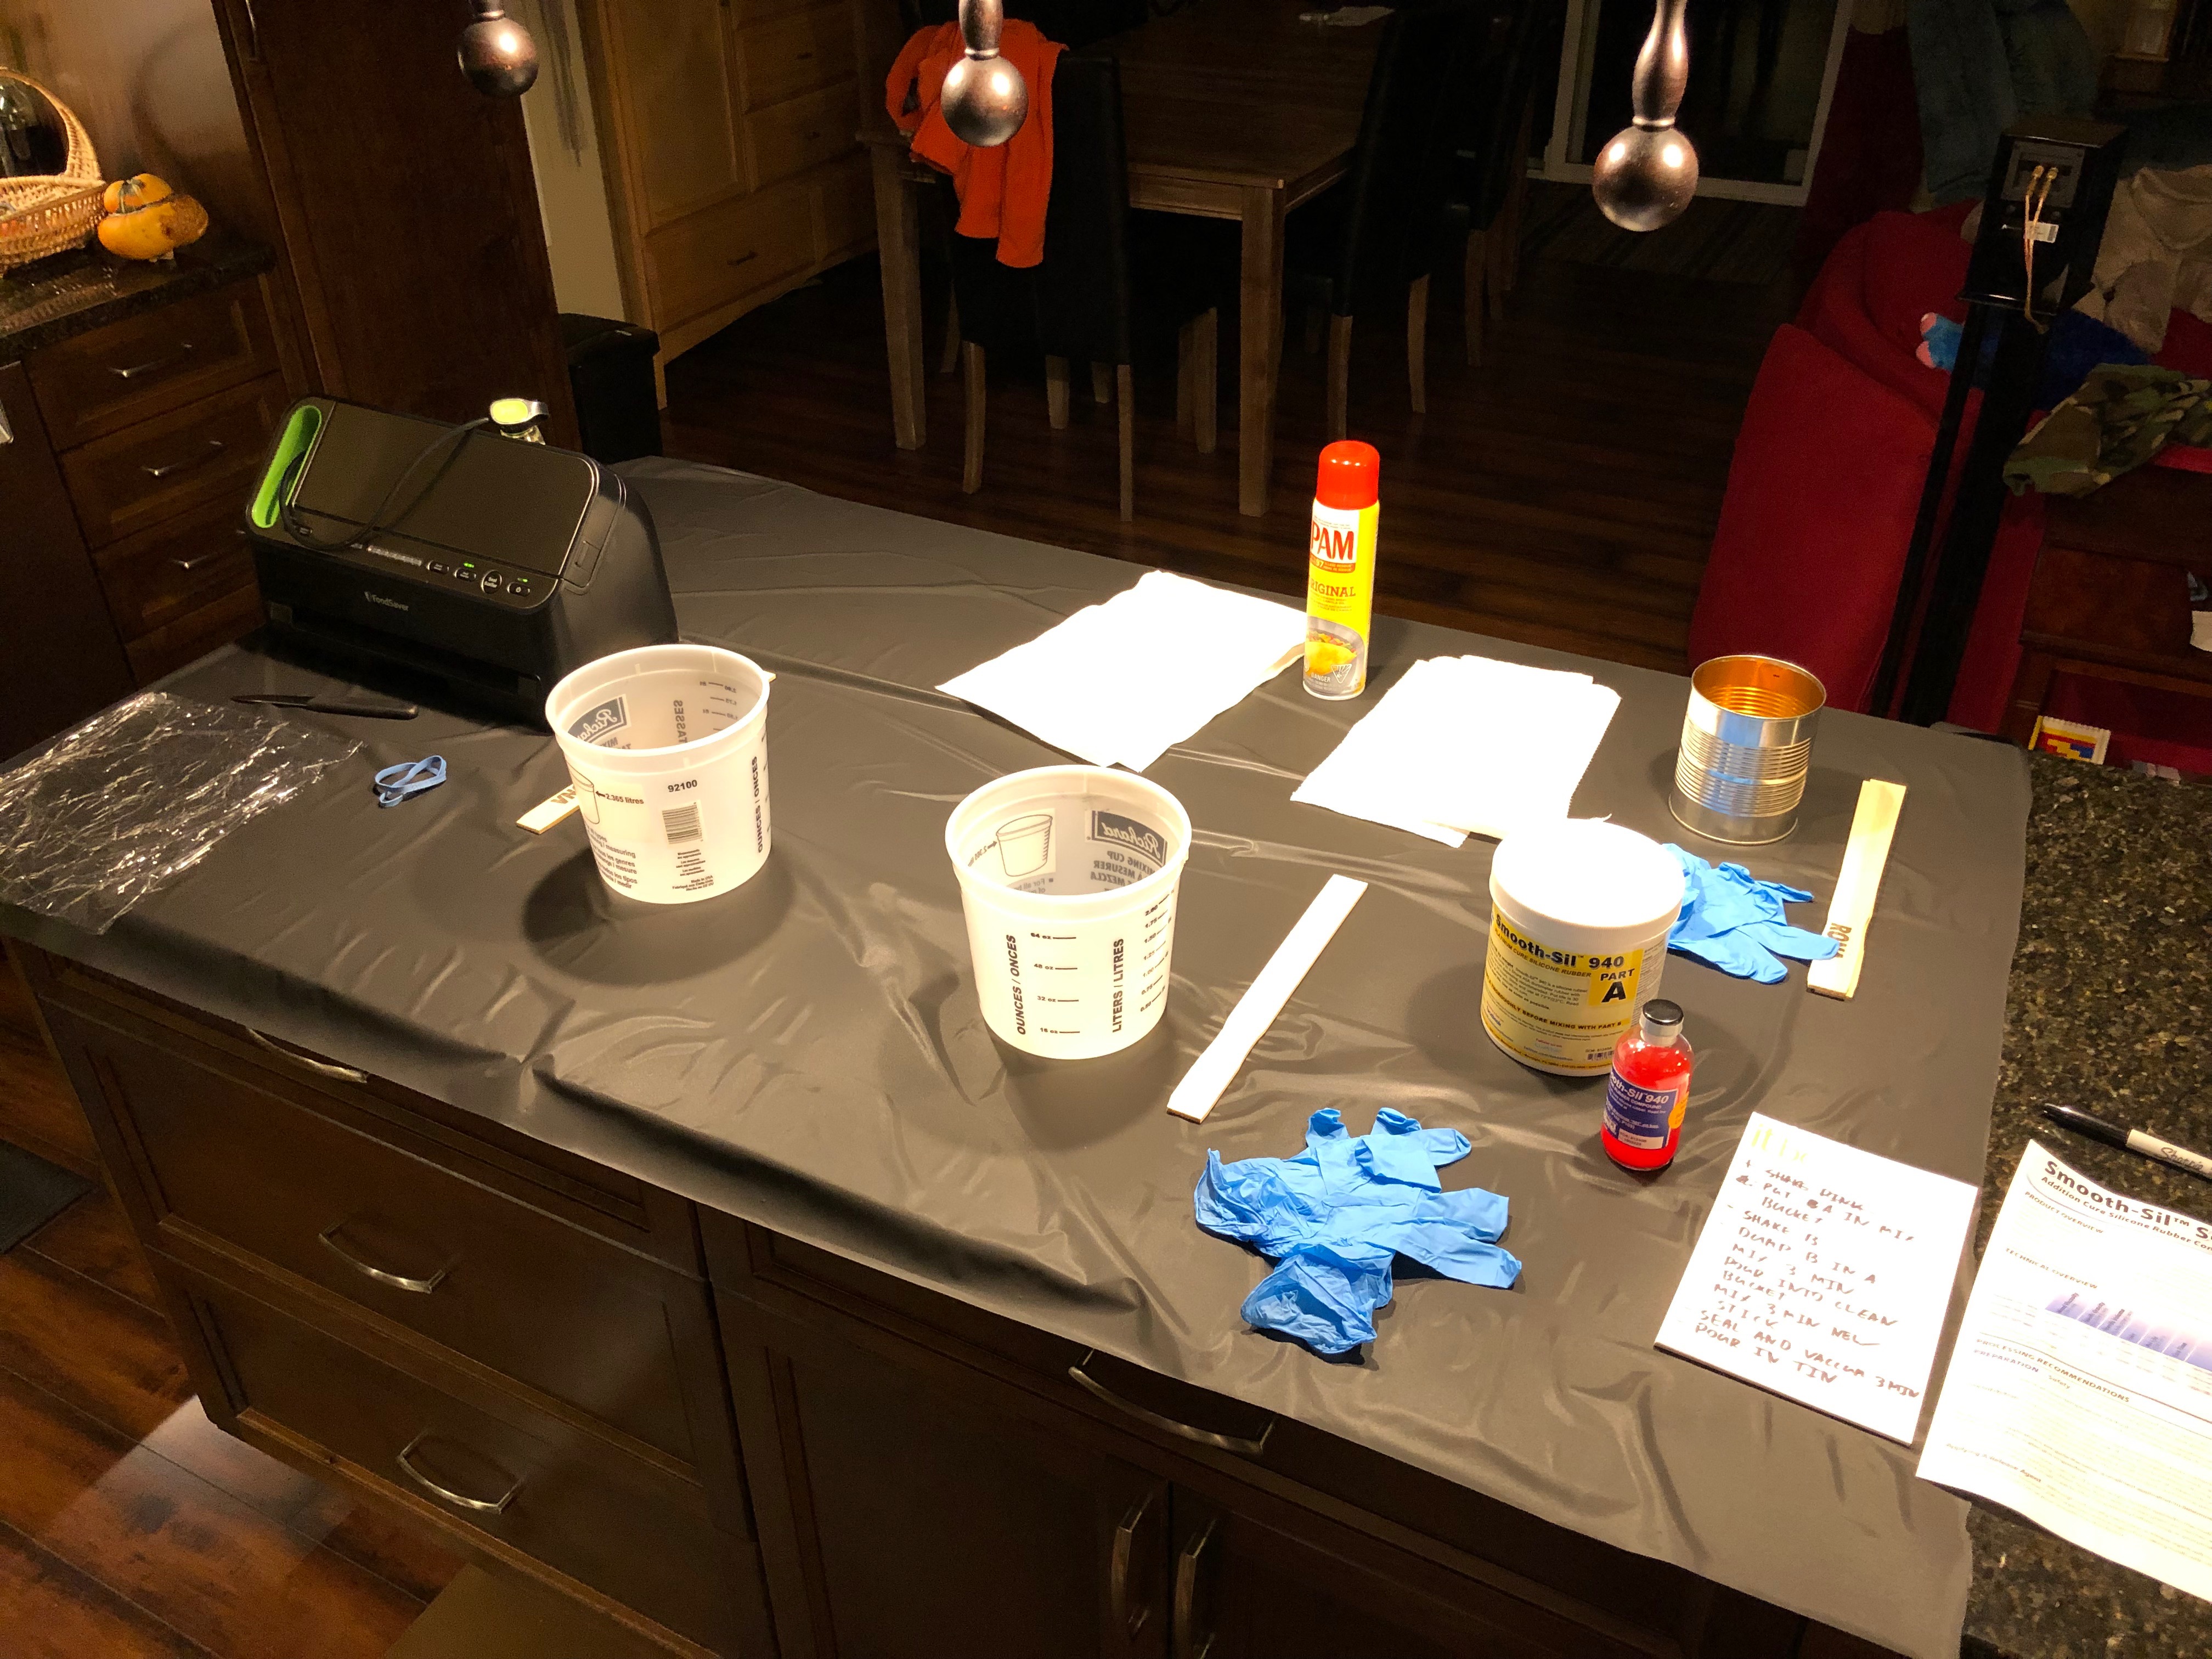
If anyone is curious here are my “Lessons learned” notes from trying to mix the silicone components.
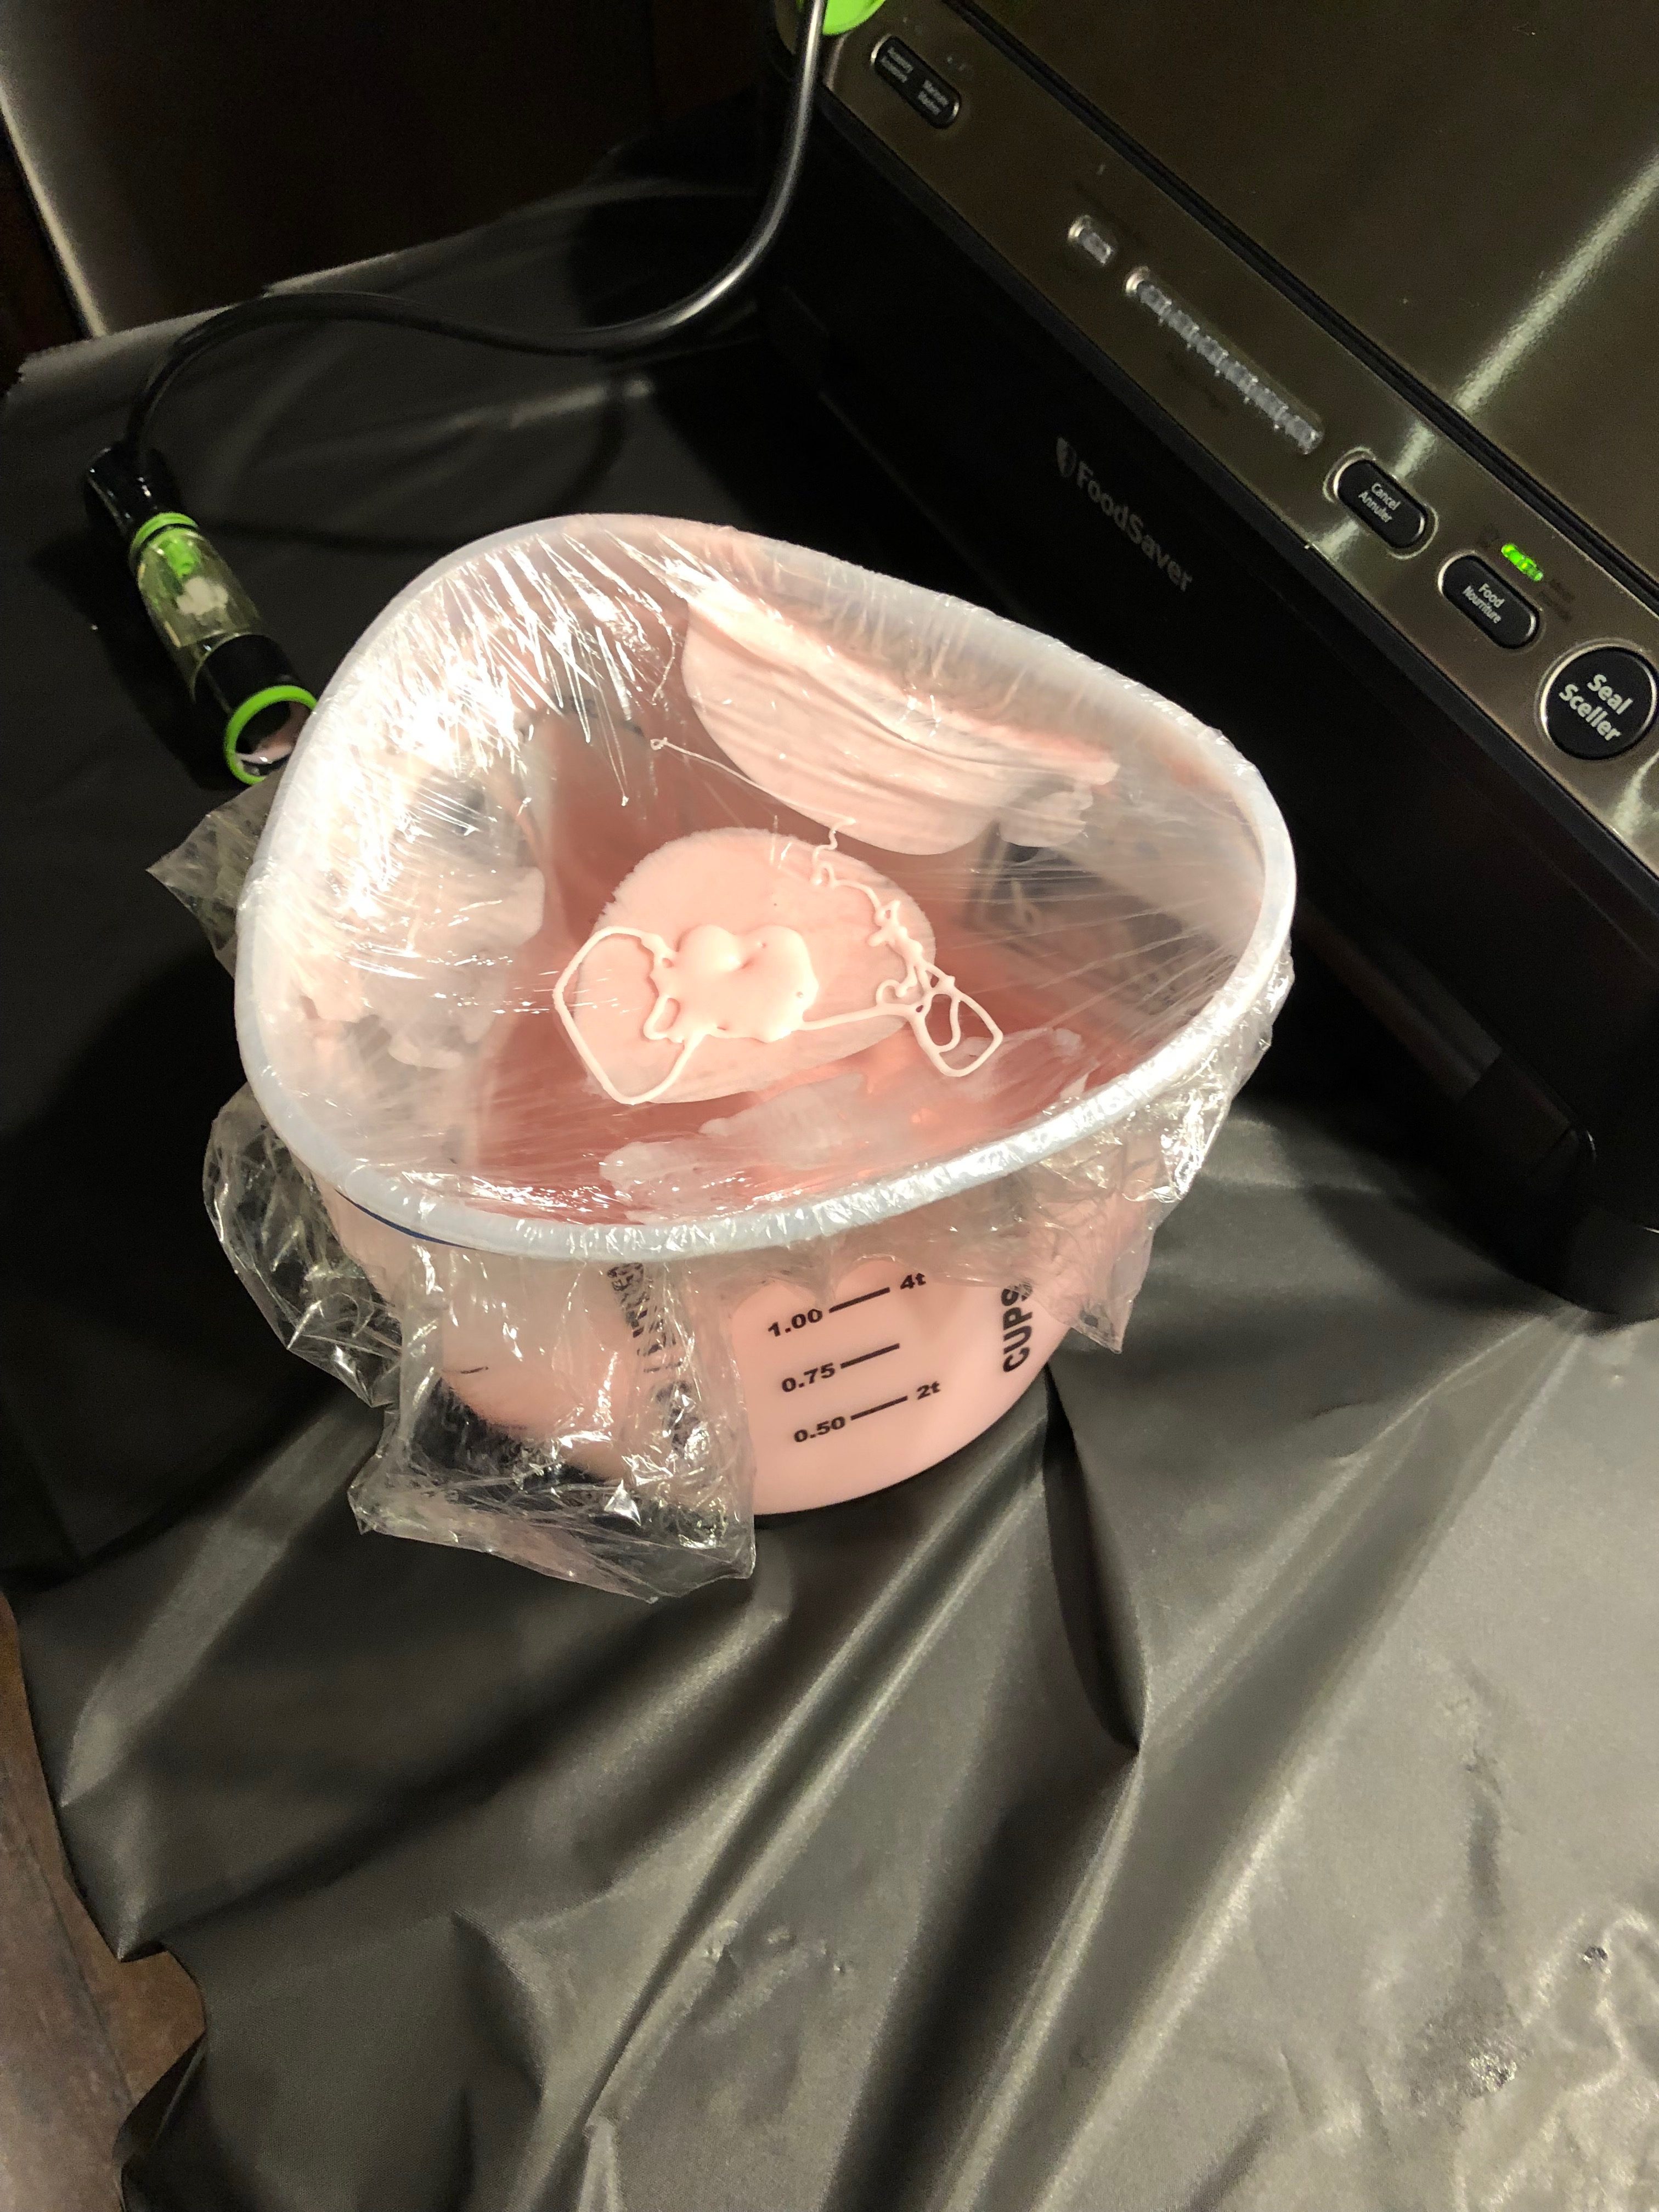
Do final mix in a more ridged container
	The vacuum sealer ended up crushing the plastic container instead of sucking the air out of the silicone
	It would have worked though shockingly
	Cleaning the silicone out of the vacuumed nozzle sucked, 99% alcohol and toothpicks for like an hour

Forgot to use a vibrating platform
	Went out to the garbage and put the tin on a desk and ran the reciprocating saw for a few minutes to vibrate things as much as I could
	Won't know if this helped until cured

Using a sheet over the island was a super good idea, easy to clean and I ended up making a few splashes
	Threw everything in the garbage
	Could have kept the plastic buckets I bet but I dunno if I'm ever going to do this again

Check volume measurements before buying a kit, I barely had enough for a single application let alone the original plan of 4

Dumped the idea of the tin foil heat deflector due to above issue with material
	Will test with just silicone and then maybe test again after wrapping the silicone in tinfoil

Left the tin with the silicone on top of my server to hopefully vibrate during the entire cure and help get some air out, dunno if this will help

Keep gloves on always, this stuff feels weird on skin and is hard to wash off
Hi. Did you find an answer to your ambient temperature monitoring for ribs. I really want to have one probe for ambient temperature only
Unfortunately I did not find a good solution. I ended up selling my Meater Block and just going with a Thermoworks Smoke X4.
I found the Meater probes incredibly unreliable in general connectivity wise even with the base station right next to my smoker.
I do not miss them and am very happy with the Thermoworks.
I just stuck the probe in a large potato. The internal temp stays below the max temp throughout the cook and you get accurate ambient temp reading.
Haha, such a great simple solution. I definitely over thinking this.
Awesome
Just stick the probe in a potato. If the internal temp gets over 200, change to a new potato.